You do not have to give up good food just because you’re backpacking in winter.
Easy Plant-based Meals
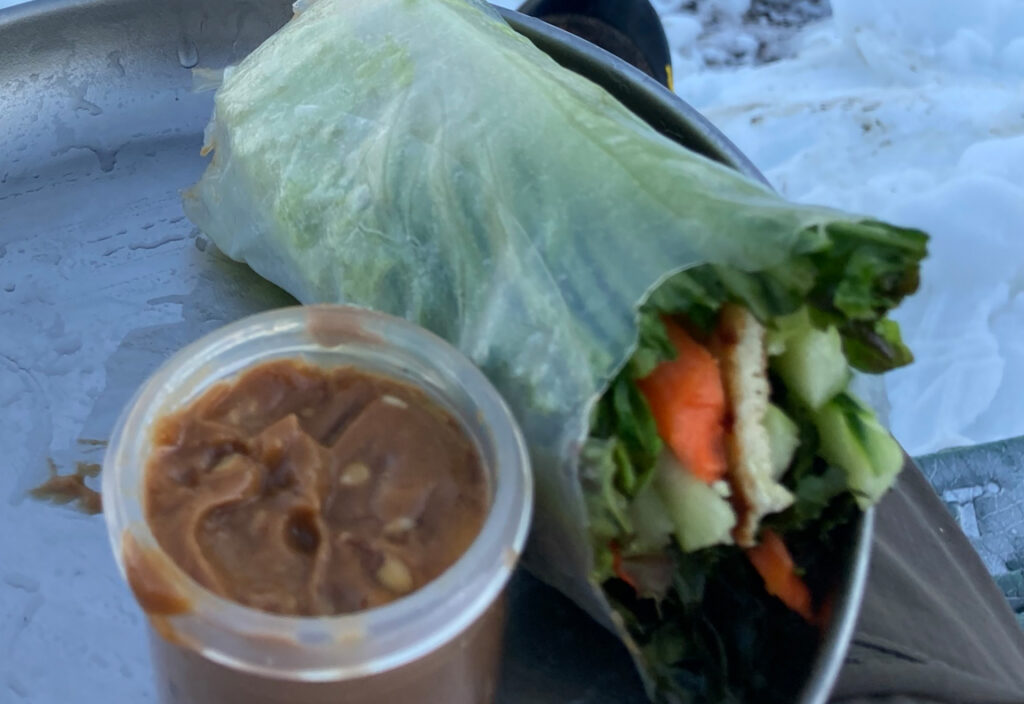
The main purpose of this recipe section is to share meals that work well in cold-weather conditions. However, you may find some of these recipes useful for year-round trips. These meals cook quicker than many freeze-dried meals and usually include some fresh ingredients. The long 9–15 minute re-hydration and cool-down periods are eliminated. This fresh meal approach allows you to eat meals when they are still hot and when you want it most.
Most hikers prefer prepackaged freeze-dried meals for convenience and the lower pack weight. However, the re-hydration and cool-down periods make this food strategy difficult to implement in cold weather. That is, there is a high chance your freeze-dried meal will not meet expectations in cold weather. Don’t blame the weather. The problem is the food method.
I usually pack some fresh ingredients, so main dinners are 2-3 times heavier than packaged freeze-dried meals. For two to four day trips this does not add enough weight to make a noticeable difference.
Everyone has their own preferences, their own comfort foods, cultural preferences, and health requirements, which is what makes the world interesting. The focus here is plant-based meals prepared with some fresh food.
Because some recipes use ingredients such as rice noodles, there are some naturally Gluten-free options too. You can switch from wheat to rice noodles for any of these recipes. You can also switch from Soy sauce, which contain wheat, to Gluten-free Tamari.
The recipes presented are mostly based on quick and easy Asian and Mediterranean choices. Asian cuisine (such as Vietnamese, Korean, Chinese, Japanese, and Thai) is especially popular here in the Pacific Northwest, making the ingredients less difficult to find. The steps are simplified to make preparation work better on the trail. This simplification does effect the results, but not enough in my opinion to put off a hungry hiker. Perhaps if I had grown up eating Asian food, I would be less satisfied with my recipe short-cuts.
More recipes will be added as time permits, including Mexican and Middle Eastern options, so check back for updates. Have a great trail recipe of your own or question? Please share your comments below.
Recipes
- Winter Dinners
- Shoulder-Season Dinners
- Summer Meal Ideas
- No-cook Lunches
- Breakfast Options
- Snacks
Shelf-life, Weight, and Convenience
Tips
Useful Winter Food Tips
Eating Healthy
Cooking Tools and Technique
Where to Find the Ingredients
Recipes
WINTER DINNERS
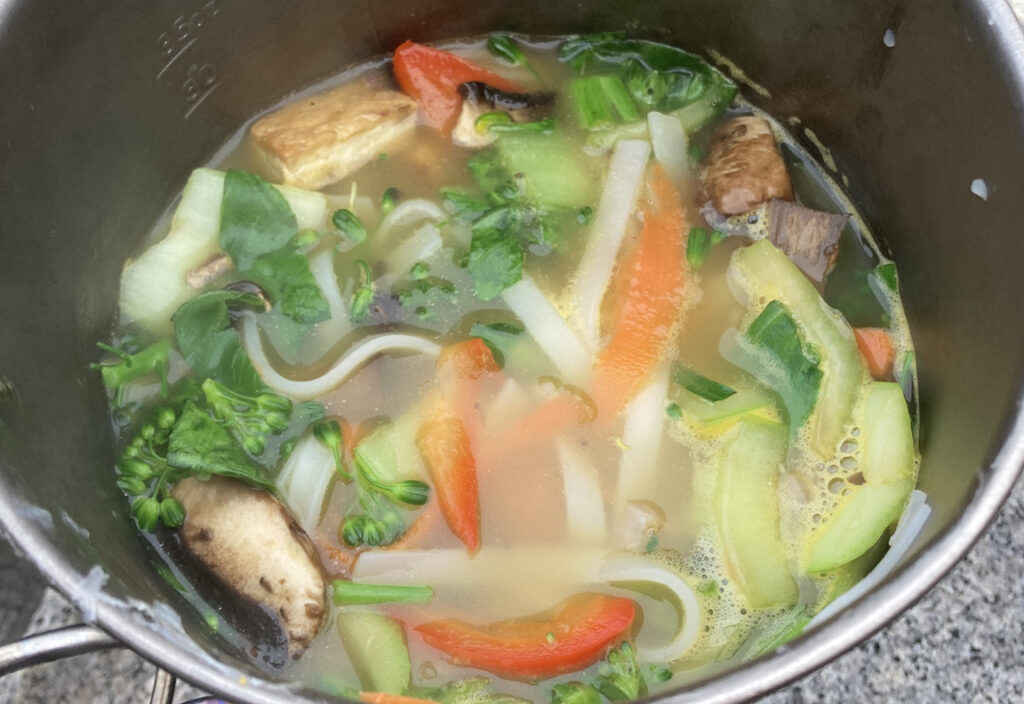
Vegetable Phö with Tofu
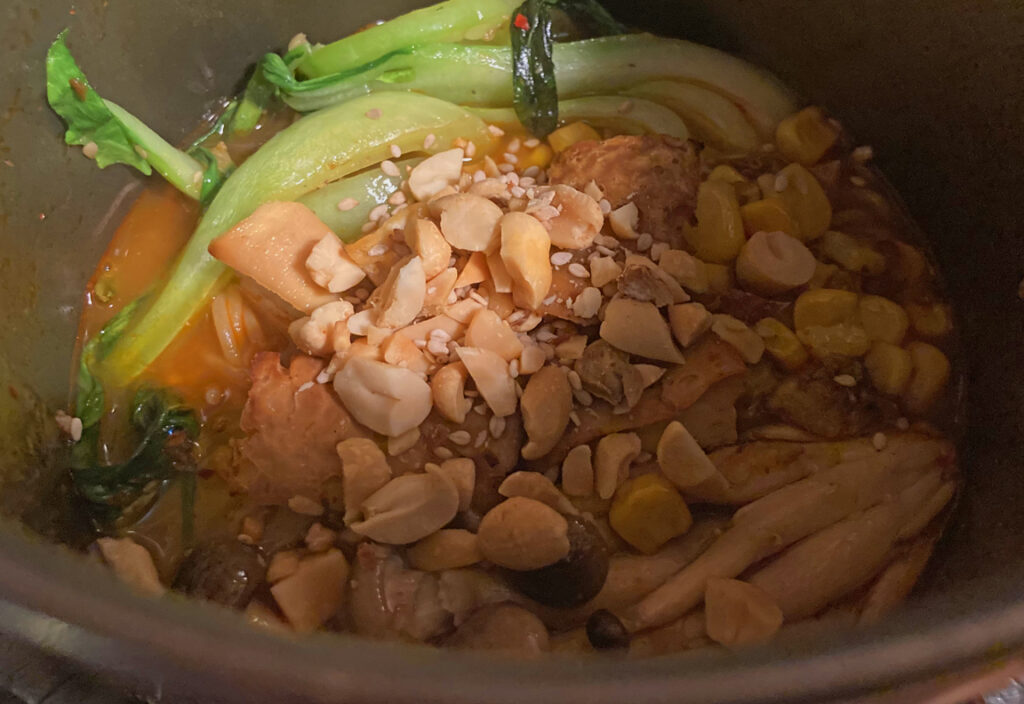
Doubanjiang Chili Ramen
Super Simple Ramen
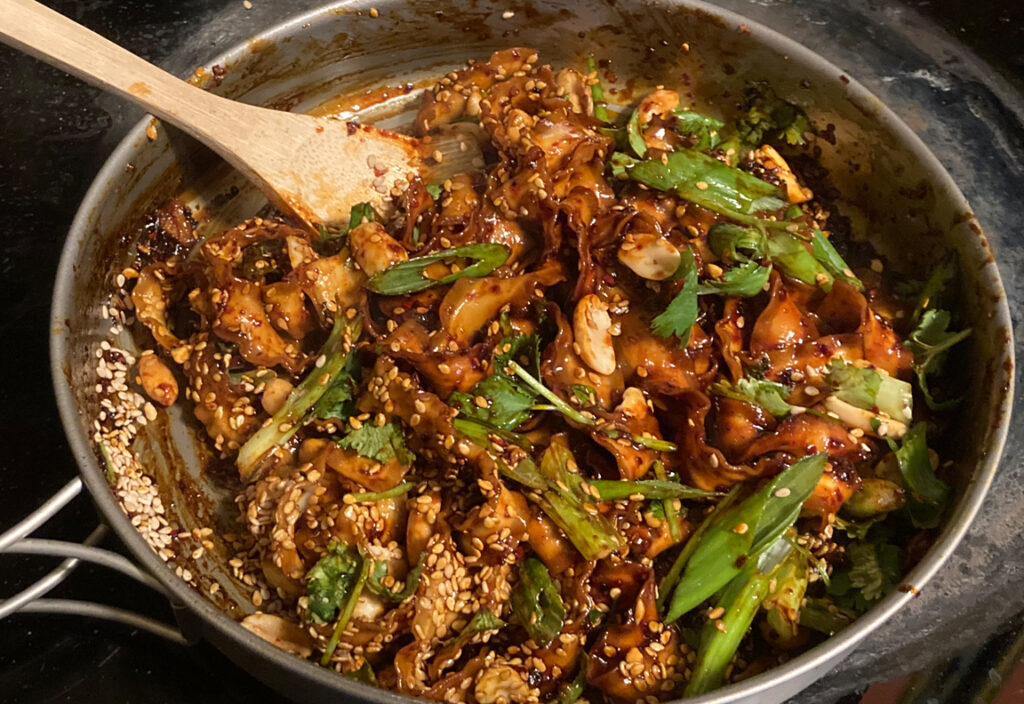
Garlic Chili Noodles
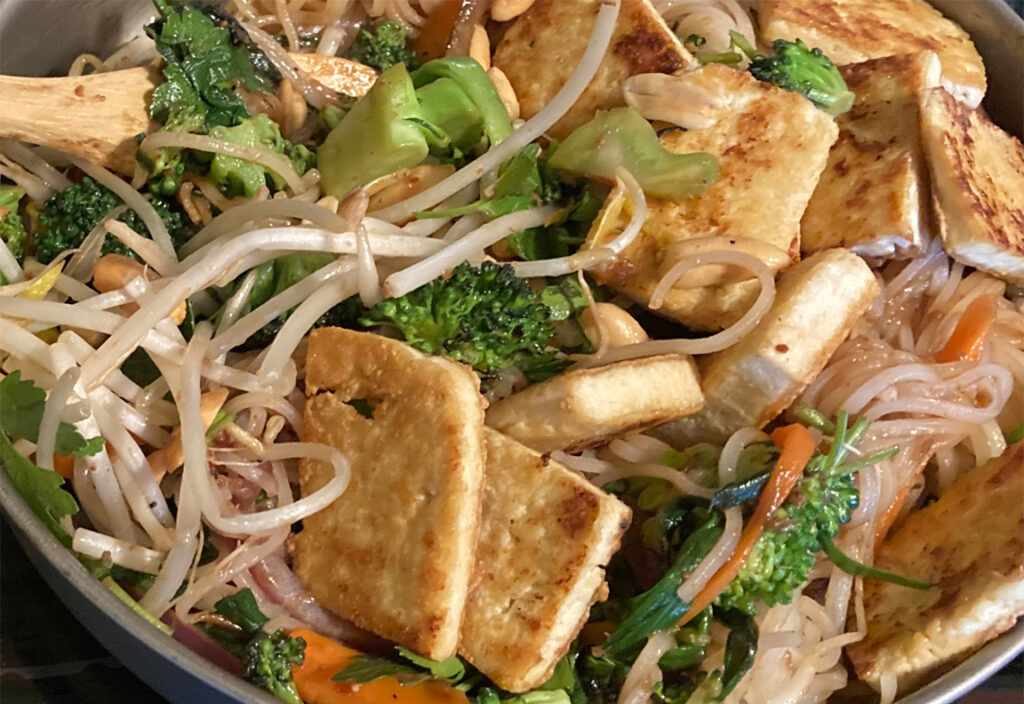
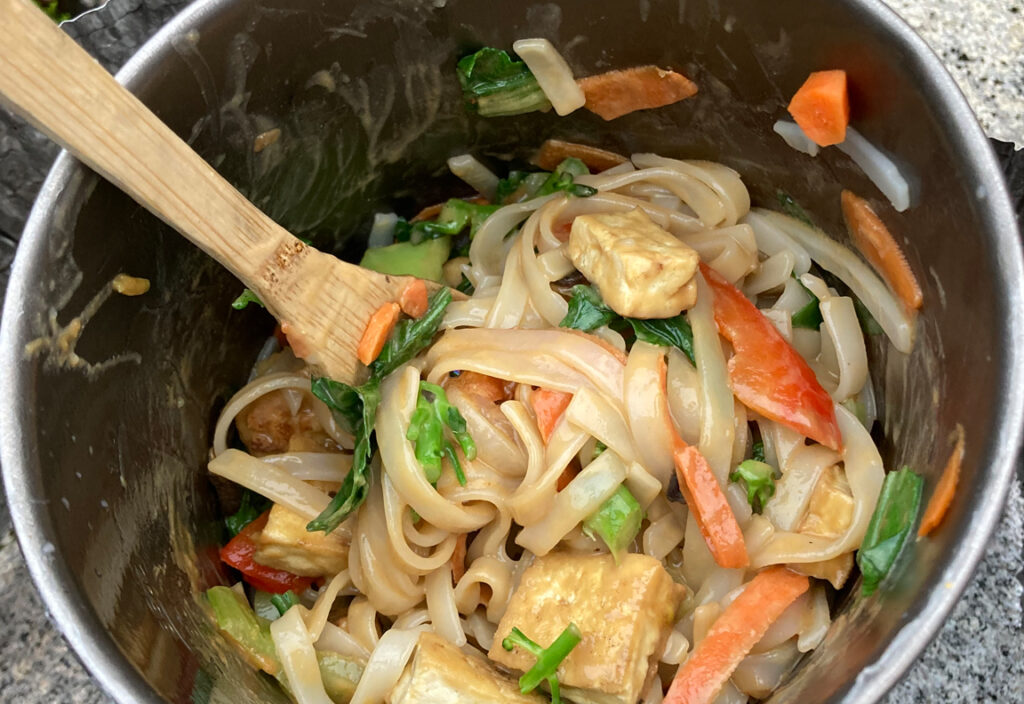
Vegetable Pad Thai
Spicy Tahini Noodles
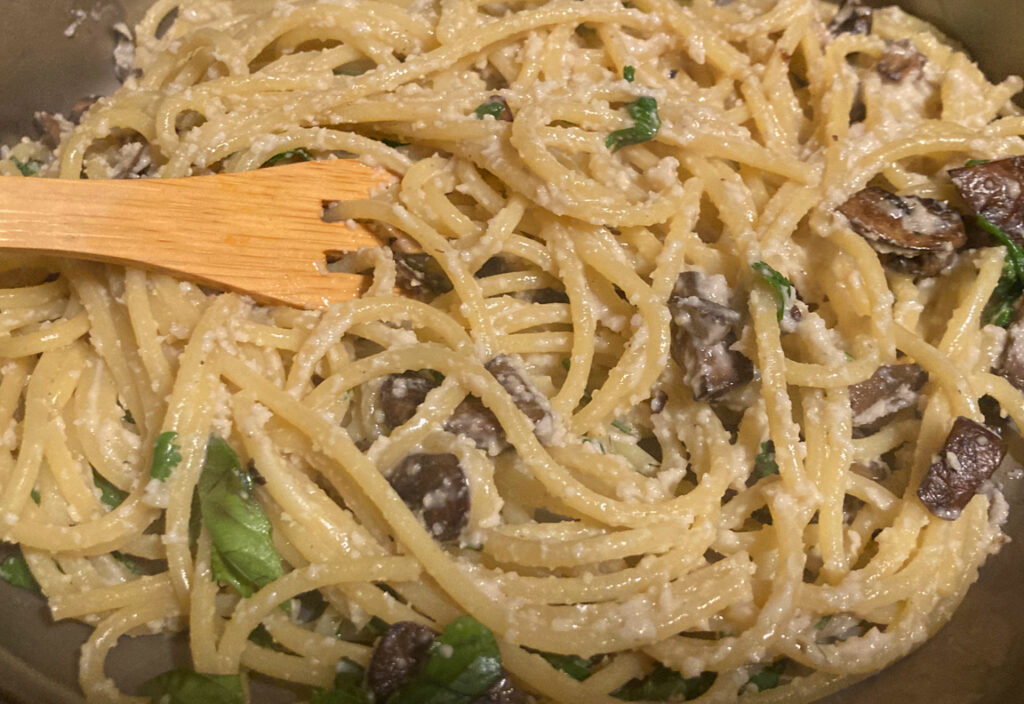
Creamy Mushroom Pasta

Spicy Sesame Noodles
Yellow Curry Noodles with Cashews
BREAKFAST OPTIONS
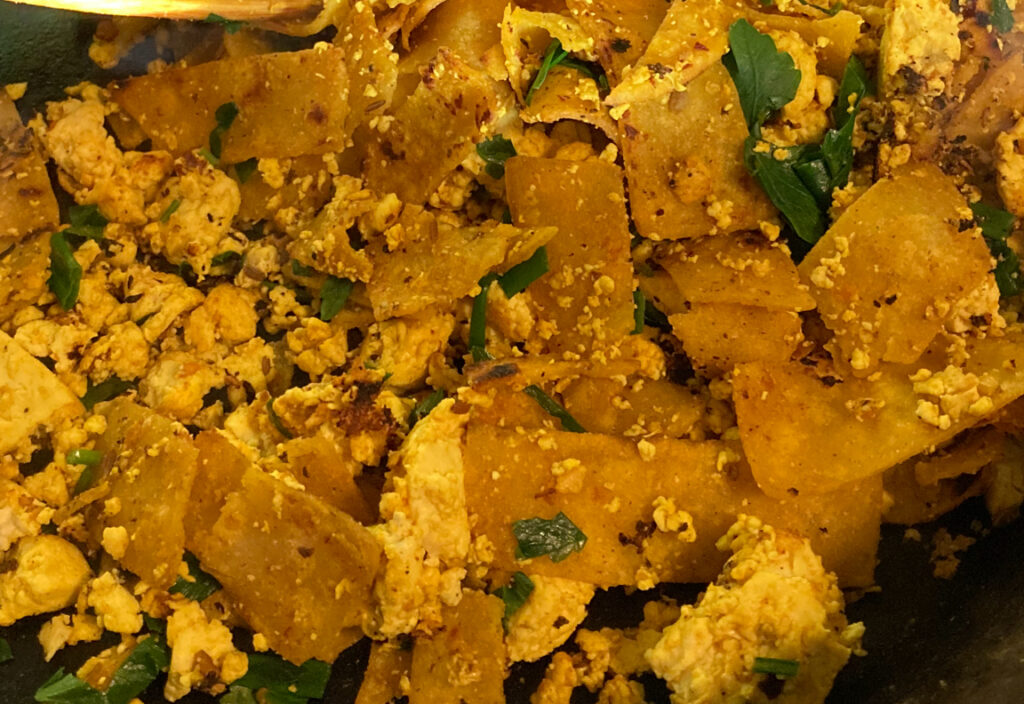
Tortilla Scramble
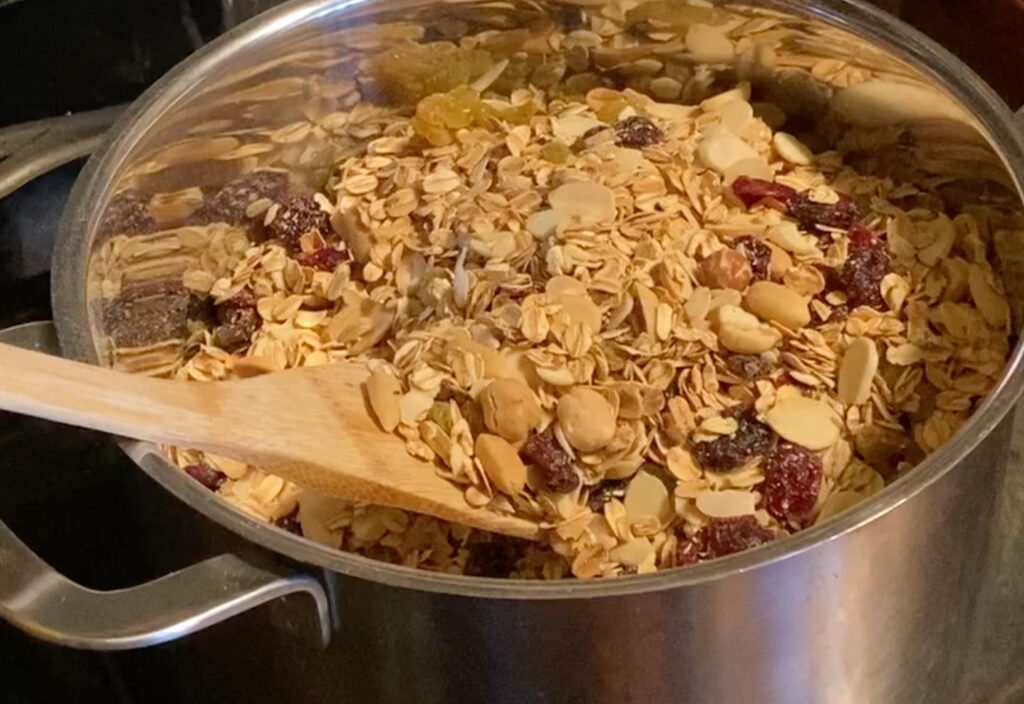
Homemade Muesli
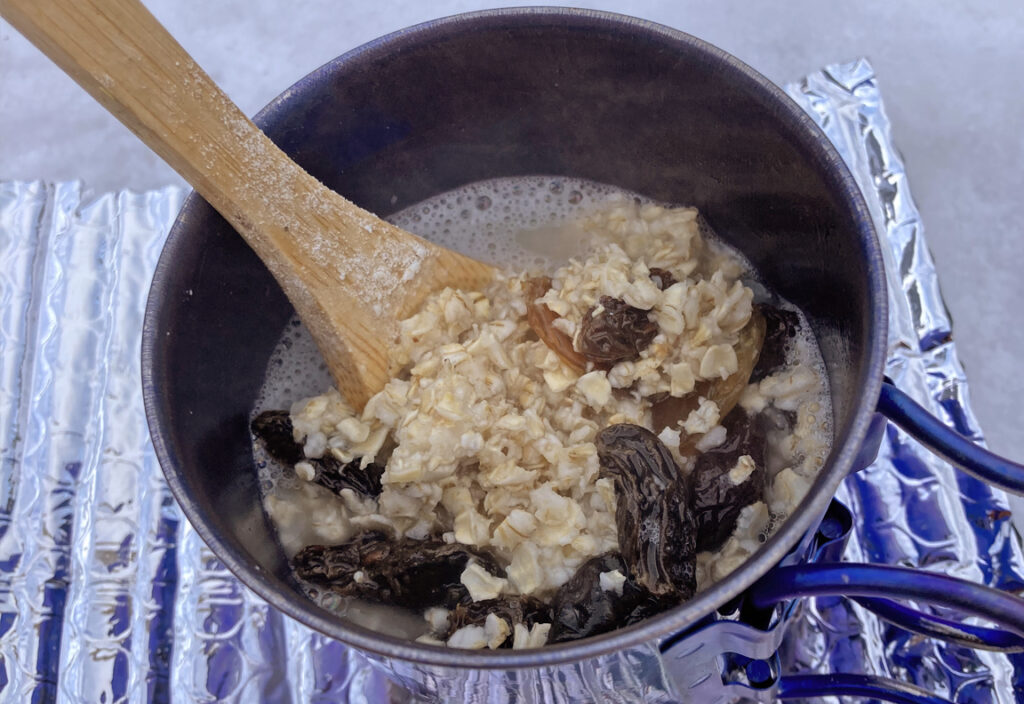
Oatmeal and Dried Fruit
——
Snacks
Most hikers will have their own list of favorite snacks. Share your’s in the comments below. There’s only two things I wish to add to this discussion.
First: Snacks can be life-saving. It’s wise to pack healthy choices, but it is a mistake to avoid even processed snacks when you need a boost of energy. Some hikers will reach camp so exhausted they have lost appetite and motivation to eat. Snack frequently to avoid loss of energy and pack something popular not just for yourself but for someone who is too exhausted to eat. For example, pack a Snickers bar or savory rice crackers that you can share with someone in need or eat yourself as a way of boosting your energy and appetite. Food is fuel that helps you stay warm and avoid hypothermia. Try to eat and resist going to bed depleted of energy. If you do go to bed without eating, plan to get up in the night and prepare a hot meal.
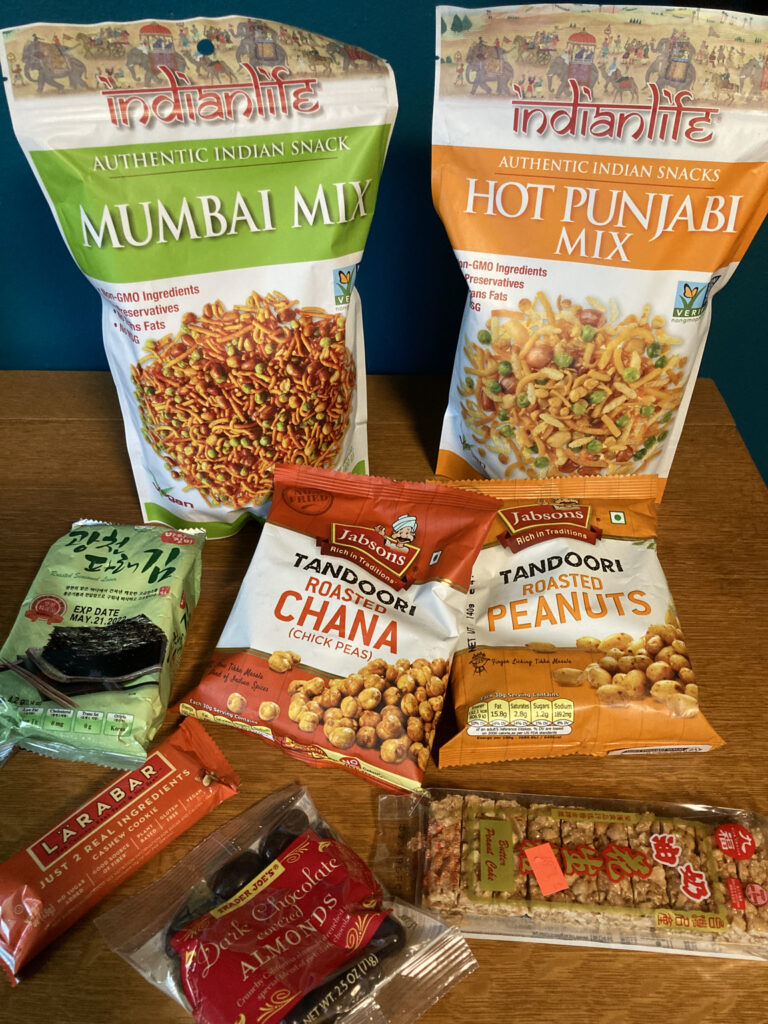
Second: Once I started cooking Asian recipes and shopping at Asian stores, I discovered a wide range of snacks perfect for winter backpacking. These included many Indian mixes of dry snacks made with straight-forward ingredients, such as peanuts, chickpea flour, sunflower oil, green peas, salt, cayenne pepper and turmeric.
You can stock up with healthy options such as nuts and dried fruit, but sometimes you will not be motivated to eat them unless they are savory (salty or spicy rather than sweet). Snacks, such as Chana and Mumbai Mix have a good combination of salty and spicy perfect for winter backpacking. Explore and see what you think.
A fresh approach
Remember those days at home when you really wanted to eat something delicious and none of the fresh food in your refrigerator inspired you, so you start digging through your backpacking storage to find a package of freeze-dried food? Me neither. Why is it that we eat on the trail food we would never eat at home or serve guests? Obviously because there is nothing at home that descends to that level of awful. Years ago, I decided to change that. Eating delicious food is something I look forward to every day. Discovering new foods is one of the main reasons I like to travel. Likewise, I want to eat something good at the end of a hard hike.
I get it that, for many hikers, the ability to shovel down undesirable food is a badge of honor. I agree. Sometimes you just have to get on with it and fuel the body. If all you have is subpar food, there’s no sense fussing about it, but why do it when it us unnecessary? There are three main arguments against fresh food—shelf-life, weight, and convenience.
Shelf-life, weight, and convenience
Most of the winter hikes organized for the Winter Backpacking Meetup are 2 days in length, with a few longer ones (typically 3-day trips). In cold weather, fresh food can easily last a week, so the durability of packaged or dehydrated foods is not required. The main advantage of dehydrated food is its lighter weight. However, it is possible to use a blend of fully hydrated and partially dehydrated meals, minimizing the added weight of non-dehydrated vegetables. With this approach to meals, a 2–3 day winter backpack can still be under 30 lbs. It also means that the meals you eat on the trail have the same ingredients as the meals you eat at home and that means they can be prepared by just grabbing food from your own kitchen cabinets and refrigerator.
Winter provides refrigeration making it easier to eat fresh, nutritious, and tasty meals in the wilderness—one of the great pleasures of winter backpacking.
A typical processed and prepackaged freeze-dried meal weighs 4–7 ounces and contains two servings (two 1.25 cups of food). This definitely saves weight. Just the empty Nalgene containers for the oil and sauce used in a fresh meal can weight as much as 1.6 ounces. The full fresh meal with sauce container and packaging can weight 9.50 ounces. This means bringing the fresh meal may add 2.50–5.50 additional ounces to your pack. Two dinners on a three-day trip adds 5–11 ounces. Depending on the recipe, the fresh meal might weigh up to 1 pound or for two dinners on a three-day trip, 2 pounds. A 26 pound pack is now 27 pounds. However, for most trips it is only adding a few ounces, but depending on the meals, maybe 1.5 pounds. Is it worth it? For me, yes. Just as I like to hike in great places, I like to eat good food.
The other advantage of processed food in a package is convenience. Many of these meals can be eaten from the package. You simple add boiling water, let it sit for maybe 9–15 minutes, stirring it once and then eating. Of course, therein is a problem. You pour boiling water into the package of freeze-dried food and let it sit for 5–8 minutes, open and stir, reseal and let it sit another 4–7 minutes, depending on the meal. This slow re-hydration period doesn’t work well in winter. It cools too fast, diminishing the re-hydration process. In the end, you are waiting a long time to end up eating cold, partially-hydrated mush. Most fresh meals cook in 4–6 minutes and are ready to eat hot.
If you are waiting for a packaged meal to rehydrate, you can keep it warm by placing it inside your jacket. The problem, of course, is that you risk spilling food and liquids inside your clothing in cold weather, which is a major annoyance.
However, one can at least argue that besides saving weight, with freeze-dried meals there’s no pot to clean up after the meal. This is very appealing, but it is not always necessary to clean the pot on the trail and if it is, it is not that difficult.
How to clean a cooking pot on the trail
In some cases, you don’t need to clean the pot. On many trips you can just put the pot in your Bear-proof container or plastic bag and washed it when you get home. In the cold weather, the food residue will not go bad on a 2–3 day trip.
If you want or need to clean a pot in the wilderness, first get it as clean as you can when eating the food. Then, add a small amount of hot water and swish it around and poor it into your hot water bottle. For a weekend trip, that level of cleanliness is usually sufficient. You can also wipe the inside of the pot with a handful of snow.
On some trips you can bring pita bread or flat bread and use that to clean the pan and then eat the bread.
Never use detergents or wash pots in streams or lakes. Left over cooked food, soup or noodles, can be drained and the solids put in a little bag and packed out.
If you need to wipe a pot dry before putting it with other gear in your pack, reuseable Lightload Towels (made of plant material called Lyocell) only weight about 1/2 an ounce. They are breathable and hypoallergenic.
Useful Winter Food Tips
Meal planning for winter backpacking:
- Nature provides the refrigeration: The weather is cold, so your pack is like a refrigerator or freezer. Food will stay fresh and preserved.
- Plan carefully. You don’t want to eat frozen food, such as a frozen sandwich. In the mild winters of the Pacific Northwest, a sandwich will likely be fine on most trips, but once temperatures get close to 25ºF or lower for extended times, sandwiches can freeze. You cannot cold soak food or even set it aside to cool because it will freeze. You can, however, hot soak ingredients, such as pasta, to reduce cook time. You can, for example, put pasta in a Nalgene bottle, add boiling water, and then put the bottle in your down jacket or sleeping bag. The bottle will heat you and slowly cook the pasta.
- Test meals at home in the cold. It helps to do meal preparation outside in the cold using your camp gear. This will give a more accurate understanding of what is required.
- You don’t need expensive processed and freeze-dried meals. In fact, for short overnight trips, you don’t need any freeze-dried food. Many common foods, such as couscous and pasta, are affordable and already dry.
- Dehydrating vegetables is easy: If you want dried vegetables, you can easily dry vegetables in your own oven on a regular cookie sheet. No special equipment is required. Simply chop the vegetables in similar bite-sized portions, sprinkle with olive oil and spread on a cookie sheet. Pre-heat the over to 400–430ºF and roast for 25–40 or 60 minutes, depending on how much you want to dry out the vegetables. Turn off over and leave the vegetables in the oven to dry further if desired. You can, but you don’t need to dry out the vegetables much. Simply roasting them is enough. You can roast vegetables with or without olive oil. However, olive oil is packed with calories and your body needs fat (olive oil contains monounsaturated fats which also help lower LDL cholesterol, reducing heart disease and stroke). Olive oil also makes the vegetables taste great.
- Avoid long re-hydration periods. Unless you have a lot of fuel and are in a base camp situation, avoid foods, such as rice, beans, some pastas, dried mushrooms, etc., that require soaking or long cook times.
- Soups work best in cold weather: It is easier to keep meals hot if they are in fluids, such as soups, Ramen, or Phö.
- Choose fast cooking pastas: Many types of Italian pastas and Asian noodles have quick cook times (3–5 minutes) and these will save fuel. Generally speaking, smaller, thinner noodles cook faster. For example, Chunka Soba Japanese style noodles (1–2 minites), Kuan Miao sliced noodles (4 minutes), Vermicelli (5–7 minutes), Acini di Pepe (4–9 minutes), and XL rice noodles (8 minutes), and Italian-style spaghetti (8–12 minutes).
- Avoid over cooking: Vegetables cook faster when cut into small dime-size pieces. Have everything ready and organized to avoid leaving the stove unattended while preparing food.
- Know yourself: If you are a teenager, both burning calories on the trail and feeding a growing body, or someone who simply tends to eat large portions, you may want larger portions than specified in the recipes here. The recipes here are good enough to eat at home. Try them out at home before testing them in the field and adjust quantities as needed. Many Asian noodles are packaged with “portion control ribbons” that function as a recommended quantity. Each portion is around 3–3.25 ounces of dry noodles. This is, for me, a large portion once the other ingredients are added. A regular size portion at home would only require about 2.5 ounces of noodles.
- Adapt to the Wilderness. Some techniques you may use at home are best abandoned along with all the convenient kitchen tools you have at home. Keep you pack weight down as much as possible for comfort and safety. As much as I try to eat well on the trail, there is no way to prepare meals on the trail in the same way I would prepare them at home. I do not, for example, rinse rice noodles when I’m on the trail.
Eating healthy
Eating healthy is defined here as fresh foods with a natural amount of fiber, avoiding as much as possible highly processed foods, saturated fats, trans fats, excessive amounts of sodium and sugar, and unnecessary chemicals, such as Yellow dye #5 and 6 and BHA (a synthetic antioxidant and defoaming agent) found in some American pastas and popular trail foods, but banned in Japan and some European nations. All the recipes here are plant based, but you can modify them to include meat and dairy if you prefer. (I’m not strictly plant-based. I will for example, eat a cheese pizza when out with friends, but generally, I prefer plant-based and it is no longer difficult in most places.)
B-12: If you are plant-based and not merely vegetarian, or are an older hiker, you will do yourself good to take occasional B-12 supplements. B-12 deficiency will definitely slow you down on the trail. It causes a loss of energy and balance and weakens muscle. Supplements easily and quickly provide all the necessary B-12 a person needs. Even if you eat meat and diary, B-12 deficiency can be caused by reduced stomach acid as we grow older.
Allergies: Many of the meals here are not suitable for hikers with allergies to nuts and gluten. If you are looking for gluten-free, many of the recipes use or can use rice noodles, which are naturally gluten-free. You can also eliminate nuts from some of the recipes. Recipes that contain couscous or pasta, such as tortellini made with durum wheat, are not gluten-free. There are other websites that provide gluten-free backpacking recipes. If you attend one of our Meetup events and you have a food allergy, such as to peanuts, you should let the group know.
Recipe strategy
The goal is to have a hot healthy and tasty meal as quickly as possible. This way you can save both cooking fuel and mental energy. Many meals can be prepared on the trail in less than 10 minutes. Some meal preparation can be done at home prior to the trip.
Basic cold-weather meal strategy: Meals that are in liquids are easier to keep warm and reheat without burning. This means that soups, Ramen, and Phö are ideal choices. Typically, meals consist of four basic parts:
- Soup base or broth or sauce. Any sauce can become a broth by adding more water. A basic broth or sauce weighs around 2–3 ounces (+1.4 ounces for containers).
- Noodles: 2–3 ounces
- Main ingredients (such as veggies, tofu, etc.): 4–8 ounces.
- Toppings (Nuts, seeds, and or herbs such as parsley or green onions): Less than 1 ounce.
For most meals, you simply boil the noodles and add the other ingredients and it is ready to eat. Soupy meals, such as Ramen and Phö are excellent ways to warm up and rehydrate after a long hike.
- Raw vegetables: Raw vegetables can be added to the same water with the boiling noodles 1–2 minutes before the noodles are cooked and both are ready at the same time. Vegetables can also be added to the water the moment it is taken off the stove and it will still be hot enough to cook the vegetables. In cold weather I usually add them to the noodles while they are still cooking on the stove. Same for Edamame.
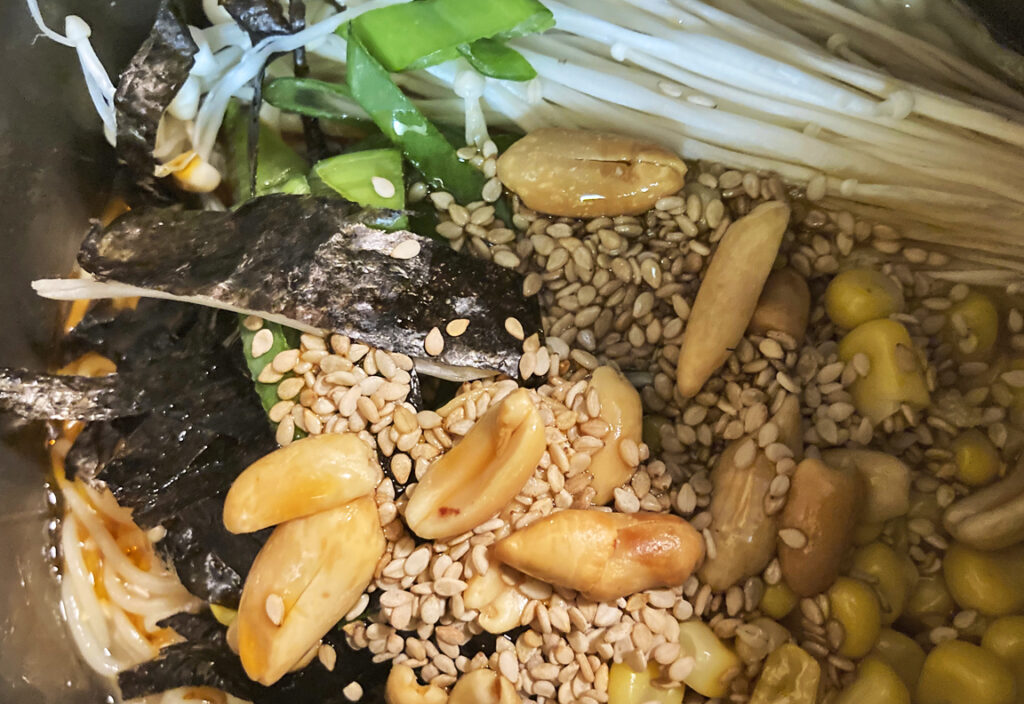
- Use fresh ingredients that don’t require cooking and can be easily heated or used on top of heated food: Herbs, sprouts, fresh mushrooms, and seaweed, nuts and seeds: Fresh basil, bean sprouts, spring onions, peanuts, sesame seeds, cashews, Enoki Mushrooms, Nori Seaweed, etc.
- Roasted vegetables: You can roast vegetables as a way of pre-cooking them, such as Eggplant (aubergines), zucchini, carrots, onions, etc. Simply add to the hot noodles and sauce.
To save time on the trail, chop vegetables and prepare sauces in advance at home. In same instances, instead of a sauce, you may want an ingredient, such as chili oil or chili crisps that can be bought ready to use.
Following this meal strategy, you can made a meal in cold-weather conditions in 10 minutes or less.
Cooking Tools and Technique
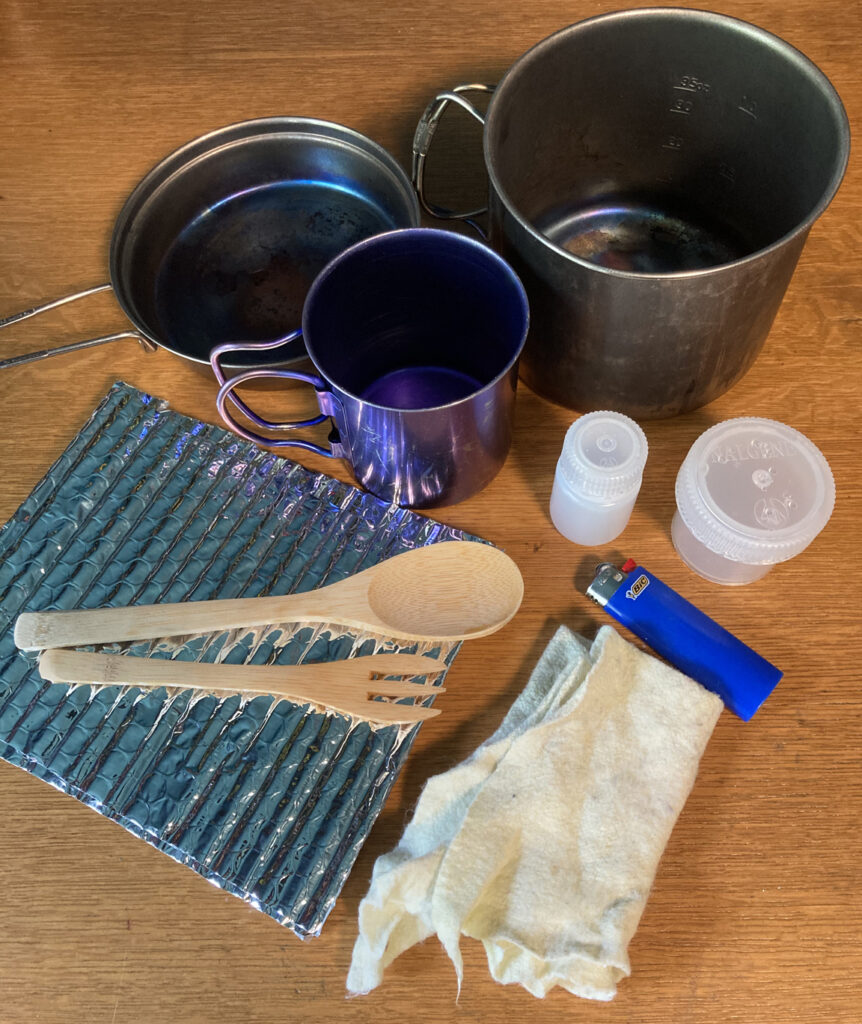
Avoid weighing yourself down with specialty cooking tools, such as strainers, pasta grabbers, tongs, and colanders. A pot, occasional skillet, cup, and a large spoon is usually sufficient.
Cooking, water, and storage gear list
- 1-liter pot
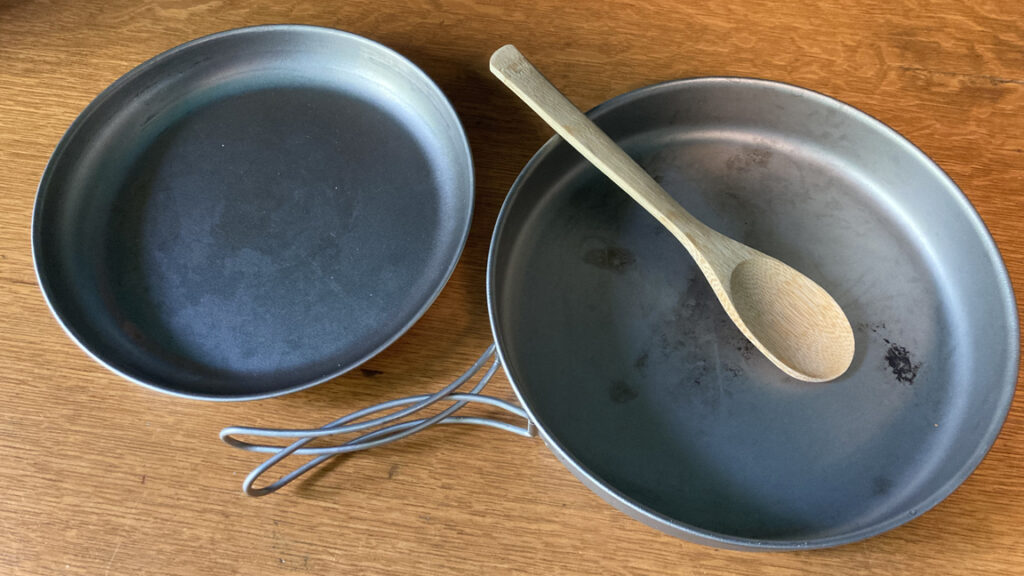
- Skillet pot lid (small) and/or large ultra-lite Titanium camping skillet
- Skillet (large 8″ Titanium)
- Metal plate (optional). I take this in the summer when I’m not bringing a pot.
- Bamboo spoon
- Bamboo fork or chop sticks
- Insulated pot warmers and/or pot coaster
- Cup
- 2 Nalgene bottles (1 liter + half liter, for drinking and hot water bottles)
- 8oz Wide-Mouth Nalgene (Mainly for shoulder season meals, such as Soy milk for Muesli)
- Metal flask (tea and/or hot drinks)
- Small 1 and 2 oz. sauce container(s)
- Bear-proof container (bear and fox protection). Sometimes required in National Parks.
- Metal lunch box (rodent protection). For most trips, this is all the food protection that is needed.
Why use a 1-liter Pot with Skillet lid: If you want or need to select a cook pot for winter use, I recommend finding one that has a skillet lid for scooping snow, such as the Snow Peak Trek 900 Titanium pot.* The Trek 900 is 6.2 oz (175 g) and has a 30.4-fluid ounce capacity (there are 33.814 fluid ounces in a liter, so this pot is slightly less than a full liter). This pot is excellent for melting snow and preparing meals. It has a few advantages over the most common alternatives:
- A lid that doubles as a skillet and functions well as a scooping tool for gathering snow to melt.
- A wider shape that provides greater stability when cooking on snow
- The shape allows for the pot to slip over the end of a packed tent for better fitting in a backpack.
The skillet lid is large enough to cook the small 4-inch flour or corn street tacos.
Large Skillet for sautéing: When a meal requires sautéing, you may want a larger skillet. They make Titanium ones that are 8 inches wide, 1 inch deep and only 5.25 ounces.
Cup: A small titanium cup is useful for tea, breakfast, and soups.
Make a pot warmer and coasters: For really cold weather I recommend making an insulated pot warmer to keep cooked meals and hot water from cooling down too fast. A small pot coaster is also useful for keeping the pot warm. To prevent the food burning, you will often need to get the skillet off the flame and place it on a coaster during the cooking process, such as mixing in the sauce.
A wooden spoon: Bamboo spoons are lighter than titanium spoons and don’t scrape the pot and skillet—especially nice when sautéing and stirring food.
Wide-mouth Nalgene containers: Small 1 and 2 fluid-ounce containers are ideal for sauces and oils. The wide-mouth design works better in cold weather. If the sauce gets frozen it will be easier to get the contents out of a wide opening.
Cooking Technique
Using a stove that doesn’t have great heat control (no simmering) and thin cooking pots is challenging. Food will burn quickly.
Here are some best practices:
- Make sure your cooking space is set up well
- Prepare an area large enough to set your pot and skillet when they are off the flame.
- Make sure the stove it stable and protected from wind.
- If you are using a liquid-fuel stove (recommended in temps below 20ºF), make sure the fuel-pump value is in the correct position. The value must point up. This is usually means slipping a piece of ice or a rock under the top of the fuel bottle to get the desired position.
- Make sure all the ingredients and cooking tools are near by and easy to reach.
- Make sure you have gloves or a pot holder that doesn’t melt and allows you to securely move the pot around and hold it as long as required.
- When boiling hot water overflows it will dissolve the snow supporting the stove making the stove unstable. Keep your snow shovel handy if you need to recut a surface.
When you need to add ingredients, take the pot or skillet off the flame and set it on a large pot-size insulated coaster. Mix in the sauce or whatever ingredients and then hold the pot back over the flame. Avoid leaving anything other than boiling water sitting on the stove supports. Most sautéing of vegetables or cooking of food such as Quesadillas requires that you hold the pot or skillets far enough above the flame to avoid burning it.
Forget about rinsing noodles. Wilderness cooking is not home cooking. You don’t usually have enough water to rinse noodles. Just drain the noodles or remove them from the hot water when they are needed. Let’s assume you are going to add noodles to a stir fry in cold weather. If it takes 3 minutes to cook the noodles, put the noodles in the water to soak as the water heats up and comes to a boil. Boil for 1 to 1.5 minutes, then set aside. Start the stir fry and let it cook for 2–3 minutes, then scoop the noodles out of the warm water and add them to the stir fry. Stir for a minute, mix in final ingredients and stir for another 2 minutes. The whole process takes less than ten minutes.
Cooking stove
Most people I know use canister stoves even in winter. Because I want a stove that is reliable in cold weather, below 10ºF, I am in the habit of using a liquid-fuel stove. This type of stove enables the fuel pressure to be controlled with a hand pump ensuring no loss in performance as temperatures drop and altitude increases.
I use a MSR International, which has no fine control for simmering, so it takes a little bit of practice to use with a skillet.
- Liquid-fuel Stove
- Fuel pump and bottle
- Lighter
- Windscreen
*Unlike some cooking systems, which are stoves that come integrated with a cooking pot, liquid fuel stoves do not include cooking pots. This meals you have to select your own cook pot.
Don’t Forget Hot Drinks
After a long hike, it is great to have a hot drink. Several options are regular caffeinated teas, such as Earl Gray or coffee. If you don’t want caffeine because it keeps you up at night, there are many herbal tea options. Another option is a Miso broth, which is available in ready-made packages. A hot Miso soup is good after any meal.
Contrary to popular belief, alcohol doesn’t warm the body. On the contrary, it accelerates heat loss and increases the risk of hypothermia. There is at first, a false sense of warmth, but it actually dilates blood vessels, increasing the blood flow to the body’s skin and periphery. If you choose to bring alcohol, you should be cautious about your body’s heat and have ways of boosting your warmth. Drink it only when you are comfortably warm and not when you are in need of warmth.

PNW Guide to where to find the ingredients
Where can you get the ingredients used in these recipes? These days, quite often any grocery store in a major metro area will have most, if not all of what you need. Because this website is mainly focused on backpacking in the Cascade Mountains—which are near Seattle, Washington; Portland, Oregon; and Vancouver, British Columbia—the recipes reflect the character of this regional. There are many American grocery store chains in the Pacific Northwest that now carry Asian foods. There are also some stores that cater specifically to Asian, Middle Eastern, and Mediterranean cuisine (Asia includes India). I shop at them all.
Shopping
Find a grocery store near you. In my specific area there are seven stores that I frequent, depending on what I need. These include:
- Ranch 99: A large store with mostly Chinese/Taiwanese groceries. There are two stores in the Seattle area. It has sesame oil, chili oil, soy sauces, rice and buckwheat noodles, also knife pare noodles, dried mushrooms, etc. They have good produce—sprouts, herbs, etc. They also have some light-weight prepackaged meals, such as Taihodien Spicy Noodles.
- H Mart: Mostly Korean groceries with many stores in Vancouver, B.C., Seattle, Bellevue, Tacoma, Portland, etc. A good place to find noodles, such as rice noodles, soba, Ramen, knife pare noodles, etc.; Korean chili powder (Gochuguru); broad Bean Sauce, plant-based Oyster sauce, dried mushrooms, Kombu, Miso soups, and good produce.
- Uwajimaya: There are around ten Japanese grocery stores in the Seattle area, but this one is a Seattle landmark establishment going back to 1928. Originally located in downtown Seattle, they now have locations in Bellevue and Renton too. Unfortunately it is too far from me so I rarely shop there, but I have known hikers to pick up Sushi and snacks there and bring them on the trail.
- Biblos: Middle Eastern and Mediterranean groceries. There are more than 10 Mediterranean stores in the Seattle area. Great for Tahini, Bulgar, Couscous, Falafel, spices, flat breads, olives, dried fruit, and nuts. They have good produce and large quantities of fresh herbs.
- Go Go Mart: Indian groceries. There are about 10 such stores in the Seattle area. They have snacks such as Mumbai Mix, as well as Naan, dates, Indian desserts and prepared meals.
- Trader Joes: Popular grocery chain in the Seattle area. Especially useful for nuts and dried fruit, organic extra firm tofu, sun-dried tomatoes, olives, tortellini, produce in small quantities, and dips, such as Eggplant Hummus. They also have Vegan Phö broth.
- QFC: Popular and large-store grocery chain in the Seattle area. They have the small street tortillas, rice noodles, Chana, Tandori Roasted Peanuts, Seaweed snacks, Spring roll raps, Vegan Phö broth, and good produce.
- Costco: A chain of membership-only big-box retail stores. Useful for buying large quantities of Walnuts, Almonds, and Soy or Oat Milk.
Let me know your favorite store below.