Use the right snowshoes for the terrain.
There are snowshoes for flat terrain, rolling terrain, and mountain terrain. Most of our trips here in the Pacific Northwest are in Alpine terrain or terrain with steep slopes. For this, snowshoes designed for mountain terrain provide the greatest safety and comfort.
How are mountain terrain snowshoes different?
The main purposes of snowshoes are flotation and traction. They keep you from sinking into the snow or sliding off the slope. The deeper your feet sink, the more difficult it is to more. The more you can float on the snow the better.
Flat terrain snowshoes serve that purpose but provide little traction on the underside to prevent slipping and sliding on slopes. This lack of traction allows you to go faster on flat terrain but it also means flat terrain snowshoes can perform like a dangerous high-speed sled on mountain slopes. Flat terrain and running snowshoes are not appropriate for our routes in the Cascade Mountains.
Rolling terrain snowshoes have more traction, but only mountain terrain snowshoes have the level of added traction needed plus pop-up heel lifts that give your calves a break on steep terrain. There are some flat terrain snowshoes that have heel lifts, so check the amount of traction. Do not rely solely on whether the snowshoes have pop-up heel lifts.
Many mountain terrain snowshoes also have removable extensions or flotation “tails.” If you are looking to acquire mountain terrain snowshoes, look for these two basic features:
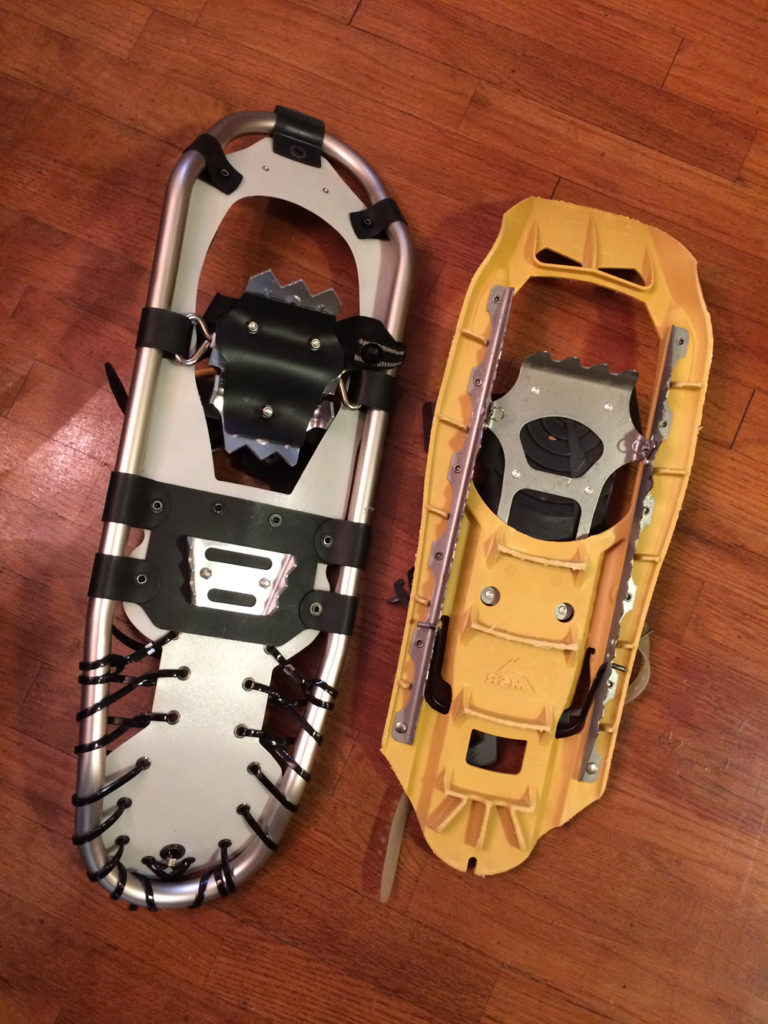
- Long sidewall traction bars
- Pop-up heel lifts
Snowshoes come in different sizes for different size hikers. Heavier hikers need larger snowshoes that provide more flotation. You can add “tails” to some snowshoes for additional lift, but getting the riht size for your weight is more important (I never use tails). Snowshoes are available in different widths based on gender and different lengths for different body weights, such as (22 in/180 pounds, 25 in/220 pounds, 30 in/280 pounds). Get the length suitable for your weight and include your likely pack weight when making your calculations.
From around December–March, most PNW trips will require snowshoes.
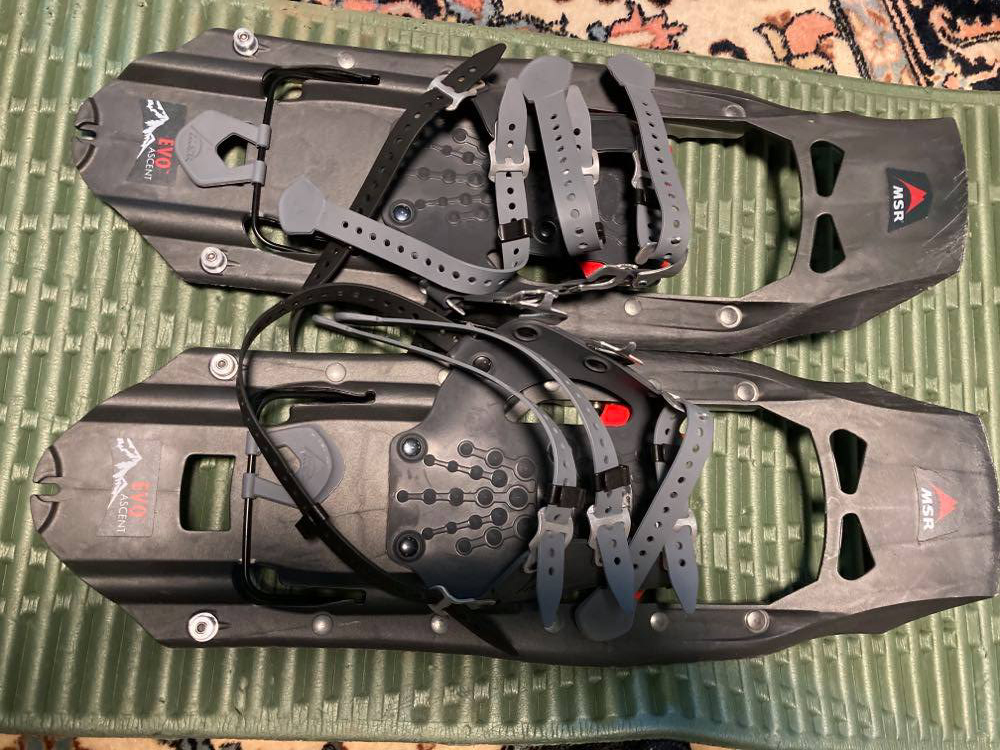
The Seattle-based company, Mountain Safety Research, known more commonly as MSR makes reliable mountain terrain snowshoes. If you are purchasing MSR snowshoes for one of our events, look for the “Ascent” series. This includes the Evo Ascent, Revo Ascent, and Lightning Ascent. Of these three, I recommend the uni-body design and stronger binding of the Evo Ascent. The Lightning Ascent is also a good choice and it comes in both a regular and women’s model. Most of these snowshoes are around 4 lbs. Product reviews in 2021 and 2022 contain complaints about broken straps and no replacement parts. I have found [January 2024] that parts are available on the MSR website and it is useful to carry extras on extreme trips. I also recommend considering secondhand older versions of the Evo Ascent and Denali snowshoes. I have bought several good pairs on eBay.
The Retrospec Drifter Plus snowshoes is another brand model that has excellent cleats, ample sidewall traction, and a durable design. The 23″ are 4.7 lbs.
If you can, pre-adjust the main straps for your boot size to minimize the difficulty of taking the snowshoes on and off when using.
The most important quality is durability. Designs change often. Look for a design that has fewer joints to separate and robust components.
Finally, consider the weight of the actual snowshoe. Most snowshoes will add around 4lbs (1.8 kg) or slightly more to your pack. Some snowshoes are nearly 5 lbs.
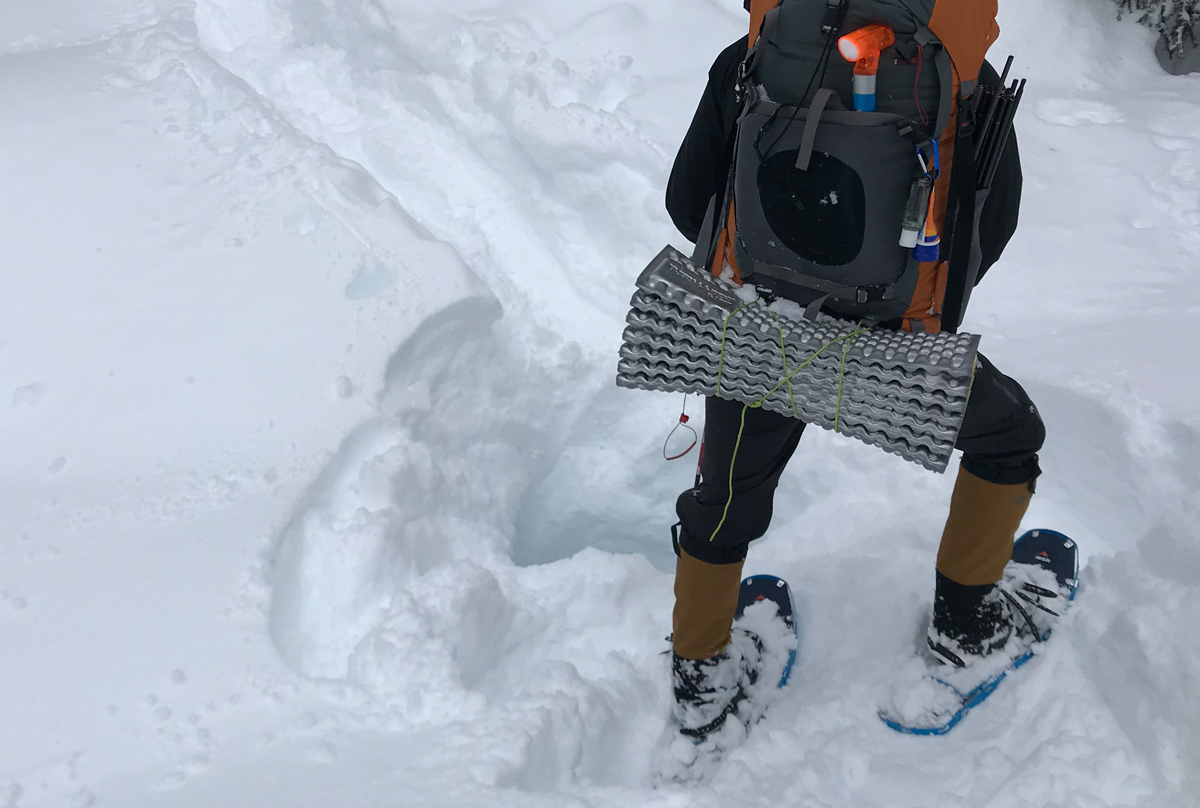
You will most likely have to occasionally carry the snowshoes on your backpack some of the distance. Keep this in mind when you are putting your gear in your car and heading out to the trailhead. Once you arrive at the trail, you may need to carry the snowshoes for the first few low-elevation miles. This means you need to also have a way to attach the snowshoes securely to your backpack. I use two accessory straps (which can also be used for other purposes).
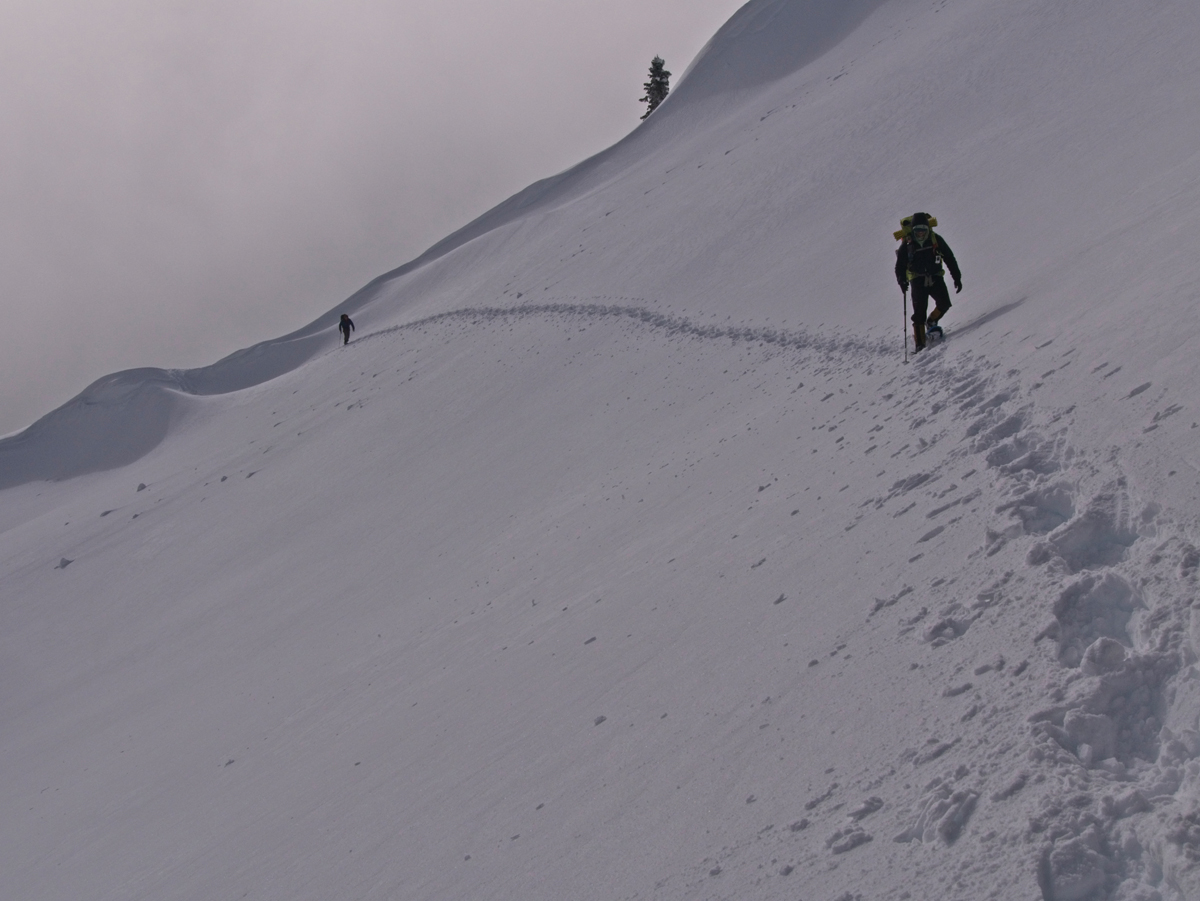
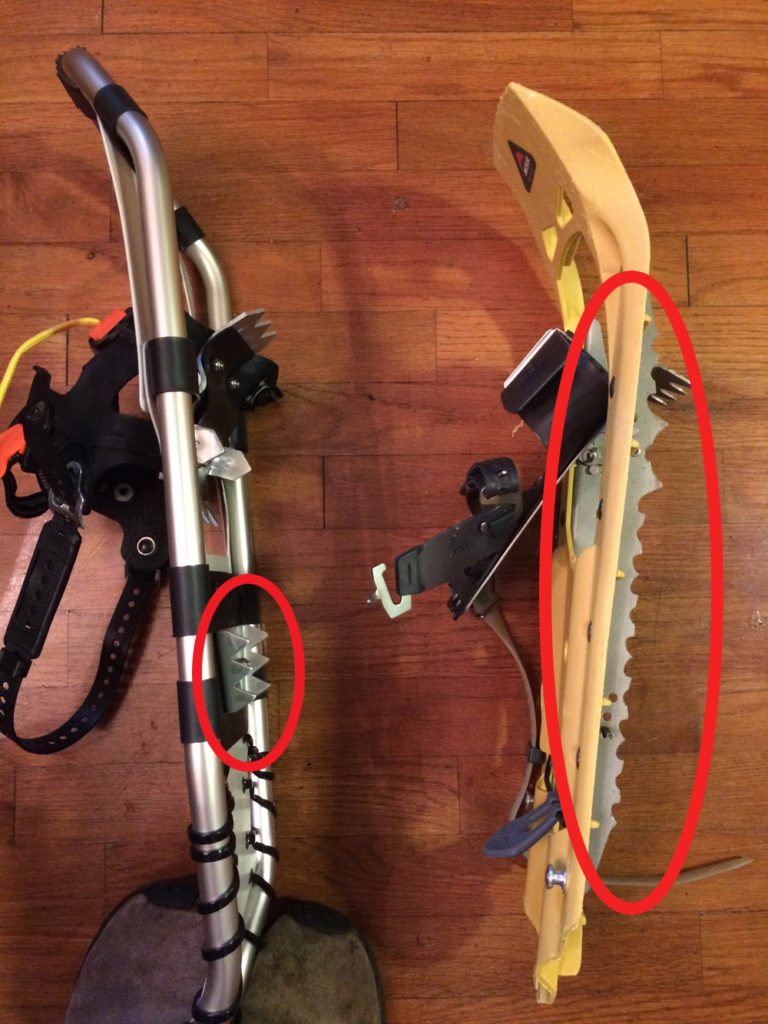
Side Traction Examples
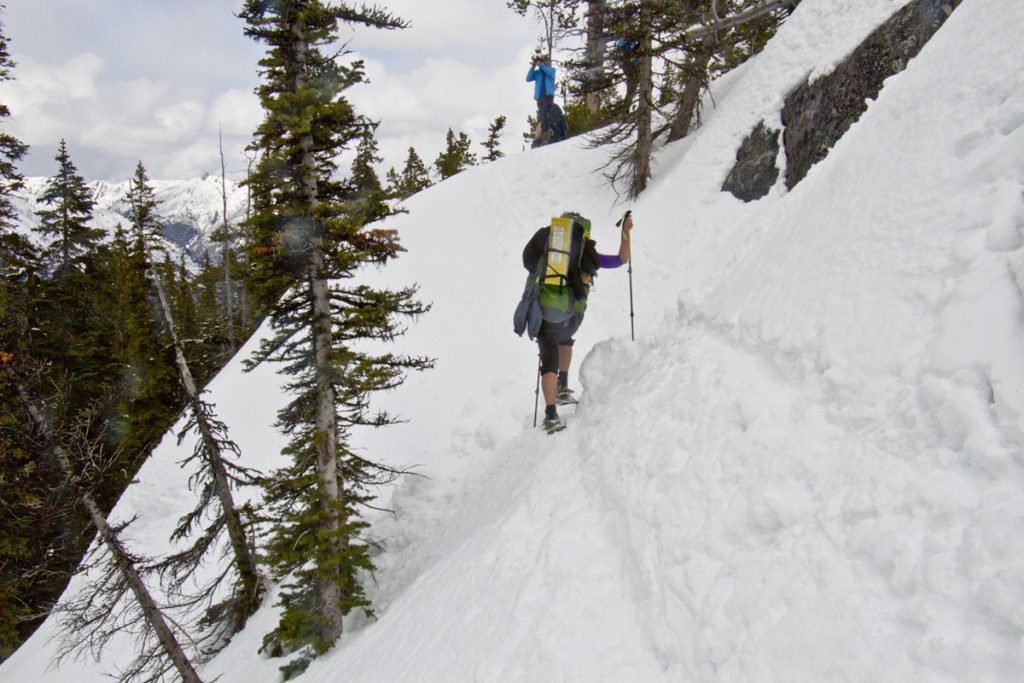
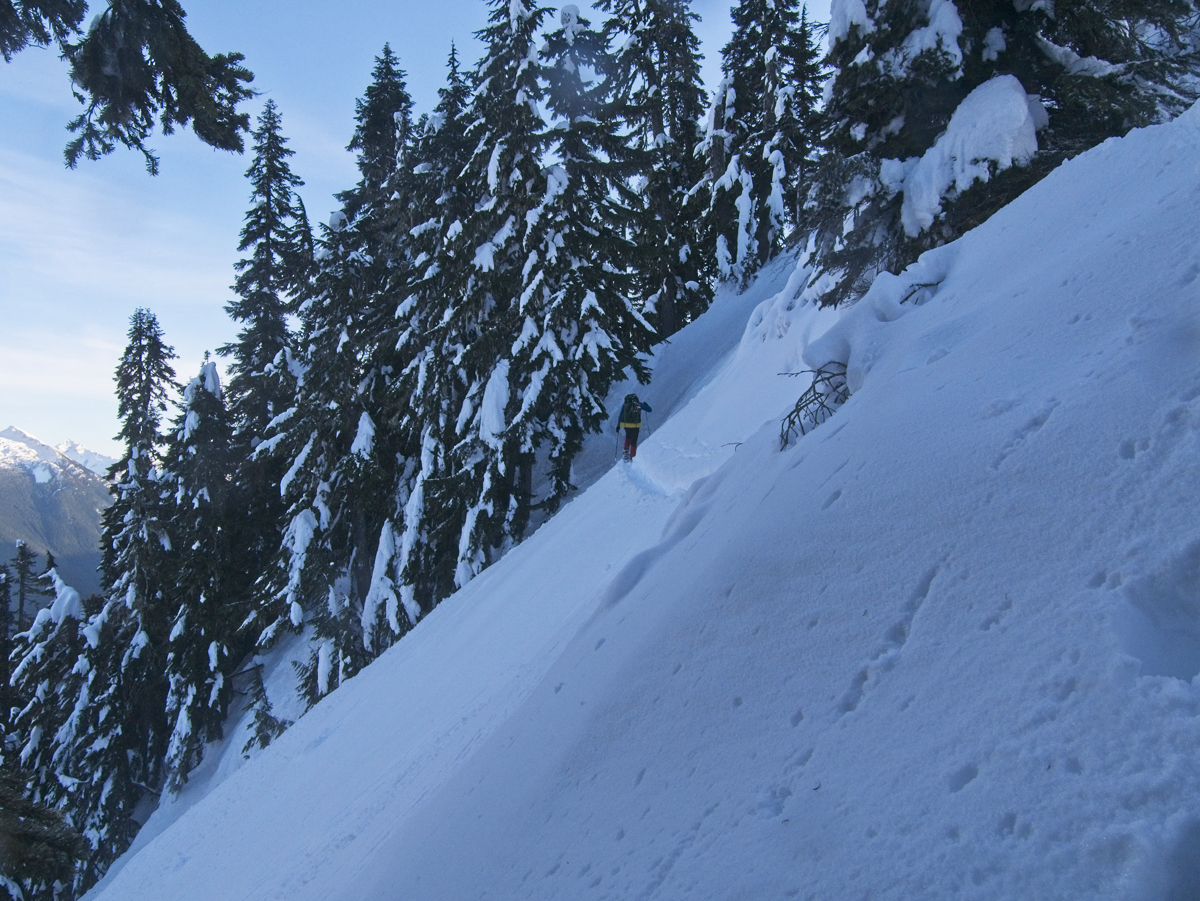
If you are hiking on terrain like the slope shown in this photo, you need good traction, which means snowshoes designed for mountain terrain. To understand the difference, look on the bottoms (see photo below). Look for long side walls or side rails for traction.
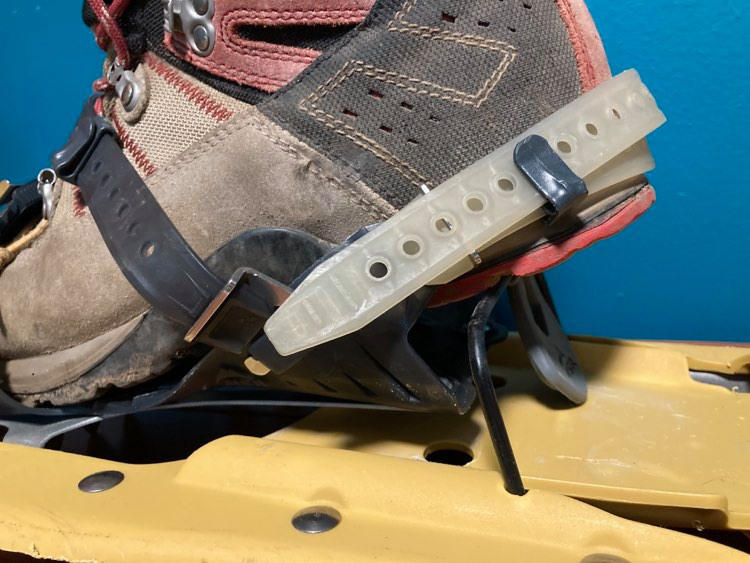
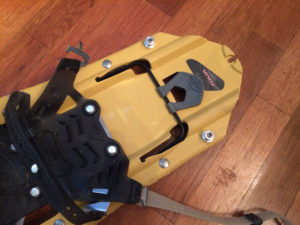
Heel lifts
Snowshoes designed for mountain terrain also have a heel lift. Look at the back of the snowshoe for this feature. This takes the pressure off your calves making the ascent much easier—kind of like walking upstairs.
Snowshoe extensions
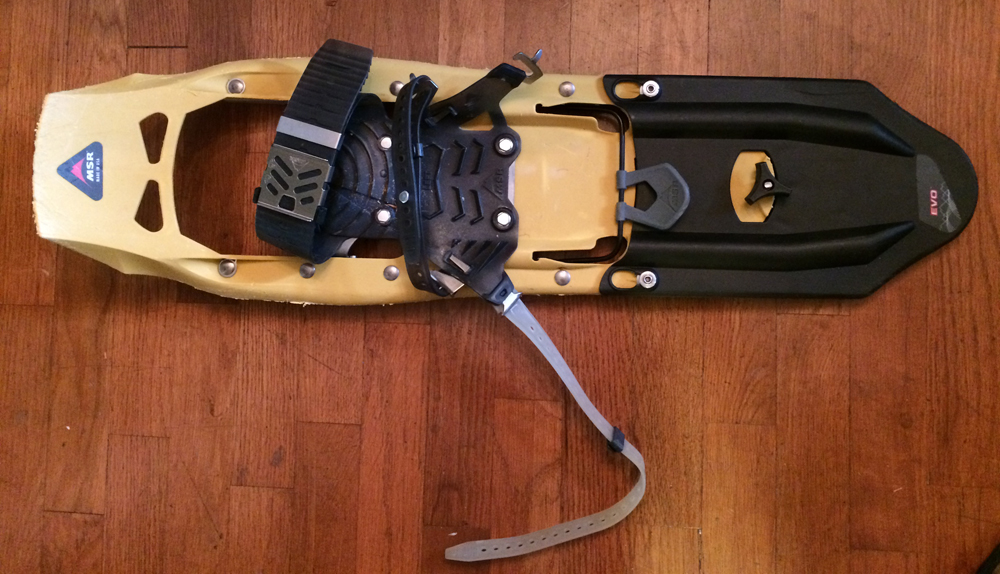
Snowshoe extensions or flotation tails can also be useful. Personally, I have never needed them and would not want the extra weight. It all depends on your body weight and snow conditions. You will need the flotation tails if you are heavy and you are hiking in deep fresh snow (especially common conditions in late fall and early winter). I have seen heavy guys struggle in deep snow even with the extensions. Without tails, they would not have gotten far.
TIPS & SAFETY
When pre-adjusting your snowshoes, adjust them so that the ball of your foot fits over the axle or pivot point. The pivot point attaches the bindings and front crampon to the frame and decking.
It is not enough to have the right snowshoes. You need to understand different snow conditions and common dangers, such as tree wells and concealed streams. Pick your route carefully, carry the 15 winter essentials, and before you even head out, check the weather and avalanche forecast.
If you head out on a long trip into the back country, bear in mind that heavy snowfall can make snow travel extremely difficult even if you have the correct snowshoes. In deep snow you can expend more energy going one mile than if you were hiking 12 miles in the spring.
If you have not used snowshoes before, look around and signup for an expert-guided snowshoe trip. You can learn important tips such as how to get up if you fall over in deep snow (make an “X” with your trekking poles on the snow, place your hand in the center of the X and push up). Guided snowshoe trips are sometimes offered in National Parks and Forests Services. Some provide snowshoes. You can learn important safety tips and find out if snowshoeing is for you.
Let us know your thoughts and suggestions
Have I overlooked anything? I’m always looking for new ways to improve safety. Please share your ideas, experiences, and challenges below. Your comments and questions are welcome.
