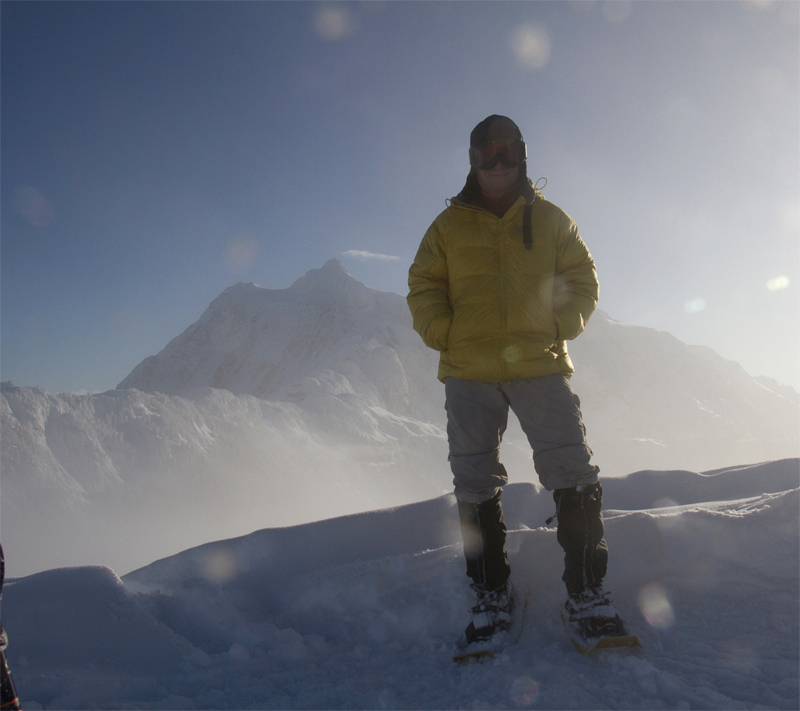
With the right winter backpacking gear, you can be warm, dry, and comfortable while snowshoeing or hanging around your camp in the snow.
These tips just concern winter gear basics and are not a full gear list for winter backpacking.
Boots
Keeping your feet warm in PNW winter doesn’t require heavy Mukluks or double-layer mountaineering boots. Your 3-season boots may even work, but only if they are loose enough to allow for warmer socks and still allow plenty of circulation. To increase warmth, use thin liner socks with heavy outer wool socks. If your socks create a tight boot fit, then your circulation will be restricted making your feet cold. If your boots are restricting your blood flow, you are better off getting another pair of boots for winter use. Circulation is key to warmth.
IMPORTANT
When buying boots for winter, be sure to try the boots wearing both liner socks and thick wool outer socks (the thicker the better). Even with both pairs of socks on, the boots should not be tight. Look for boots that are waterproof, but breathe, and sturdy enough to use with snowshoes.
For snowshoeing, a flexible boot that doesn’t have a rigid shank will be warmer than mountain climbing boots. If you need more rigid boots, such as Lowas Tibets or Caminos, will work if you also need to use crampons. You can use mountaineering boots, but they are not ideal for hiking long distances, snowshoeing, or keeping your feet warm. The warmer double-layer mountaineeering boots are heavier than needed and again, not ideal for hiking.
If you want to use your summer boots, but the fit is tight, try relacing them, starting about half way up. How you lace your boots is very important for correct winter fit. Even with boots made for wide feet you may need to skip the first bottom eye-rings to get a loose winter fit. More here: https://winterbackpacking.com/how-to-keep-your-feet-warm/
I don’t use wool insoles in my boots, but I sometimes use them in my camp booties. The insoles only cost a few dollars, so they can be helpful for extra warmth when standing around at camp. Usually, a folded pad (4 R-value) is all I need so I consider wool insoles optional.
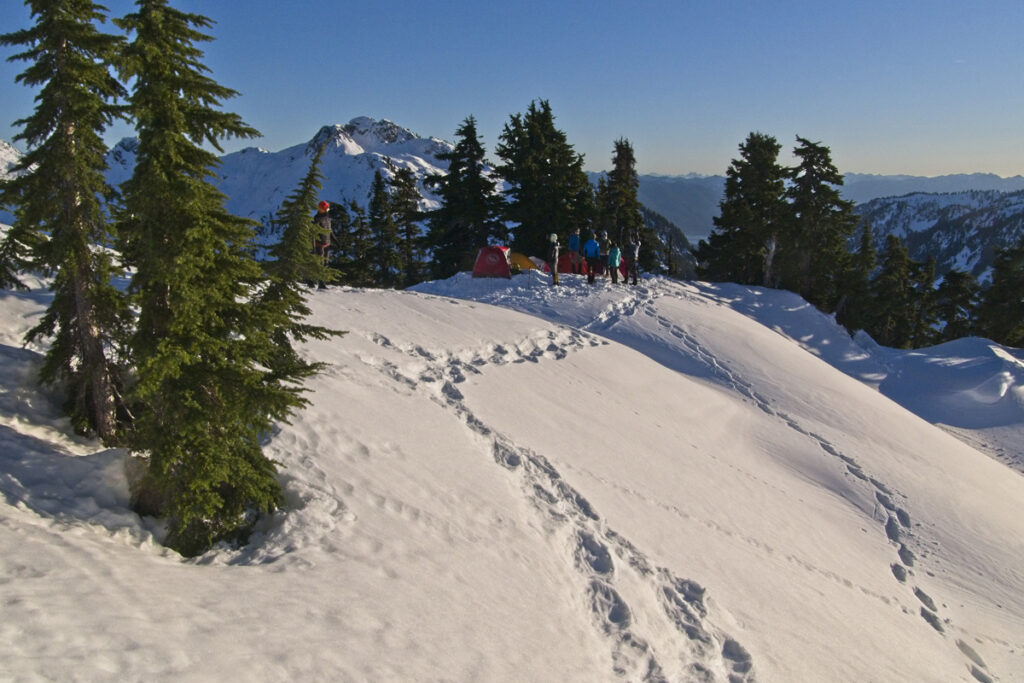
Snowshoes
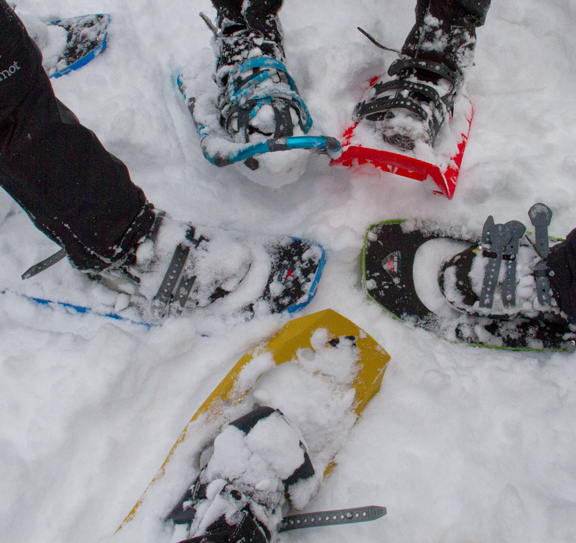
terrain” snowshoes are the safest option. Not all the ones shown in this photo are for mountain terrain.
Look for mountain-terrain snowshoes. This type will have two features that are essential in the Pacific Northwest: long bottom traction rails and heel lifts. Tubular flat terrain snowshoes are not safe on steep terrain. From around December–March, most PNW trips will require snowshoes. Simply being “tubular” or having a heel lift are not in themselves indications of the appropriate design. Some tubular snowshoes do have sufficient traction and some have heel lists but insufficient traction.
More here: https://winterbackpacking.com/snowshoe-tips/
Another type of traction you will want is microspikes. These are easy to put on your boots.
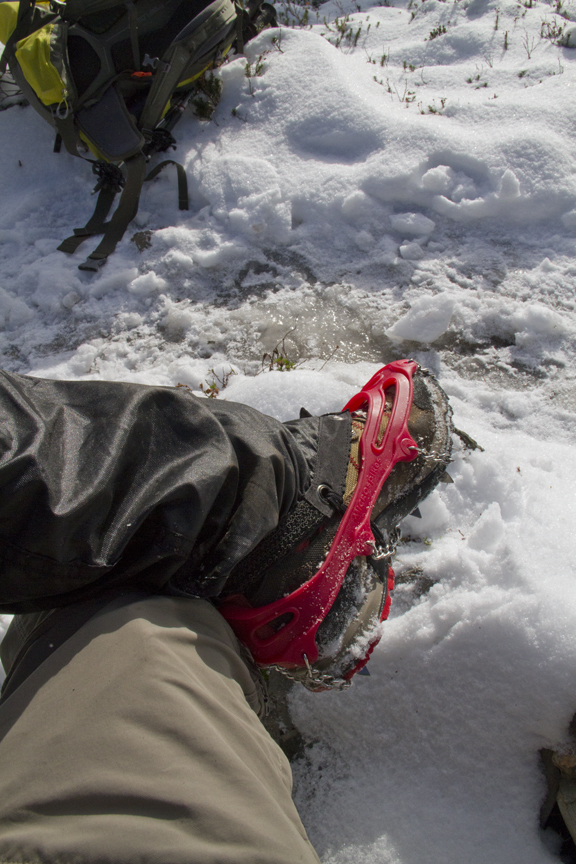
If you need crampons, be aware that not all crampons require mountaineering boots. Some crampons use a “step-in” design that require boots with a heel groove or welt to hold the lever of the crampon. However, if you have boots that use a shank and are rigid enough, such as Lowa Tibets or Caminos, you can use “Strap-on” crampons.
Backpacks
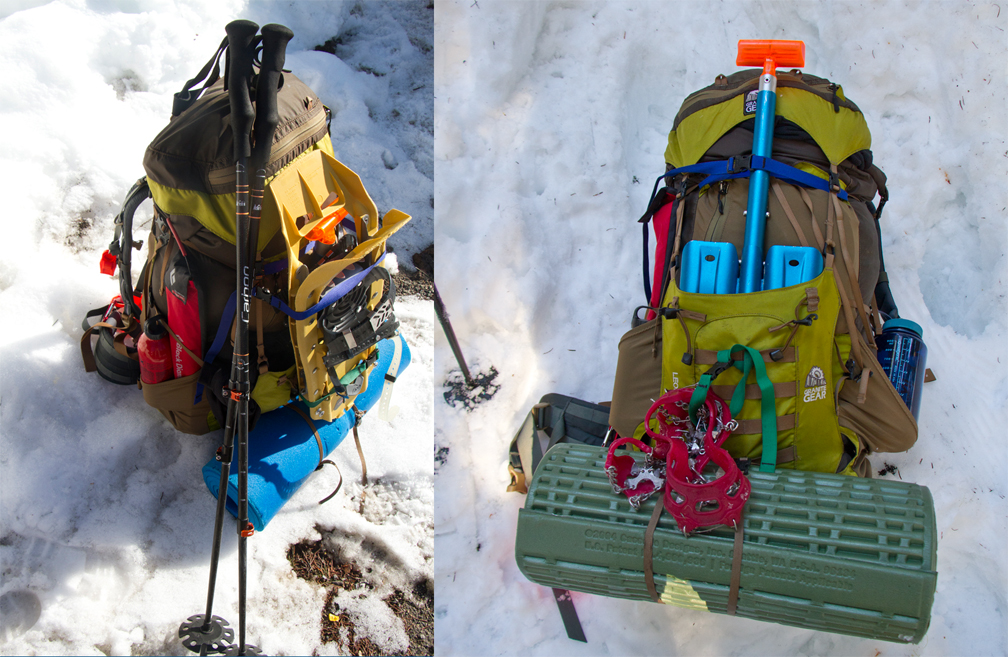
In the winter, colder months, and higher elevations, you will need more cold-weather gear, adding weight to your pack. There are more layers to bring, the extra mattress, the heavier sleeping bag, the snow shovel (necessary avalanche gear), etc. For some trips, you will also need to strap your snowshoes to your pack for part of the trip. I’ve tried hard to get my gear weight down and still I end up with 22–28 lbs for most 2–3-day trips, counting the weight of the pack, This does not include the snowshoes which are 4 pounds. This means my pack weight can hit 32 lbs.
The pack I began with was a Granite Gear Leopard A.C. that used the same suspension of the earlier Blaze A.C. pack (both discontinued). It was a 58-liter pack weighing 2 lbs 11.5 oz (3 lbs 1oz. with lid) with a 40 lb capacity. Now it is possible to get a good pack in the 2–2.5 pound range.
Size: Whatever pack you choose, it will most likely need to be 55–65 liters. However, if you pack a heavy synthetic sleeping bag you may need a larger backpack.
Weight: Backpacks are one of the “big three” items. To hold down weight get a backpack that is in the 2–3 pound range. Avoid heavy packs with lots of needless features.
Backpack buying tips: Buy the pack that fits your gear requirements. Don’t do it the opposite way by buying a pack and trying to make your gear fit its limitations. You don’t want a pack that is too large because you’ll just end up carrying useless pack weight. If the pack is too small the gear will not fit and the pack will likely be too weak to carry the weight or uncomfortable. This means you need to first determine how much volume and weight your gear will be. Find the lightest pack you can get and afford, but without sacrificing comfort and durability. A good backpack will, for example, have a hip belt and load lifter straps on the shoulder straps. The backpack doesn’t have to be designed for “winter” use. In fact, most packs are not designed for winter use.
A person carrying more than 40 lbs needs a stronger and larger pack than what I use. Some of the people who hike with me tend to use higher capacity packs. Generally speaking, a 60 liter weighing 2–3 pounds with a 40 pound load capacity is all that is required for 2–4 day winter backpacking trips. I have never needed anything larger.
Try the pack on and be sure that the weight is on your hips and not your shoulders. The hip belt system is critical for comfort on long-distance trips. Pack weight, durability, and comfort are the most important qualities, not extra pockets and compartments. I eliminated the top lid to cut weight and I haven’t missed it.
Remember, you will probably need to attach snowshoes and a snow shovel to the exterior, so think about how you will do that before you make the purchase. You may need a way to attach some extra straps.
Sleeping pads
For sleeping on the snow, first, check the “R-value” of your sleeping air mattress. You’ll need 5 to 7 R-value for true comfort. In that range, you will not notice that you’re sleeping on snow or ice.
Be aware that even if the air temperature is 40–50 degrees Fahrenheit (5–10º C), the ground may be covered in thick frost, ice, or snow.
There are a few air mattresses around that achieve a 7 or better R-value, but the best practice is to have a solid foam pad plus an air mattress. Even though an air mattress can provide all the R-value you require, don’t rely solely on an air mattress! Instead, always bring both an air mattress and a solid-core pad. The solid pad will help protect your air mattress and add additional R-value. When combined you can achieve a higher R-value. You can’t rely on just a solid foam pad because most are only in the 1.5-2.8 range and that’s not enough. If the air mattress fails you will be in a difficult situation and will likely need to borrow someone else’s foam pad to double up on foam. In the worst situation, you can fold the solid pad under your core (upper body) and put your other gear under your legs. Ideally, in an emergency, someone can give up their foam pad and get by with just their air mattress. It is harder to get by with just a foam pad. The two-pad loan strategy is a critical safety measure for the team.
Sleeping bags
For winter backpacking, you’ll want a bag that is lightweight and warm, but your budget may not give you both. The key thing to know is that a “10º F degree” bag may only be comfortable down to around 20–30 degrees. A 0º F degree bag may only be comfortable in the 10–20 degree range. So, if you are serious about winter camping, Get a zero degree bag.
A zero-degree bag is the best option for most trips
For most winter trips in the Pacific Northwest, a 0º F (–17º C) rated sleeping bag is sufficient. Most winter backpackers I know are using 15º, 10º and 0ºF rated bags. For a more detailed comparison of 0º F sleeping bags, see Winter Sleeping Bags.
If you anticipate going on trips with temperatures dropping into single digits (unusual in the PNW), then add a liner or switch to a -20ºF expedition sleeping bag. I only use a -20ºF rated bag once or twice each winter and it probably was unnecessary. If I expect day-time temperatures to go lower than 0ºF, I don’t go. We almost always camp between 3,000–6,000 feet in elevation and temperatures tend to be in the 10º–45º F range.
Synthetic is the economical choice and will work, but down is lighter, especially higher loft down such as 800 or 950-goose down. The cost difference between synthetic and down sleeping bags is huge. A 0ºF synthetic sleeping bag will usually cost around $80–150 and weigh 4–7lbs. A 0ºF 650-fill down sleeping bag will usually cost around $250–350 and weigh 3.5–4lbs. A 0ºF 800-fill down sleeping bag will usually cost around $650 and weigh around 3lbs. A 0ºF 900+fill down sleeping bag will usually cost around $700–1,000 and weigh slightly less than 3 lbs.
The weight difference between a 10ºF degree 700 down bag and a 10ºF degree 850 down bag is one pound.
Look for a good sale, and be aware that sleeping bags gradually loose their loft, reducing effectiveness. That means it is risky to buy second-hand sleeping bags. Also, if the sleeping bag is stored in a compressed way, that too will ruin the loft.
TIPS
To help protect your sleeping bag it helps to sleep wearing a fresh thin base layer—top, bottom, and liner socks. Don’t wear clothes that you hiked in as the moisture will reduce your warmth significantly.
Avoid trying to overcome a low-rated sleeping bag by sleeping with your coat on and wind jacket, rain pants, etc. If you do that and temperatures fall even lower than expected, you will have no further way to gain any additional warmth. That is, have extra warm capabilities, rather than just enough.
Never store your sleeping bag compressed in a sack. Hang it up in a closet or put it in a large laundry bag where it can stay loose and breath.
Gloves
Being truly comfortable in the winter requires keeping your hands dry and warm. I often use a three-glove strategy. First, carry a light-weight fleece or smart wool liner glove to use while hiking. Then a mid-weight insulated and waterproof glove for colder conditions and handling snow. Finally, loose-fitting mittens for the coldest conditions.
You can wear liner gloves and mittens together. If your liner gloves get wet while hiking you can wear your mid-weight waterproof gloves. Use the heavier waterproof gloves or mittens around camp.
It is very hard to keep gloves dry. Expect them to get wet and expect that you will want another pair. In some Spring months, the wet gloves can dry out while you wear the extra ones, but in many situations, that’s not going to happen. For more about glove strategies, see What are the best gloves for winter backpacking?
Jackets, wind protection, and layers
At lower elevations, temps can be above the freezing point, making snow stick and melt on your outer layers. This means you need a rain jacket or parka even in winter, and ideally this garmet needs to fit over your puffy when necessary. Be sure to test the rain jacket’s or parka’s fit over your insulated coat before you make a purchase. The fit should not be so tight it compresses the loft of the down.
A parka is longer than a jacket and provides more protection foryour core. If your puffy is a parka then your outer rain layer also needs to be a parka to fully cover it.
While hiking you will not likely need an insulated coat, but when you stop or set up camp, you will need to add layers. Ultra-light down jackets (8oz of down or less) are usually not enough warmth for winter camping. Ideally, get a puffy that has 14–16 ounces of 800 down fill.
Bring wool and/or fleece tops too because these can keep you warm even when wet. A wool top base layer and synthetic base-layer for legs, plus a clean pair of wool socks will help you stay comfortable around camp and while you sleep at night.
What you hike in will likely be moist from sweat, especially on trips with a lot of elevation gain. Always carry a thermal base layer and fresh socks just for camp and sleeping at night. This means there is always dry clothing to keep you warm. Wet or moist clothing will wick away your warmth.
Smart wool can be expensive, but investing in at least one smart wool top base layer will put comfort and added security in your winter kit on colder trips. Capilene is a synthetic fabric that is light and very effective for insulation as a base layer. It is a lighter weight alternative to smart wool. However, wool is odour-resistant and antibacterial which means it remains fresher after multiple uses whereas Capilene and other synthetics smell bad.
For more about layering see Tips for Staying Warm at Camp and Layering for Winter Backpacking
If you have a choice between jackets and tops with or without a hood, I recommend always choosing the hoodie for the extra wind and UV protection, as well as warmth.
If high winds are in the forecast, pack a balaclava, ski goggles, and double-layer mittens. Be able to cover all exposed flesh. If you are not prepared for wind, you will suffer! For more information about wind see my post “Preparing for Winter Winds.” For milder conditions, a buff is a versatile and light-weight accessory that can come in handy.
Everyone is different, and if you are coming from a warmer climate you may need more than someone who lives in the Pacific Northwest. Generally speaking, in weather 25ºF and above, I just wear regular hiking pants while I’m hiking up a mountain. If the temperatures are going to be below 25ºF degrees, then I add a thin synthetic base layer under my pants (just thermal underwear made of nylon, not wool or even Capilene). If below 10ºF degrees (rare), then a smart wool base layer. The colder it gets, the more layers you need. On many hikes, if not most, one challenge is adjusting layers in a short period of time as you move from lower (warmer) to higher (colder) elevations. It always happens that hikers stop and start pulling off layers 15–30 minutes into an uphill hike. With base layers under your pants, it is just harder to remove a layer—especially when you are wearing gaiters and snowshoes. What many winter hikers do is start off cold with the expectation of warming up. Try to be careful about using unnecessary base layers under your pants.
In addition to layering, you will want UV protection. In the later cold-weather hiking season (March–July), high-elevation snow travel and camping on snowfield can mean intense exposure to UV rays. You need UV sunglasses (category 4) that will wrap around to the sides. Lightweight UV shirts with hoodies and/or hats with neck and side capes or a bandana to cover exposed areas of the face. This will help prevent severe sunburns, which can happen in a single afternoon. The UV rays are bouncing off the snow, so even your lips and underside of your nose can get painfully sunburned.
Tents
You can get a 4-season tent, but for most trips in the Cascades, a three-season tent can work. Even a tarp will work. It all depends on how comfortable you want to be. Tents provide some extra warmth (about ten degrees for some 4-season tents) but winter tents are mostly for wind and snow protection. The advantage of a tent, especially free-standing tent designs, is that you can quickly set up camp when you’re tired to get out of the wind. Pole-supported tarps and tents are not recommended because they are harder to set up in wind and harder to stake out in the early season when snow is heavy and soft.
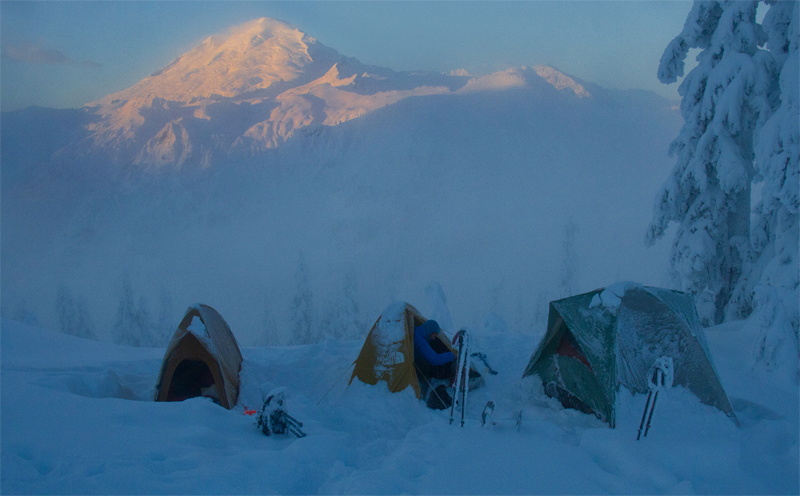
Whatever you use, if snow is in the forecast, tents that have steep walls and very little top surface area are best. That is, avoid tents that have large top surfaces that will easily collect snow. I have seen hikers use 3-season tents in most of the conditions where I have used my 4-season tent. The greatest limitation of the 3-season tent in winter conditions is wind protection and snowdrift (snow getting through mosquito netting). Even a light 5 mph breeze will carry snow into some 3-season tents. This can be mitigated by positioning the tent door away from the wind and building a snow wall around the fly edges.
All the 4-season solo tents on the market today have some limitations. They are either single-wall construction causing interior condensation (if waterproof), or not waterproof (if breathable), not steep enough to shed snow well, or too heavy. Nevertheless, most of them are good enough to get you through average conditions. Many of these tents are in the 2–4 lbs range.
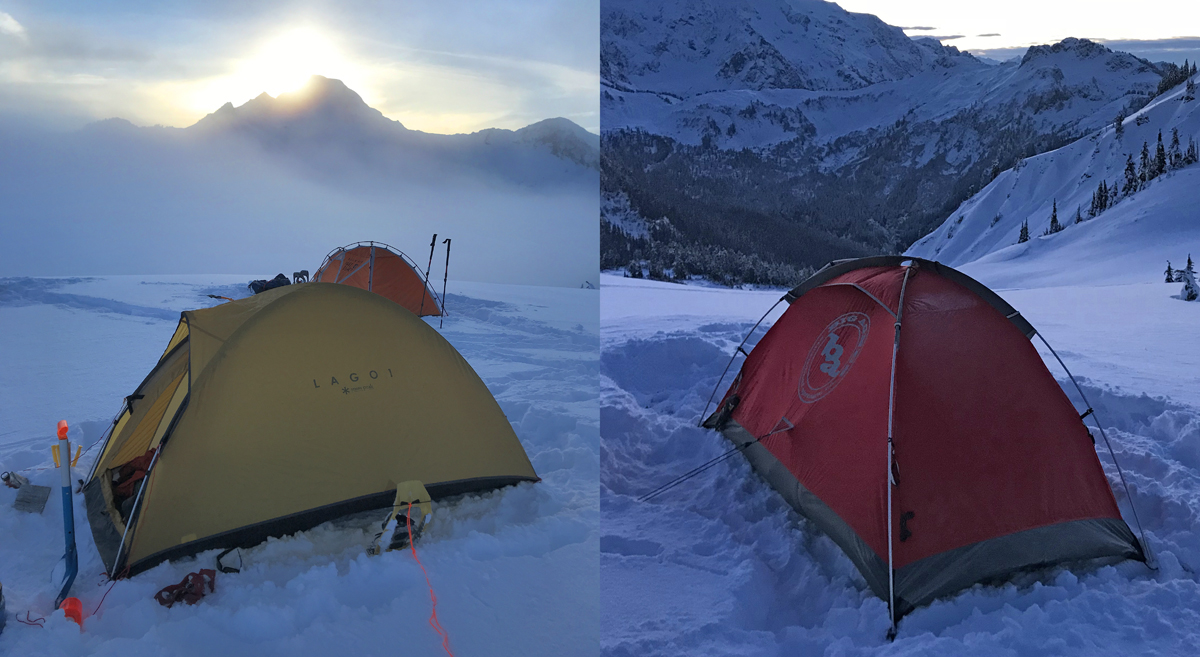
The tent on the right is the Big Agnes Sheild 2. It is a single-wall construction (not fully waterproof) but has excellent ventilation at the top. It is, in my opinion, a tight fit for two people, but makes a roomy solo tent. It is reasonably light at 3lbs, 12 oz. Another 4-Season option is the MSR Advance Pro™. It is Ultralight (less than 3 lbs) and also 2-Person.
What about hammocks? Whatever you think about them, it is a simple fact that there is no place to set up a hammock in most of the places where we camp in the winter. The trees are too encased in snow, too dangerous to approach, too small at the higher elevation, or non-existent in the location.
Don’t forget to upgrade your tent stakes. In addition to some snow stakes, take some extra 2–3mm utility cord to add extensions for deadman stakes (i.e., added length to bury stakes deeper in the snow in a horizontal position). For more on staking out your tent with pre-tied cords read this: https://winterbackpacking.com/how-to-stake-a-tent-in-snow-without-tying-knots/
For a deeper dive into 3-season vs. 4-season tents and some specific examples see 3-Season vs. 4-Season Tents.
Cooking gear and Pack Bladders
I strongly recommend dropping the pack bladder for winter conditions. The mouth value freezes and you’ll get dehydrated. Sometimes, the bladder freezes overnight. You may be able to work around these problems, but a simpler alternative is a sturdy Nalgene Bottle. It offers fewer problems and more utility. I carry a one-liter bottle and a half-liter bottle. There’s no need to carry a lot of water because snow is everywhere. The Nalgene bottle can double as a hot water bottle at night—which is important.
It is best to carry water bottles on the outside of your pack and flip the bottles upside down while hiking if the water is likely to freeze (0–20º range). If the water freezes, it will freeze at the top first blocking access to the unfrozen water. If the bottle is upside down this problem is solved. Carrying frozen water is a pain and it renders the container useless. You must drink the water or pour it out before it freezes.
The majority of my winter trips are in the 20–40º F temperature range. However, if temperatures are exceptionally cold—15º F or below—you need a metal thermos bottle or stainless steel hydro flask filled with hot water or tea. This is the only way to keep water in liquid form while hiking. At these temperatures, it is IMPORTANT to empty your plastic bottles before they freeze and become useless. You must have an empty Nalgene Bottle to fill with hot water at night, so you must also be prepared with enough fuel to melt snow, boil water, and cook food repeatedly.
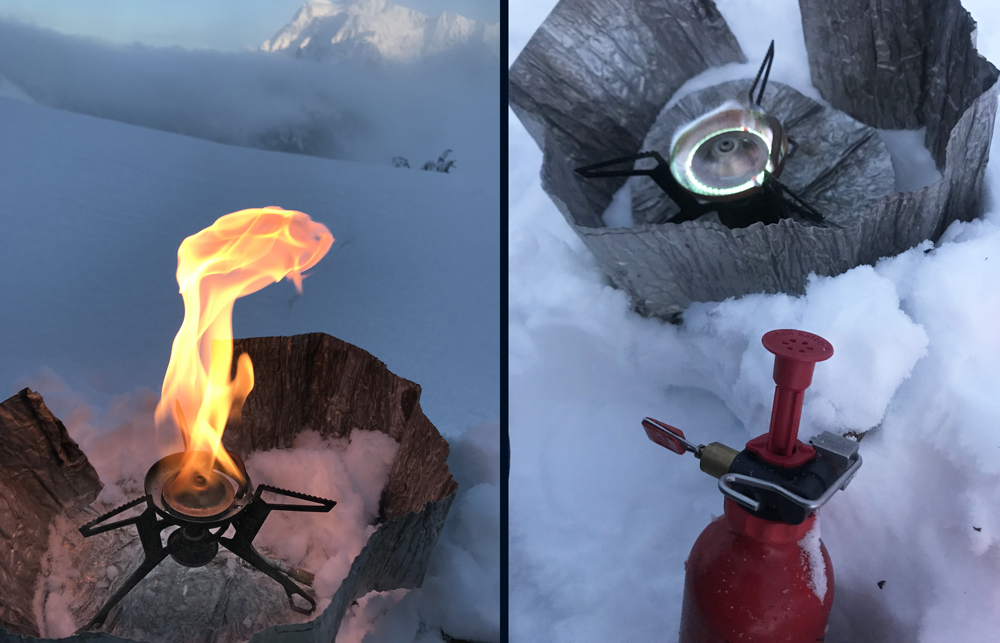
Carry a pot large enough to melt snow—often the only way to refill your water supply. Don’t bring water filters in freezing weather because it will damage the filter. Pack both cookable and cold meals in case you are unable to use your stove (it happens).
I use and recommend a liquid-fuel stove, but I regularly hike with people who use canisters and they get the job done in the winter conditions we have encountered thus far. Is a liquid-fuel stove better—absolutely! They are more reliable and melt snow faster. However, they can fail. If you use one, I recommend knowing how to service it and carry a repair kit.
IMPORTANT TIP: Bear-proof containers. Black bears are not true hibernators and may move from den to den in mild winters. I don’t expect to see black bears in the higher winter locations where I tend to camp, but smaller mammals are around and they can tear through your gear looking for food, especially in the shoulder months. I always carry a bear-proof food container. This is now required year round in the Baker-Snoqualmie National Forest which covers most of the Cascade Mountains in Washington State. Hard shell bear-proof containers are typically required in the National Parks.
Whatever you think about hanging sacks, it is a simple fact that there is no place to set up a bear sack in most of the places we camp in the winter. The trees are too encased in snow, too dangerous to approach, too small at the higher elevations, or non-existent. When you make gear chooses, make chooses that give you the freedom to camp where you want to camp. If you don’t want to carry a heavy bear canister, consider an UrSack. I use one or the other depending on where I am camping.
If there are no regulatary requirements, consider using a small metal lunch box. These weigh 6–10 ounces (a bear canister is 2 lbs) and will help keep mice and other small animals from eating through or carrying away your food.
WAG Bags
Two popular WAG bag kits are the Biffy Bags (2.1 oz) and the slightly more robust “Go anywhere toilet kit” (2.2 oz). With either, I recommend including some of your own extra toilet paper and sanitary wipes.
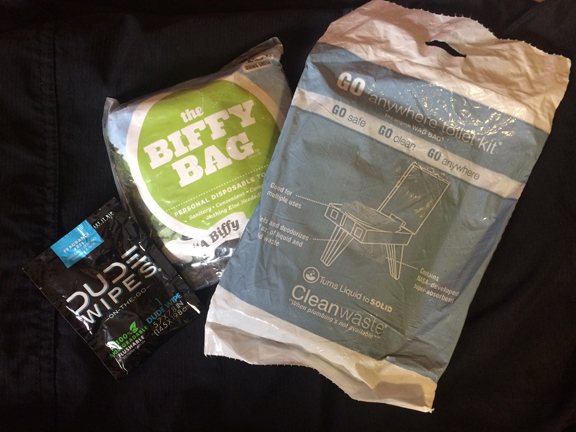
Bring WAG bags. Seriously, don’t be the person who poops in the snow. Wag Bags make it easy to go anywhere and allow you to pack it out for true LNT. Consider a popular area such as the Enchantments, which received 17,000 visitors in 2009, which increased to 50,000 by 2016. Is it really possible to have clean virus-free mountain water if tens of thousands of people are burying human waste along the same trail and campsites? Whatever the official rules or time of the year, it is better to pack it out, same as climbers do on popular routes.
Avi gear
Looking for the perfect holiday gift for the winter backpacker in your family? Show them that you care with some avalanche gear. The three basics are 1) transceiver, 2) shovel, and 3) probe.
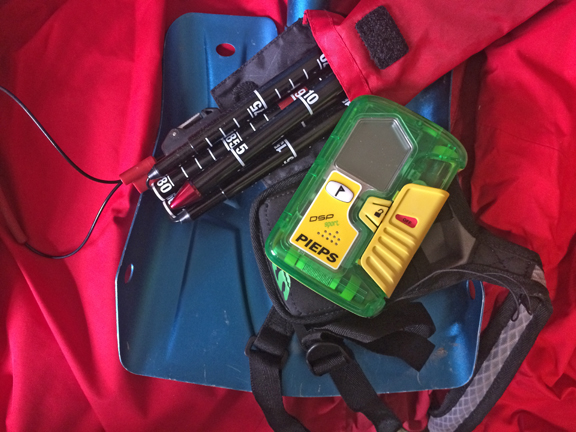
One transceiver isn’t enough. There has to be another person with a transceiver to pick up the signal of the person buried. Being prepared is a group effort. The same is true for shovels and probes.
There are lots of online videos and free classes as well as in-depth courses for developing avalanche and safety skills so you can enjoy the outdoors year-round.
Even if you never have to use your transceiver in a real avalanche emergency, you will likely use the shovel frequently when setting up camp. If you have family or friends or believe the purpose of life is to serve others, then invest in some basic avi gear to keep yourself and others alive should the unexpected happen.
The avalanche gear choices I use are
- Check out this Gear Lab article for beacons: Best Avalanche Beacons.
- The Backcountry Access B-1 EXT Bomber Avalanche Shovel. 1lb 5oz. (About $50)
- The Black Diamond QuickDraw Tour Probe – 280cm. 13.5 oz (usually around $60) Probes are usually 240cm to 320cm. Longer is better.
A good stocking stuffer is the small book, Avalanche Essentials: A Step-by-Step System for Safety and Survival by Bruce Tremper, Mountaineers Books (Paperback).
IMPORTANT TIP: New batteries in your avalanche transceiver will last 200–300 hours depending on the type of transceiver you own. So turn it on and test it at the trailhead and leave it on for the duration of the trip! You don’t want to forget to turn it back on in the morning.
Ultra-light gear in the winter?
Every ounce you can cut off your kit is helpful. There’s plenty of ultra-light gear that works well in winter. The main consideration is durability in situations where your gear performance is critical. A winter kit will inevitably be heavier than a summer one, and that means you must have a backpack that can carry the heavier load and do it comfortably. That said, there are sixty-liter backpacks in the 2–3 pound range that will do the job. Solid lightweight backpacks often cost the same as heavier bags, so there is no reason to have a 5–7 lb backpack.
There are both 3-season and 4-season tents that are around 3 pounds or less that will do the job for most mild winter conditions. If you want to camp in heavy snowfall or higher winds, then a sturdy 4-season tent is your best option. Some 4-season tents are considered “tree-line” tents, meaning below the tree level, which is one way of saying not fit for high winds. High winds are common on ridges or where there are no trees to break the wind. Personally, I avoid camping under trees, especially in winter. The ice and snow can bring down huge limbs and whole trees.
Sleeping bags and clothing will be the biggest challenge when it comes to reducing pounds. There is a huge cost difference between synthetic and higher-quality down. The best approach is to cut weight where you can and then gradually acquire better gear as your budget allows. I started with a synthetic zero-degree sleeping bag and quickly upgraded to lighter down bags.
A hardshell rain jacket/parka is a critical piece of gear in high winds. It needs to provide real protection, so avoid the ultra-light options that will not protect you.
Where to shop?
Before making your purchases, bear in mind that not all online retailers are socially responsible companies and, as with most companies, once they become too large, they become toxic to democracy and support party platforms that undermine public lands. Consider buying your gear directly from the small companies that make the stuff or from smaller socially responsible retailers.
Let me know if you have any gear questions or suggestions. I’ll be updating this post periodically, correcting bad grammar and spelling, etc.
Also, don’t forget to subscribe to my blog and leave comments below.