There is nothing more satisfying than being comfortable in extremely harsh weather. It is possible to be in below-freezing temperatures for multiple days without ever shivering or feeling cold. Staying warm in cold weather requires a combination of gear and skill. If you don’t have the appropriate gear you will be cold and uncomfortable. You can bring the appropriate gear but if you fail to use it correctly you’ll be miserable. You need gear to insulate you from the elements but you also need to adjust your behavior in the cold.
Winter backpacking is not about learning how to endure the cold. It is about learning ways to stay warm and prevent heat loss.
I don’t build fires to stay warm. I don’t do jumping jacks to stay warm. I don’t use unreliable tools such as hand warmers or electrical warming devices. So how do I stay warm and comfortable? This post will focus on staying warm around camp and staying warm inside your tent.
Types of layering systems
The goal is to stay warm but not to be so hot you are sweating while hiking or overloaded with heavy gear that exceeds your needs. Winter backpacking is possible because innovations in gear allow us to put everything required in a backpack light enough to carry long distances and up mountains. If you have to haul a sled, you’re not really backpacking. All the gear you need can usually fit in a 60 Liter backpack.
Snowboarders and skiers, mountain climbers, and the army have worked out laying systems. Of these, mountain climbers are most similar to our needs but still different. On some peaks, mountain climbers are moving much more slowly and need more insulation or they may need less if they are climbing in the spring and summer. Every system needs to be adjusted based on the weather conditions and activity.
The system described here has evolved to fit the mild winter backpacking conditions found in the Pacific Northwest.
The Enemies of Warmth
You can select and use appropriate gear more effectively if you understand the reasons the gear is required.
The enemies of warmth are moisture, wind, time, restricted blood flow, insufficient calories, and exhaustion. Moisture and wind wick warmth away from your skin. The more time passes while exposed, the more warmth you lose. Staying warm requires staying dry, staying out of the wind, and doing these things quickly without procrastination. It also requires boots, gloves, and clothing to be properly fitted to not restrict blood flow. Experienced winter backpackers eventually do these things by habit and without thought. With the right gear and technique, you will never find yourself cold or shivering.
- Moisture: Sweat from hiking, snowmelt (especially on boots), tent condensation, air moisture from snow sublimation or clouds, and falling in tree wells and streams are all ways of getting wet while backpacking. It is important to anticipate these dangers and have countermeasures to mitigate the effects, such as waterproof boots and gaiters, rain gear, dedicated base layers, and dry sacks or plastic bags to protect gear. On a clear day, warm air can cause snow in the trees to melt into a downpour of forest rain, soaking you and your pack if you are unprepared.
- Wind: In the Pacific Northwest winters, temperatures rarely go below 0º F (mostly 10–45º F) in elevations below 8000 feet. However, windchill can drive temperatures below 0º F and for that reason, it is essential to have gear that enables you to cover all exposed flesh, such as basic rain pants, rain jackets, balaclava, mittens, and ski goggles.
- Time: It is easy and common for hikers to fail to perceive the danger of time. They will stand on the cold snow and think, I’m fine, so I don’t need to do anything. Then, gradually, they lose warmth, and at that point, they are no longer comfortable and need to take action to regain their warmth. Regaining warmth is much harder than preserving it.
- Restricted blood flow: If your boots and gloves are too tight, your blood flow to your feet and hands will be restricted, causing your feet and hands to get cold. Good circulation—regular blood flow to your hands and feet—is essential for warmth and comfort. Maintaining your core warmth helps maintain the warmth of your feet and hands. When you are exposed to cold your body naturally increases blood flow to your core to protect vital organs. In this way, the body limits heat dissipation and maintains core temperature. This increase in blood flow to your core means less blood is flowing to your limbs, leaving your hands and feet with less blood to warm them. Cold hands and feet are often a sign that your boots and gloves are too tight or that your core body temperature is dropping too low. Good gloves and booties are not enough to keep your hands and feet warm. Your core has to be kept warm too. And a warm core will not help your feet if your boots are too tight.
- Insufficient calories and hydration: Food is your body’s fuel source. Your body uses calories to generate heat through metabolism. Eating is important for staying warm and preventing hypothermia. Likewise, hydration increases the body’s ability to regulate temperature and maintain proper circulation. When hydrated, your blood volume increases, making it easier for the body to circulate blood effectively and deliver heat to the extremities, preventing heat loss and decreasing risk of hypothermia.
- Exhaustion: When you’re exhausted, your body’s metabolic rate slows down, leading to less heat generation. Exhaustion can also diminish peripheral vasoconstriction, a crucial physiological response for maintaining core body temperature in cold conditions. Just as important, fatigue can diminish your ability to make appropriate decisions and take actions to stay warm, like putting on dry and warmer clothing and consuming sufficient calories and rehydrating.
Staying Warm Outside Your Tent
The longer your body is exposed to moisture, wind, or contact with snow and ice, the more warmth your body will lose. Here are the main things you can do to help preserve warmth and stay comfortable:
Change out of sweaty clothes!
Your clothes will be sweaty from hiking, especially your back, so when you reach camp it is essential to remove these sweaty moist clothing as quickly as possible. Being warm requires that you have a dedicated base layer that is only worn around camp and while sleeping. The clothes you hike in will be moist from sweat even though it may not feel moist. Remove these moist clothing quickly and replace them with a fresh dry synthetic or wool base layer. The colder and windier the conditions, the more important it is to do this and to do it quickly. You may be tired and not want to do this, but it is important.
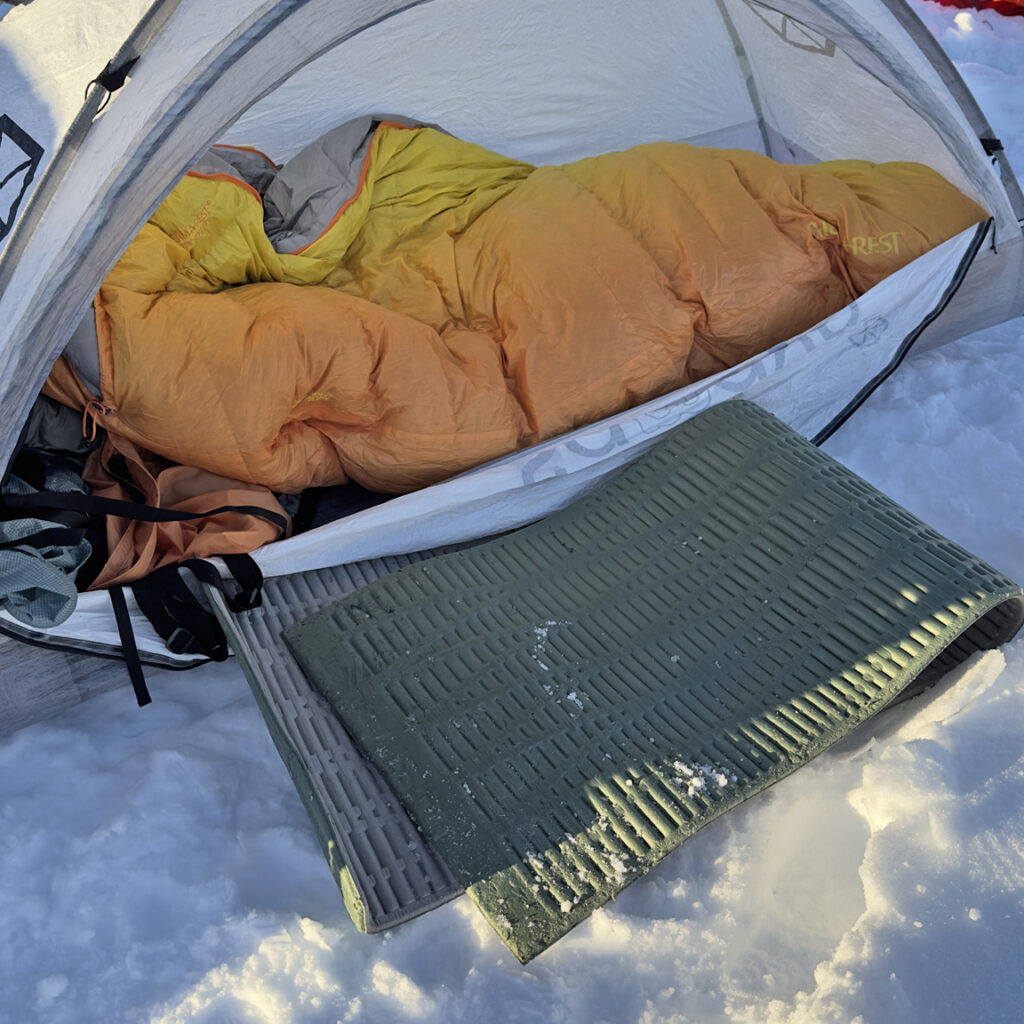
Use your pad!
By “pad” I mean the solid or “closed-cell” pad, not the air mattress. If you are standing or sitting on ice, only insulated by your pants or boots, the warmth in your bottom and feet will transfer to the snow causing your core temperature to drop and your feet to get painfully cold. If you are sitting, standing, and not moving, put your solid pad under your butt and feet. Double it over so it provides an R-value of 4. When you are setting up or taking down your tent, put a folded pad between you and the snow. Whatever activity you do, whether standing or kneeling, stand or kneel on your pad. When you are cooking food and socializing around camp, put a folded pad between you and the snow. Your solid pad is durable. The main reason for bringing the pad is not to have a cushion but as insulation from the snow! Leaving it in your tent when you are outside does not help you. It is only 2 R-value unless you fold it to make it 4 R-value. Use your pad! This is why your pad is the last piece of gear you will use and pack up before leaving camp. If you are only using the pad in your tent, you haven’t understood the purpose of the pad.
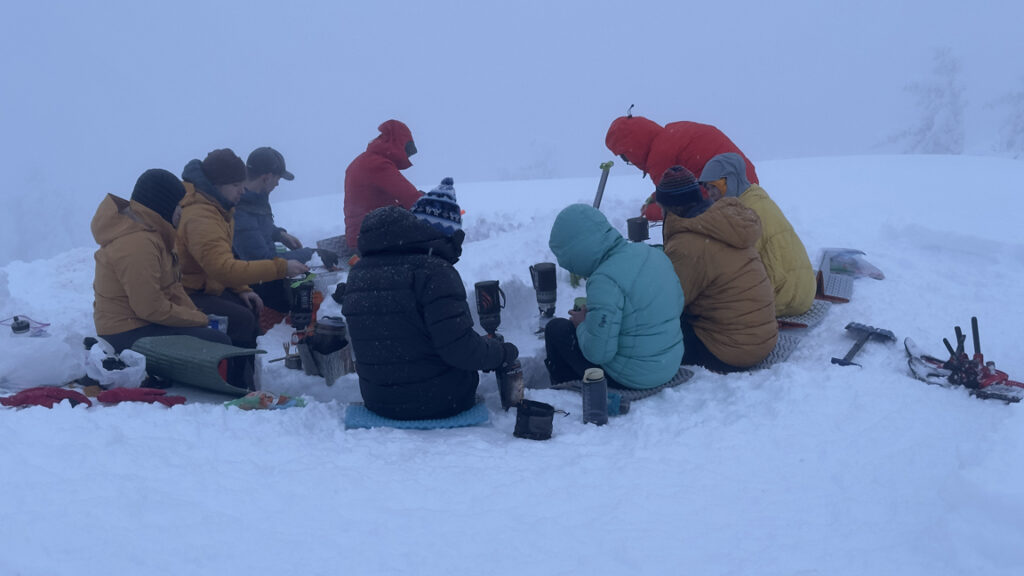
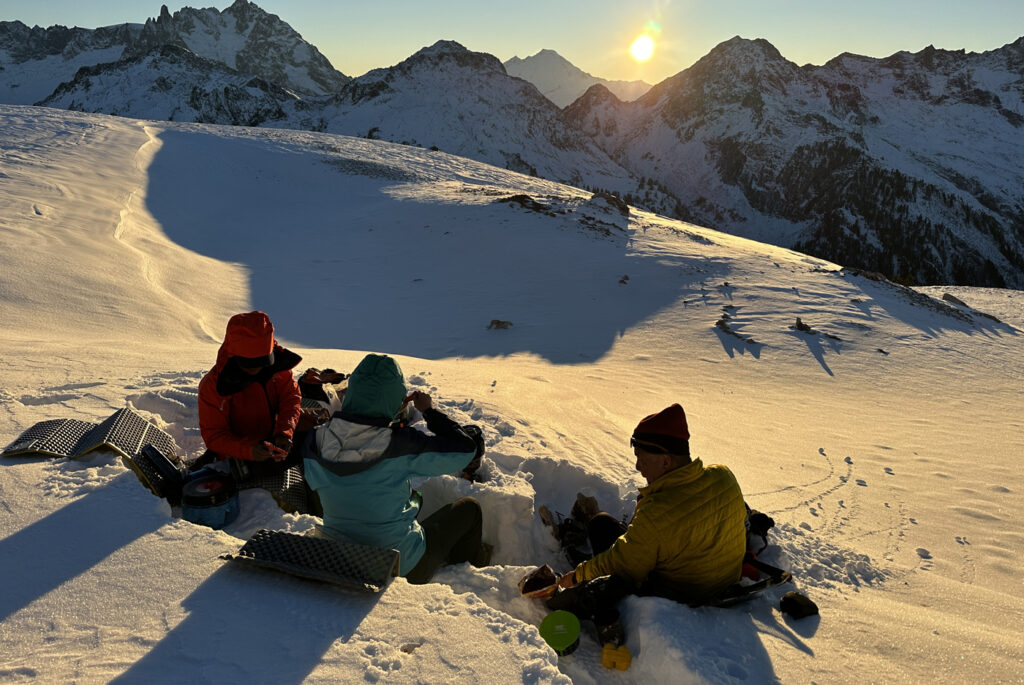
Protect yourself from the wind—quickly!
If you come over a ridge and find yourself in the wind wearing only one or two thin hiking layers, you need to drop your pack immediately and add a hardshell layer before the wind robs your warmth. If you reach your camp destination and it is windy, anchor your tent with your pack, get inside immediately, and change into your dry camp clothes, layers, and hardshell. Then, go outside and finish setting up the tent fly and anchoring the tent. If high winds are likely, be prepared to cover and protect all skin from exposure—hardshell (rain) pants, hardshell parka, balaclava, goggles, and mittens. Dig a cooking pit so you can sit comfortably on your solid pad. When you dig the pit, put the dug-up snow between you and the wind. If necessary dig a pit deep enough to keep your core out of the wind.
Insulate yourself!
When you are hiking you are burning calories and generating warmth. Normally, one or two thin layers on your core and one on your legs (just regular hiking pants) are all you need while hiking with a pack. If temps drop below 25º F, then a nylon layer under one’s hiking pants is needed. Everyone is different, but usually, not much insulation is needed while hiking, especially while gaining elevation. However, as soon as you stop, the body cools down as the sweaty clothing wicks away warmth, and it is necessary to immediately add a jacket or rain parka to mitigate the loss of warmth. When you are around camp and your body is at rest and generating very little heat, it is essential to add layers. You may, for example, put on a base layer on your legs, then down pants, then rain pants. You will need a dry base layer on your core, maybe a fleece pullover, and a down parka. An effective down parka will have 14–16 ounces of 800 fill down.
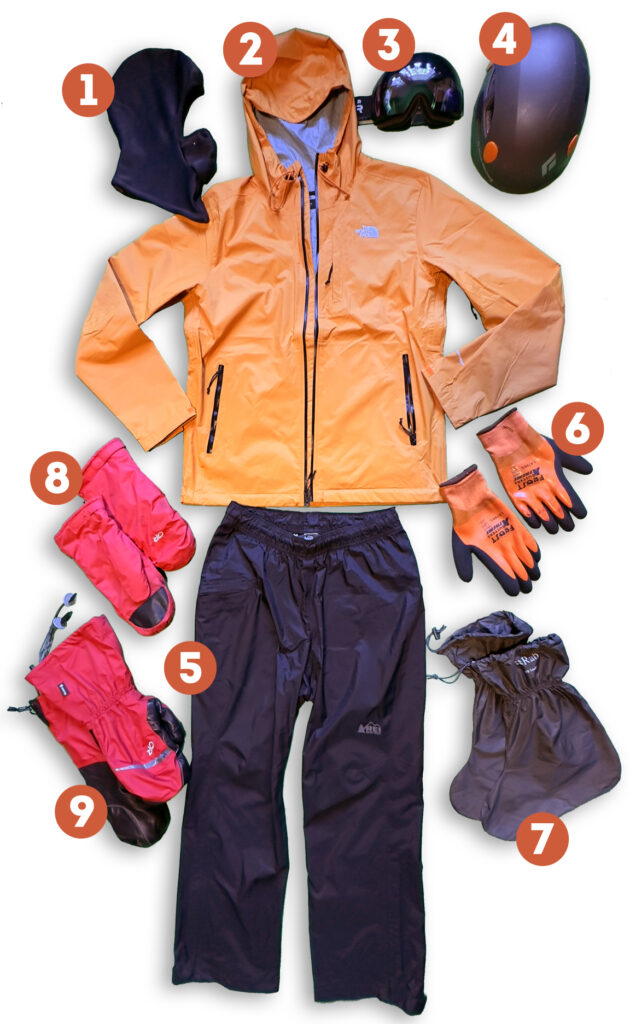
Three Types of Layers
Build a complete and versatile Pacific Northwest three-layer system with a base layer, a down layer, and a wind and water proof hardshell.
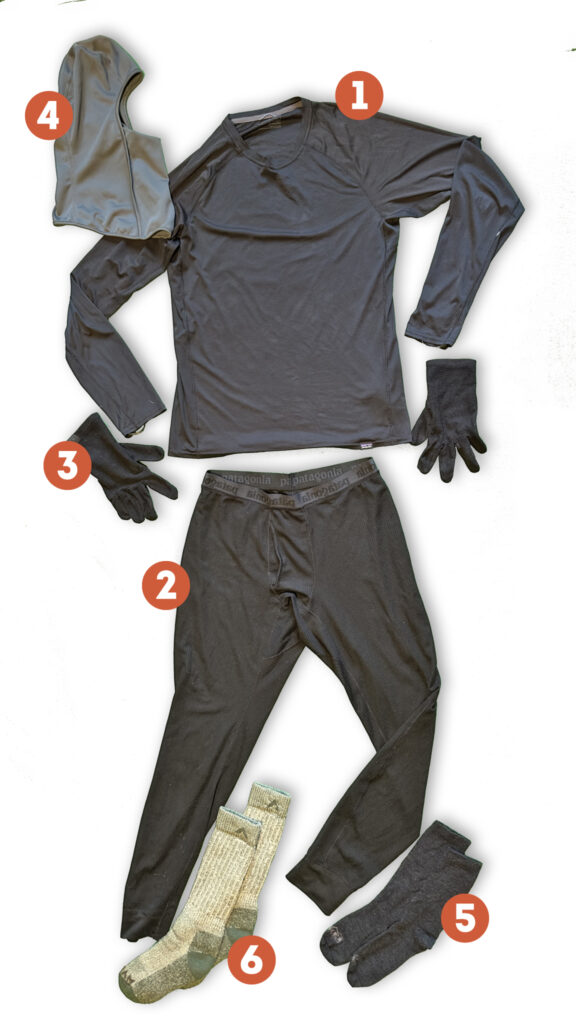
1. The complete base layer
2. The complete down layer
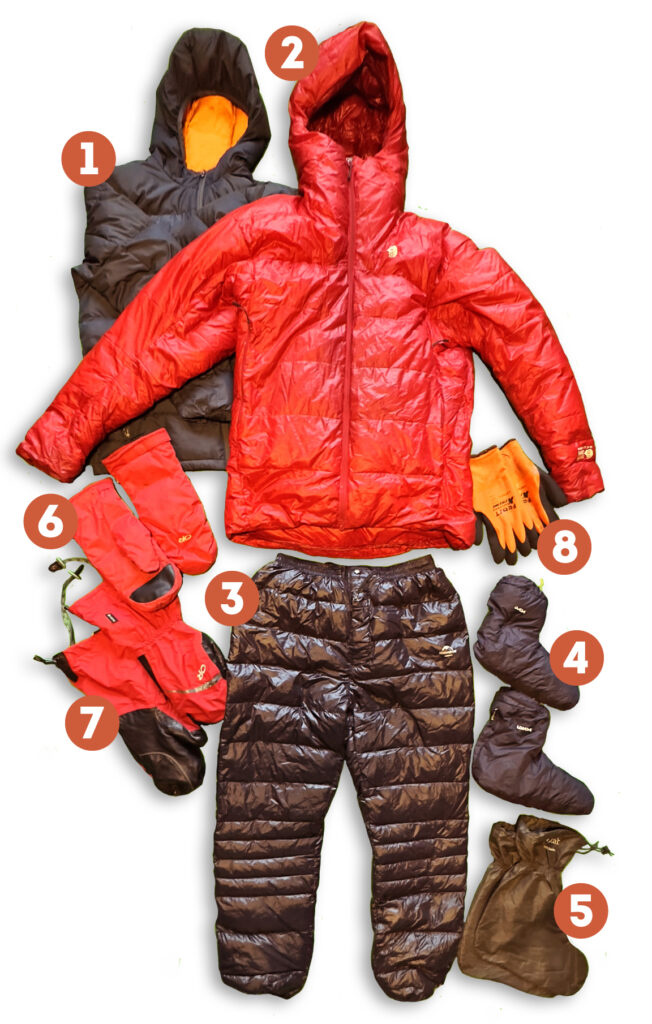
3. The complete hardshell
Pacific Northwest winter conditions
This system is for typical Pacific Northwest winter conditions, which are around 0–45º F between 1,000–7,000 feet in elevation. If you are heading up to higher elevations in the winter or out to some colder part of the world, such as Alaska, where you may encounter -40ºF weather, you will need a more robust layering system. Typically, a thermal base layer that is a thin synthetic is all that is required in the Pacific Northwest. However, if temps are likely to get down to single digits, you will want to swap the synthetics for a mid-weight Capilene or Merino wool (500 weight).
Stay dry
When the snow gets on your clothing, it often melts and gradually you get wet. If you are moving snow around to set up your tent or set up your cooking system, use waterproof gloves to keep your hands dry. If you are sitting in a cooking pit making food and wearing down pants, wear rain pants over the down pants to keep them dry. You can protect down booties around camp from the snow melt with plastic bags or vapor barrier socks. Wear gaiters when you are hiking to keep snow melt out of your boots. If you leave camp to relieve yourself, wear gaiters and snowshoes to keep yourself from sinking in the snow and getting wet. Gaiters will keep snow out of your boots. Brush snow and ice off your boots around camp. If your boots have snow and ice stuck to them and you put them in your tent, put them in a plastic bag.
In December and January, the days are short and cloudy and there is little hope of drying gear. To dry minor moisture on your pants, socks, and liner gloves, place them in your sleeping bag at night.
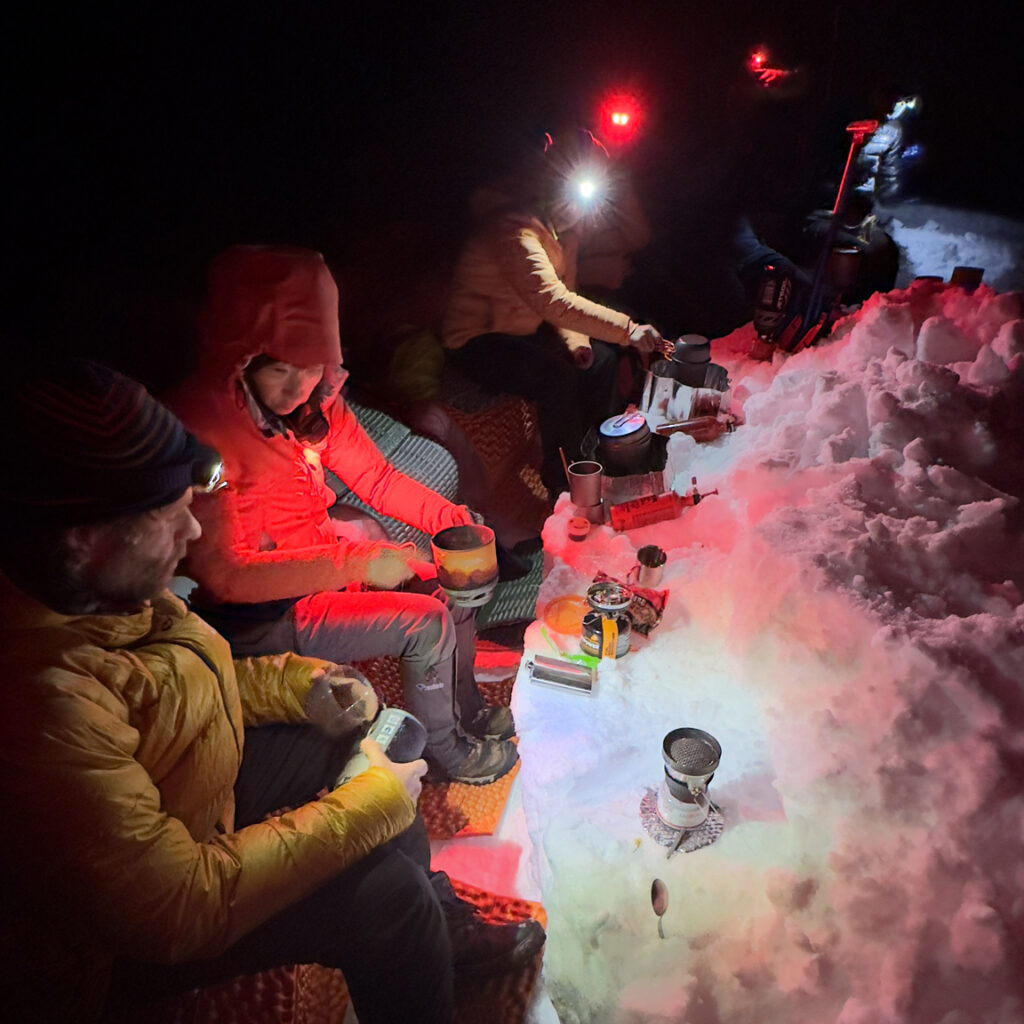
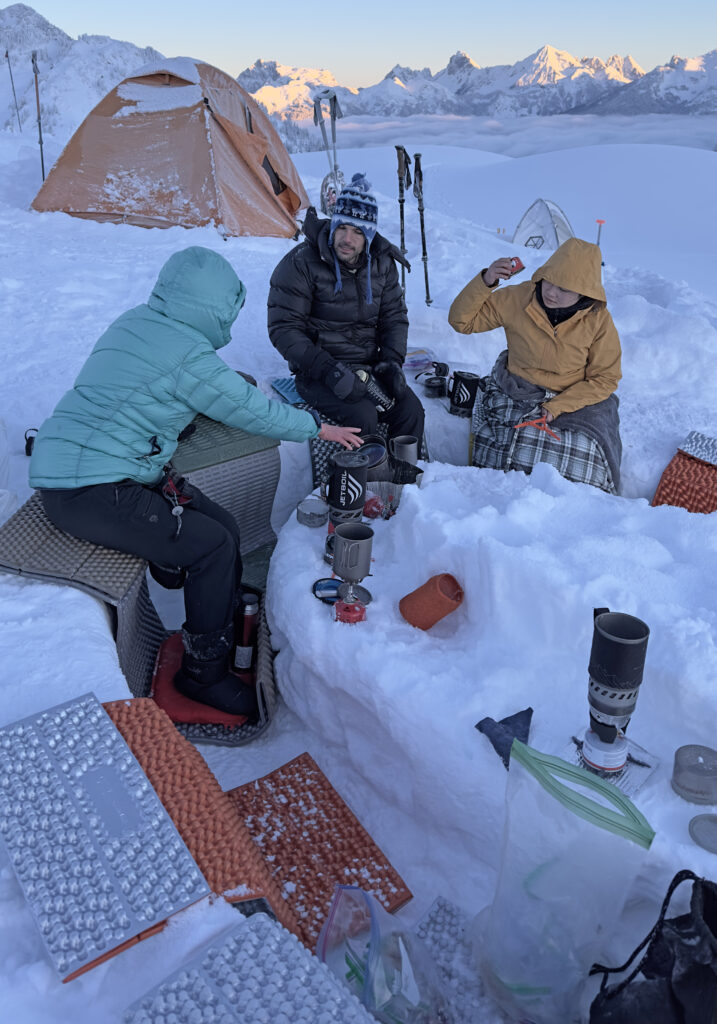
Consume hot food and drinks
Once you have dug your cooking pit and you’re seated comfortably on your solid pad, it’s time to set up your stove and make hot food and drinks. Your jacket, gloves, sleeping bag, etc. don’t generate heat. They just help you preserve heat. It is only your body burning energy and your stove burning fuel that create heat. There’s not enough fuel to use your stove as a heater but you can make a hot water bottle to go in the inside pocket of your down parka and you can make hot drinks and hot meals which will both warm your hands and body.
Sometimes newbies try to cut weight by not bringing a stove or they want to avoid the effort of preparing hot meals. Everyone is free to do as they please, but you will be colder and less comfortable without a stove. On many trips, the stove is your tool for melting snow and resupplying your water.
There’s usually plenty of time to prepare a hot meal or enjoy multiple cups of miso, tea, or coffee. In cold weather, people often fail to hydrate enough. Your body needs to heat the air before it reaches your lungs, increasing your body’s water loss. Drinking tea and making meals such as Ramen, Phở, or soups is a good way to increase hydration and warmth. Meals with broths work best in cold weather because they can be more easily reheated. Your body needs calories to maintain body temperature. Your body uses calories to generate heat through metabolism.
Keep in mind that your stove is a component of first aid in cold weather. It may be necessary to use the stove to create a hot water bottle to help reverse early stage hypothermia.
Use a hot water bottle
Hot water bottles are not just for comfort in sleeping bags. Sometimes you need to remove your gloves to have the full dexterity of your figures to set up or take down your tent or operate your stove. Put a hot water bottle in your jacket after breakfast before you take down your tent. That way you have instant warmth for your hands when needed, helping you avoid hand pain and make a quick recovery. The basic idea is to reduce the time your hands are cold. There is no perfect solution for hand warmth with activities such as assembling tents. You can do most things with waterproof gloves. But sometimes you need to use your bare hands to do something quickly. When you do, a hot water bottle and/or double-layer mittens are the best way to rewarm the hands. A small 16 oz Nalgene bottle is useful for this purpose.
The three most common mistakes
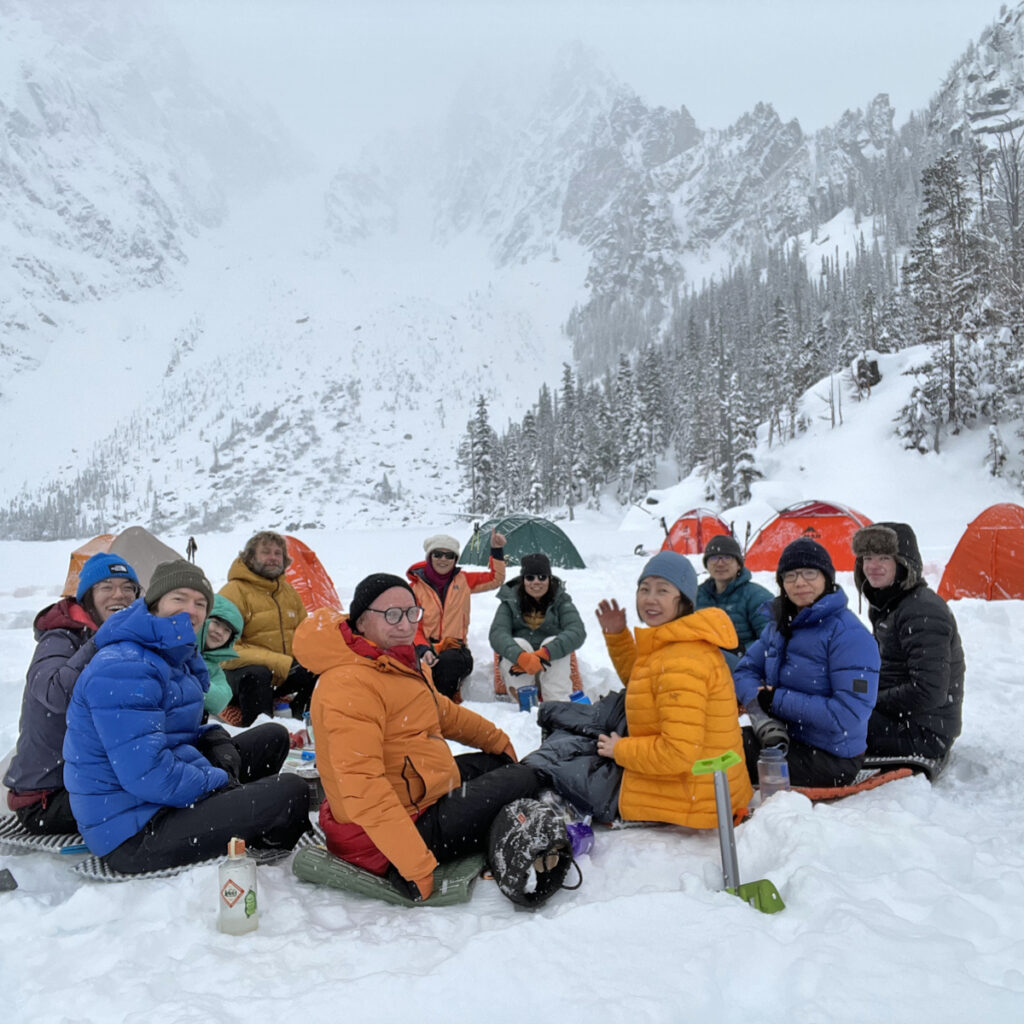
The three most common mistakes observed on our group events are 1) people not changing out of sweaty hiking clothes once they reach camp, 2) people wearing inadequate down jackets, and 3) people not using their solid-core pads to insulate their feet and bottom from the snow. Because heat loss is gradual, people don’t realize their mistakes until it is too late. Recovering warmth is difficult. Change into dry layers, use your pad, and take a down jacket that is adequate for long periods in the cold. You will want to be warm around camp while socializing. Don’t be the person who has to abandon the group to recover in a tent.
10 Ways to Stay Warm In Your Tent
All of the above points are about staying warm while hanging around camp. Next, let’s focus on staying warm in our tents.
Having a warm sleeping bag is not enough if you don’t know how to use it in conjunction with your other gear. Here are 10 ways to increase the warmth in your tent or more specifically, while you’re in your sleeping bag.
1. Have sufficient R-value
R-value refers to insulation value; the ability to resist heat loss to the ground. The higher the R-value the better. You need 4–5 R-value minimum on the snow in winter temperatures. Most solid pads are only 2 R-value or 4 if folded. Air mattresses offer R-values in the 2–7 range. Ideally, your air mattress should be in the 5–7 range and combined with a solid pad in the 7–9 range. You should not rely on a folded pad because you need protection for the full length of your body. Having extra R-value is a safety precaution. If someone’s air mattress fails they are at risk of hyperthermia. Someone should be able to share their pad with them giving them the minimum 4 R-value of two full-length pads. Relying on a folded solid pad is strictly an emergency measure when there is no one to loan you their pad. That is, in an ideal situation, I can loan someone my pad because my air mattress provides more than enough R-value to meet my needs. However, apart from such an emergency, you should never rely solely on an air mattress because air mattresses can fail. Always carry both an air mattress and a pad. The pad is mainly for use around camp anyway and is put under the air mattress at night to add comfort and help protect the air mattress from punctures. The added R-value of the pad is beneficial but shouldn’t be essential.
2. Use a sleeping bag with the appropriate rating
You may recall, in the Winter Backpacking Meetup welcome letter it says “A sleeping bag 10º–20ºF warmer than forecast is recommended. A 0ºF rated sleeping bag is a good choice for most of our winter trips.” The advertised rating for many sleeping bags is the lower limit, often about 15º below the “comfort” rating. Some people (warm sleepers) are fine in a 15º sleeping bag in 15º weather, but for others (cold sleepers), a lower limit of 0º is needed to be comfortable down to around 10–15 degrees. The night forecast may be 34º and the actual temperature 20ºF. Most winter trips are in the 15–45º range. I have never recorded temps below 4º F on any trip. However, I am a cold sleeper, so if I see rare single-digit temperatures in the forecast, I pack extra warmth—either a sleeping bag liner for my zero-degree rated (lower limit) sleeping bag or a –20ºF expedition sleeping bag.
3. Use your sleeping bag features
Mummy bags have multiple features to help keep you warm. Make sure the down collar and the down zipper seal features of the bag are positioned to keep in the warmth. Some bags have two-way double zippers that allow you to unzip the lower and upper sides of the bag. Make sure you are zipped correctly and not pulling up both zippers at the same time leaving the lower bag unzipped. The foot box has extra down for your feet. If you are short, pull up the bag so that your feet are in the footbox.
4. Maximize loft
Shake out the bag and fluff it up as much as possible. The thickness of the loft helps hold in warm air. Do not put rain jackets or coats on top of the sleeping bag as these will lower the loft and capture moisture in the sleeping bag. Do not over compress the sleeping bag and do not leave the sleeping bag compressed at home as this will ruin the ability of the down to keep its loft.
5. Wear a fresh base layer
Wear a fresh or dedicated base layer in your sleeping bag. The meaning of “fresh” and “dedicated” is that you do not hike in this base layer. It is fresh or unused or dedicated solely to camp and night-time use. Your hiking clothes will have body moisture and that moisture will make you colder at night. It is common for hikers to assume that their clothes are dry when they are actually moist from sweat. You will be warmer sleeping naked than sleeping in wet sweaty clothing. Your base layer can include fresh wool socks and thermal pants and a top. Usually, balaclava and liner gloves are unnecessary, but a beanie helps keep your head warm. Wearing a base layer at night also keeps your sleeping bag clean and protects it from hiking grime. Small individually packaged sanitary wipes are a good way to clean off sunscreen, sweat, and grime before going to sleep.
6. Utilize your down jacket and extra clothing
Use your extra clothing (hiking pants, gloves, pillow bag) to fill the empty space in your sleeping bag. The less space your body has to heat the warmer it will be.
7. Keep the sleeping bag dry
Pack the sleeping bag in a waterproof dry sack or plastic bag. Keep it away from the condensation on the interior tent walls. A double-wall 4-season tent reduces condition because the inner wall is breathable and condensation collects mostly on the waterproof outer wall. A major source of tent condensation is your breath. You can mitigate breath-caused condensation by sleeping with your head near the tent door and leaving the tent door fully or partially open (assuming it is not windy or snowing). Don’t take your sleeping bag out until you are ready to use it. If you take it out and leave your tent, be sure to close the tent door. Otherwise, you may come back and find the sleeping bag wet from cloud moisture or snow sublimation (evaporation from the snow).
8. Use a hot water bottle
Make a hot water with a leak-proof Nalgene bottle. Double-tighten the lid. Once you add hot water and tighten the lid, the heat will expand and loosen the lid. So, after a few minutes, the lid needs to be retightened. Be careful to not over-tighten it because you may not be able to open it in the morning. The purpose of the hot water bottle is not to heat you all night long but rather to help you go to sleep warm without a long process of getting warm inside your sleeping bag. A hot water bottle will typically last half the night in a zero-degree sleeping bag. Your hot water bottle should be more of a luxury than a necessity. By the time the bottle cools, you should be fully warm and comfortable in your sleeping bag. If you are wearing a base layer, there is usually no need to insulate the hot water bottle to keep it from being uncomfortably hot against your skin. If needed, you can slip the bottle into a thick sock. Once I put boiling water into a Nalgene, I don’t drink it because I don’t know what plastic chemicals it may release into the water. I use a metal thermos for hot drinks. I carry an empty Nalgene solely for the purpose of a hot water bottle. The hot water bottle is also a component of winter first aid in the event someone experiences early signs of hypothermia.
Be sure to bring extra fuel. You will use more fuel in winter. Avoid taking the minimum amount to save weight. If you’re on a 1–2 night trip have two full canisters of fuel or if you are using a liquid-fuel stove, bring a full 20-ounce fuel bottle. Fuel consumption will depend on how cold it is, how much snow you melt, how many meals you make and hot water bottles you make. Usually, you’ll be chatting in the cook area in the evening and drinking miso or tea and putting hot water bottles inside your jacket. We have had as many as four hikers show up on one trip without enough fuel.
9. Go to bed warm
If you use your pad around camp, eat a hot meal, use a hot-water bottle, put on dry dedicated camp layers, wear a warm puffy jacket and wind protection if needed, and use mittens and gloves while sitting around camp, you should be able to stay warm and go to bed warm.
10. Protect your sleeping bag from wind and snow drift
Many 3-season tents will work fine in mild winter conditions, but a double-wall 4-season tent offers superior wind and snow protection. Wind and snow drift can penetrate the mosquito netting of a 3-season tent. A double-wall 4-season tent has a fly that reaches close to the ground to block wind and a breathable interior fabric that prevents snow drift from getting inside the tent. 4-season tents also are designed to shed snow better. Both snowdrift on your sleeping bag and wind against the sleeping bag will reduce the ability of your sleeping bag to keep you warm. If you don’t have a 4-season tent, use your snow shovel to dig down and build a snow wall next to the tent to block the wind.
Prioritize Safety
Personal Protective Equipment (PPE)
All the gear described above and on this website works as Personal Protective Equipment (PPE) for winter backpacking. The gear is intended to keep you comfortable. It is also intended to eliminate the risk of hypothermia, frostbite, and UV burns.
- Dedicated camp base layer
- Insulation
- Hardshell
When you arrive at camp you remove sweaty clothing and put on the dedicated camp base layer to reduce the risk of hypothermia. If you decide you don’t need this protection and you leave the base layer at home, what will you wear if you fall in a stream? You need the ability to change into dry clothing at any time necessary to prevent hypothermia in cold weather. Likewise, if you leave your rain gear (hardshell) at home because there is no rain in the forecast, what will you wear in high winds? Only a hardshell will prevent the cold wind from robbing your warmth. The ability to cover up fully (balaclava, goggles, mittens) is essential to avoid cold injuries in high winds.
Have any questions or comments?
In the comment section below, let us know your thoughts. Your comments and questions are welcome.
10 replies on “Tips for Staying Warm at Camp”
Fantastic post once again! The basics are simply that but not knowing the basics can be harmful as well as make any trip outdoors rather uncomfortable and unpleasant. Keep up the great work!
Thanks! Much appreciated. I needed to put together something for the new people coming on our trips.
I found this article incredibly insightful and reassuring. It significantly eased my apprehensions about the upcoming trip, providing a sense of confidence and preparedness. Michael, you’re more than just an adventurer; your talents as a writer and artist are truly amazing!👍
Thank you Lili! I never know if people in our group are reading these posts, so I appreciate your acknowledgement. I hope this information helps you on our future trips. Please share it with others. I never like to see anyone suffer.
I love your blog and it is a wealth of knowledge. Thank you so much for pouring so much time into it and sharing your experience and wisdom. I was wondering what rain parka you recommended. I was able to purchase a used, but like new mountain hardware down parka like the one you mentioned in one of your blog posts. But now I need a rain parka to go over it. Also, I recently acquired an old MSR whisper in great shape. I’m new to liquid fuel stoves and was wondering if you would be willing to do a blog post about how you store your stove at home and when backpacking, what kind of routine maintenance you do to keep it functioning, in field maintenance (is there any routine cleaning you do after each use?), etc. Thanks again for sharing all your wisdom. Now I need to save up for avi equipment so I can come along on one of your meet ups.
Thank you. I appreciate the positive feedback. Glad you were able to find a Mountain Hardwear Phantom Parka. I recommend washing it with down wash and putting it in the dryer with some tennis balls to fluff it up (delicate setting). I’m actually using a jacket over my down parka which is a recent purchase. It is the North Face Alta Vista jacket. My down parka is a medium and the rain jacket is also a medium. The parka is about 3 inches longer but I just tuck it in and it is a good fit. It’s currently on sale.
There is a post on the website about the MSR WhisperLite (https://winterbackpacking.com/why-use-a-liquid-fuel-stove/). See “Tips on how to operate a Whisperlite Stove.” The stove has a self-cleaning mechanism in the jet and you can gently shake the stove and hear it move to clear the jet. Google “msr whisperlite manual pdf” if you need a manual. Once a year or when needed, I do the standard maintenance on top a cookie sheet that captures any fuel leaks or gaskets. I recommend doing this just so you can get the hang of it before you need to do it on a cold windy night in the wilderness. Take at least the wrench and an extra jet when you are hiking. There should be a pocket on the stove carry sack that holds the tools and parts. When I’m at home, the stove is just in its sack with my other gear. When I’m backpacking it usually is in the UrSack or Canister or by itself in my pack.
Thank you for your response Michael. Washing the parka with down wash was the first thing I did when I got it. It’s an incredible jacket that keeps me toasty warm around camp. Thank you for the recommendation on the jacket and the advice for the stove. Again, I appreciate all the advice you share. It’s been a tremendous help.
Thank you so much! Everything has been very helpful !
Great article Michael. Thank you for sharing your knowledge and tips on cold weather camping. Knowing these things ahead of time can make for a more enjoyable experience.
Thank you Ed. I’m glad it is helpful.