Even if you are an experienced 3-season backpacker, realize that the winter adds unique risks, and what you know about common gear, such as stoves, hydration systems, sleeping bags, sleeping pads, and tents, will be different from what you need to know for winter conditions.
Know the Risks
Whenever you hike into the backcountry you expose yourself to dangers and risks, such as avalanches caused by snow, mud, or rock slides. There are hunters, falling rocks, falling trees, tree wells, and the risk of slipping off ledges, falling through snow or ice, suffering from hypothermia, snow blindness, frostbite, severe sunburns, stove accidents, etc.
Know the risks when you decide to go winter backpacking. Be prepared and bring what you need. Basic tips for staying warm and knowing what gear to bring are explained below. This is not a comprehensive discussion of winter backpacking or backcountry safety, but it does contain important things that you MUST know before going.
Be Informed
Temperatures and wind speeds: To estimate likely temperatures, use the Mountain Forecast website. It provides expected temperatures and wind speeds at different elevations for well-known peaks:
https://www.mountain-forecast.com/
We are usually camping between 3,000 and 8,000 feet in elevation in the Cascade Mountains (mostly 5,000–6,000ft). In this range of elevation, temperatures are usually 20º to 40º F. Thus far, no trip has involved recorded temperatures below 5º F. In fact, 5–10º F was probably the lowest, excluding the chill factor for high winds. That said, if the forecast is 20ºF, expect it to be around 10º colder on the snow or ice. Always be prepared for weather at least 10–20º below the forecast. If you are prepared for 0º F as a lower limit you should be able to attend the majority of our trips and stay comfortable.
The winters in the Pacific Northwest are usually mild and heavy arctic expedition gear is not required.
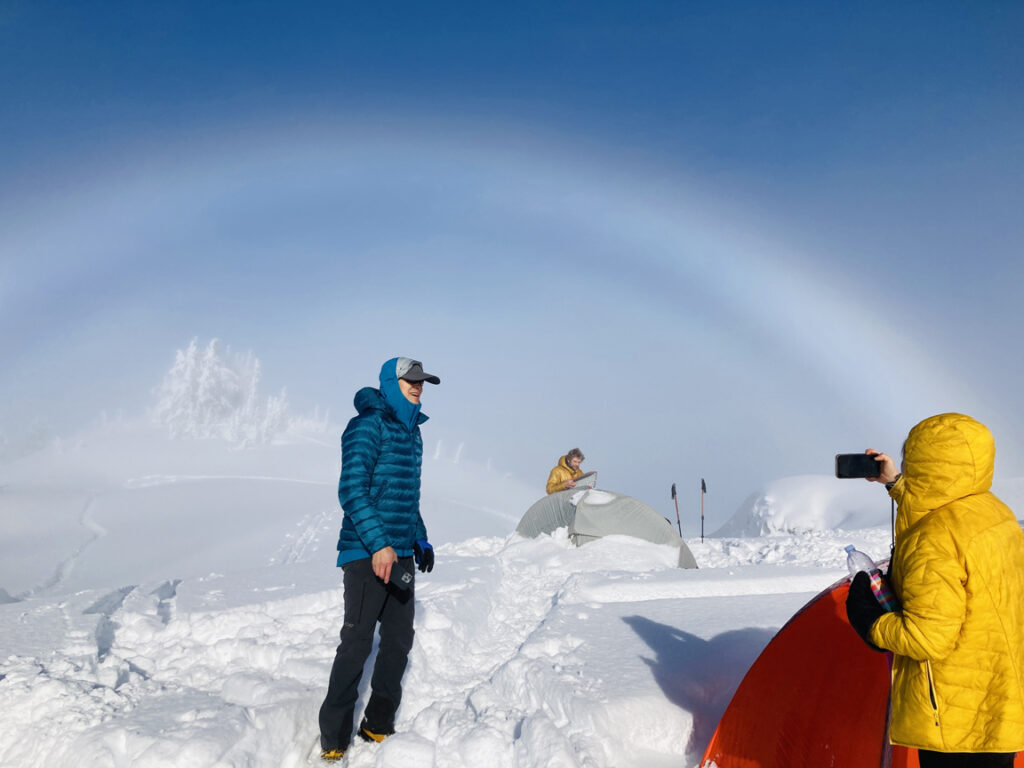
Avalanche Risks
For the latest information on avalanche risks, please visit the Northwest Avalanche Center website: https://www.nwac.us/
There is always a risk of avalanches in the mountains and we must take precautions. If you have avalanche safety gear (transceiver, probe, and shovel), always bring them. For some trips, avalanche gear will be required. There are areas where large trees have been blown down by avalanches and/or the avalanche air blasts indicating that avalanches can strike in places where they don’t often strike. I recommend reading Avalanche Essentials by Bruce Tremper, Mountaineer Books, 2013.
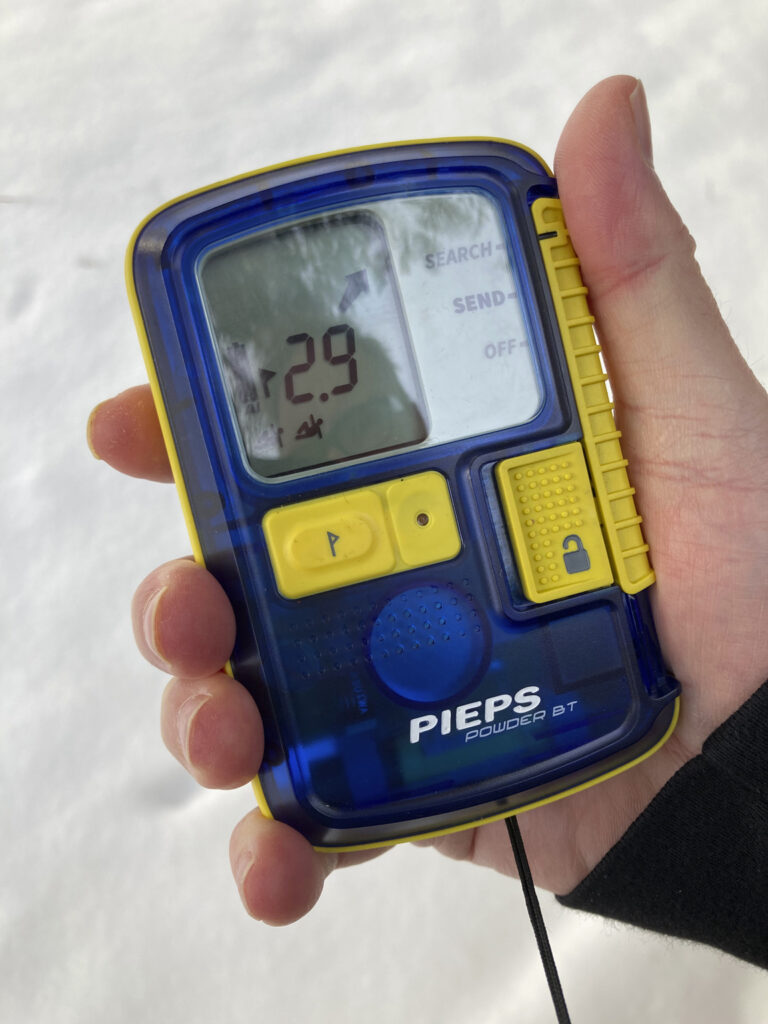
Wear a Transceiver
Avalanche danger can extend from fall to summer. To help manage the risks, there are trips when everyone needs to wear a transceiver under their outermost layer and carry a probe and shovel in their backpack. Check the batteries before leaving. Turn on the transceiver at the trailhead, check it, and leave it on (in send mode) until the end of the trip. Fully-charged batteries will last 200–300 hours.
Cell phones and personal locators are not substitutes for transceivers or beacons!
- Use Alkaline batteries.
- Cell phones, GoPro Cameras, and heated gloves can interfere with the transceiver signal, especially when conducting a search when other electronic devices can create a ghost signal that can disrupt directional arrows and distance readings. Keep your transceiver 12 inches or 30 cm away from other electronic devices.
Take Precautions
Risks can’t be eliminated, but we can take precautions, such as:
- Bright Clothing: Wear bright clothes during the winter and hunting seasons (especially Sept.–Nov.)
- Traction: Wear appropriate foot traction. Mountain terrain snowshoes are essential for winter and early-spring travel in the Cascade Mountains. For some trips, you will need micro-spikes or crampons.
- Snow baskets: Put large snow baskets (round 3+ inch disks) on your trekking poles. This is essential to maintaining balance in fresh deep snow (especially Nov.–Feb.).
- Headlamp: Bring a headlamp and extra batteries. Be aware that some headlamps can get accidentally turned on in your pack, requiring that you keep batteries separate. Ideally, the headlamp should have an IPX8 rating to ensure that it is waterproof.
- Stove maintenance kit: Read stove safety instructions and bring a maintenance kit if you are using a liquid fuel stove. Bring extra fuel and extra fire starters.
- Glacier glasses or goggles. When you expect to be on snowfields for extended periods of time on either sunny or cloudy days, have glacier glasses or goggles to prevent snow blindness and eye injury. Eye protection should be category 4 shades, which are too dark for driving.
- Other essential gear: first aid; map, and compass; headlamp; fire starter; water; food; rain protection; clothing layers; shelter; sun protection. For how to modify the standard ten essentials for winter, see The Fifteen Essentials for Winter Backpacking.
- Climbing helmet. If you’re crossing snow-covered slopes or icy rocks where you can slip or fall and hit your head against a rock or tree, then wear a climbing helmet. Remember that attaching a helmet to your pack is not enough. If you are not wearing it, it doesn’t help your head.
Mountain Terrain Snowshoes and Trekking Poles With Snow Baskets
For the Pacific Northwest, only use mountain-terrain snowshoes with trekking poles. Do not use low traction flat-terrain or rolling-hill terrain snowshoes. Snowshoes with heel lifts are recommended. Learn more here: https://winterbackpacking.com/snowshoe-tips/. Equip your poles with snow baskets to prevent the poles from sinking too far into soft snow. This is essential for balance.
Packing Tips to Avoid Hypothermia
With regard to hypothermia risks and recovery:
- Secure your sleeping bag and extra clothing: Pack your sleeping bag and extra warm camp clothes in a waterproof dry sack or plastic bags, even if your pack is waterproof and even if there are NO clouds or rain in the forecast. If the temperature is near freezing on a sunny day, the snowmelt from the tree tops in the forest will quickly soak your backpack. Your gear also needs to be protected in case you fall into a hidden stream.
- Secure your water: As a precaution against wet gear and frozen tubes, avoid pack bladders or internal-pack hydration reservoirs in winter. Be sure that your water is secure and leak-proof. Carry water on the exterior of your winter pack and/or hip belt in solid Nalgene bottles that can also be used for hot-water bottles at night or in an emergency. If you carry water or any supplies on the exterior of your pack, be sure to secure it with a clip or strap. If you can lift it out of a side pocket, it is NOT secure and you risks loosing it (it happens often!). Nalgene bottles work better in winter than ultra-lite flexible bottles. In freezing weather, you can turn the bottle upside down while hiking to prevent ice blockage. In weather below 20ºF, a metal thermos or hydro flask is recommended. For more about cold-weather water management, please read How to Keep Your Water from Freezing.
- Avoid cotton clothes (including underwear)! Wear polyester, nylon, fleece, Capilene, or wool. Cotton makes you colder and contributes to hypothermia risk because cotton does not wick moisture away from your skin. Cotton takes too long to dry. Wool is good, but usually too warm while hiking and heavier than alternatives such as fleece and Capilene. A Smartwool or wool-blend baselayer top for sleeping is a good choice for temperatures in the 0–32º range.
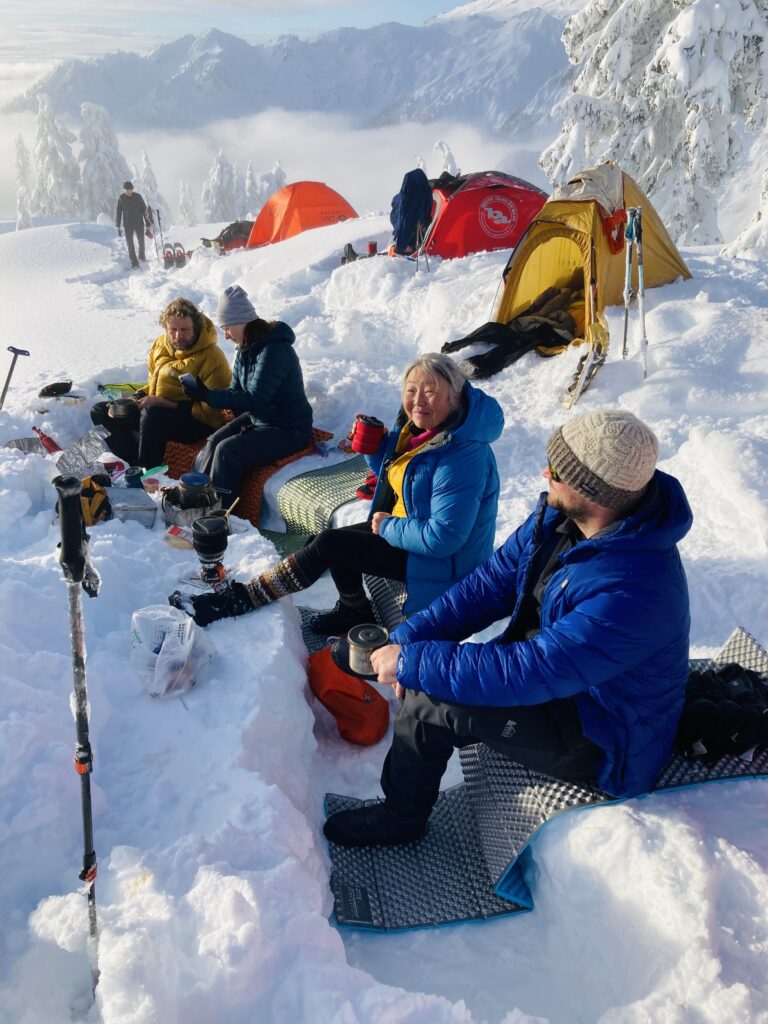
How to Stay Warm Snow Camping
Once you reach camp it is essential to have temperature-appropriate gear. Carry extra layers for camp. Staying warm while hiking doesn’t require heavy insulation, but once you stop hiking, you need to add layers.
Don’t wait around to add layers. Once you lose warmth, it’s hard to regain it. The key to being comfortable in winter conditions is knowing how to preserve your warmth all the time!
If you follow these recommendations you will likely be warm and comfortable. If you do not, you will be miserable and you will likely be too cold to sleep at night. Here’s what you need for comfort:
- Dedicated base layer: When you reach the camp, it is best to remove sweaty clothing and put on a fresh sweat-free base layer—wool socks, thermal leggings, thermal top, fresh shirt, and beanie. If your hiking pants are damp and that’s your only pants (likely), wear your rain pants instead. These are your camp clothes. The sooner you put them on once you reach camp the better. Sleep in this dedicated base layer. Do not sleep in the sweaty or moist clothing you wore during the day. Most hikers think their hiking clothing is dry when it is actually wet with sweat.
- Protect your clothing at night: Keep any clothing you will wear later inside your sleeping bag. This will keep them warm and dry from tent condensation.
- Insulated parka: Have a warm parka to wear around camp. 16 ounces or more of 800 down is recommended for comfort in 0º to 32º F temperatures. Obviously, you can layer up in many ways with or without down, but the point is, don’t rely on an ultra-light jacket for 0–10ºF conditions. Dress to be comfortable. You should never be shivering. In the Pacific Northwest, you don’t need a heavy expedition-level parka, but rather a combination of lighter gear—base layers, down parka, and rain jacket.
- Gloves: Bring at least two pairs of gloves. Liner gloves are mainly used while hiking and when finger dexterity is required. Waterproof insulated thermal gloves are used for moving snow and in wet conditions. For deep cold or wind, use insulated down mittens. For more about glove strategies, see What are the best gloves for winter backpacking?
- Cap: Keep your head warm with a balaclava or wool or synthetic beanie or cap.
- Rain-jacket: Have a loose-fitting rain jacket robust enough to provide wind protection and large enough to go over your down parka without compressing the parka’s loft too much. Some jackets have hoodies designed to accommodate climbing helmets. If high winds are anticipated, bring goggles. Be aware that you can get goggles that fit over eyeglasses.
- Rain pants: Some people use soft-shell pants for cold weather and wind protection, which is fine. However, soft-shell pants are often too hot for Northwest conditions below 10,000ft and rain pants provide superior wind protection and can be worn around camp for warmth. Some people hike in regular summer hiking pants and only temperatures colder than 20 to 25º F, add rain pants or a thermal base layer (such as light thermal leggings, and in temperatures under 10º F, a mid-weight Capilene or smart wool bottom). Depending on temperatures, you may need no base layers on an ascent but on the descent when you are burning less energy, you may require a base layer or rain pants to stay warm. Rain pants are a good option for adding warmth over regular hiking pants because the full-zip type can easily be added and removed, whereas thermal base layers are difficult to remove while snowshoeing. In addition to rain pants, rain kilts or shirts can be useful. Rain kilts are lightweight (around 2.5 oz), easy to add or remove, and breath much better than rain paints (less sweat). If the concern is rain, a rain kilt is better for hiking. But for wind protection and warmth around camp, rain pants are perferred. On some trips, you may want to take both.
People have different needs. Typically, on uphill routes, I hike without thermal base layers, unless the temps are below 25º F or high winds are expected. Once at camp, I add Capilene thermal, smart-wool, or wool blend base layer. You will need to learn from experience what you require, but if you are unsure, bring extra warmth as a backup. For a detailed look at layering, see Layering for Winter Backpacking. For more about staying warm around camp and in your sleeoping bag see Tips For staying Warm at Camp.
It is important to have fresh dry clothes to replace sweaty hiking clothes at camp.
On cold trips in the 0–15º F range, four layers consisting of a base layer top, wool blend top, fleece top, and insulated parka, are usually sufficient for me. Sometimes I add a rain parka too, making 5 layers.
How to Keep Feet and Hands Warm and Dry in Winter
Understanding this rule is essential for keeping feet and hands warm: Blood circulation equals warmth.
If your gloves or boots are too tight, the tightness will reduce your blood circulation and that will prevent your hands and feet from being warm even if the boots and gloves are well insulated. On long hikes, feet and hands tend to swell, so it is good to wear boots that are slightly larger and if you use a two-sock strategy (thin liner sock, plus heavier outer wool sock), be sure to wear these socks when testing the fit of the boots (i.e., before you buy the boots and when you are trying them on).
If your feet are cold while hiking it is most likely because your boots are too tight. The restricted circulation is keeping your feet cold.
If you are wearing your boots around camp, keep them unlaced. The looser the boots, the warmer your feet will be. You can also stand on your solid core sleeping pad. When you are outside your tent cooking or socializing, it is important to take your solid pad with you and use it as insulation. The main purpose of the solid pad is to use around camp for insulation while cooking, socializing, setting up and packing up camp. Do not stand around directly on the snow when you are not moving because your feet will get cold, even if you are wearing down booties.
Most “waterproof” boots actually breathe, but some have a plastic or rubber casing that is fully waterproof. You do not need fully waterproof boots in the Cascade Mountains so you do not need vapor-barrier socks to prevent soaking your boots with sweat. However, if your water-resistant boots are older than a year, consider adding new waterproofing with a fabric and leather waterproofing product.
Booties: One method to help keep your feet warm at camp is to not rely on the sweaty or wet hiking boots you used during the day. Use fresh layered wool socks and insulated booties instead. This is a non-essential luxury item, but one that many hikers enjoy. If you leave camp to relieve yourself in the middle of the night, wear your hiking boots and snowshoes if necessary. Insulated booties have very poor traction and sinking in the snow without snowshoes will get to covered in wet snow.
How to Prevent Frozen Boots
The sleeping bag method: Follow these steps to prevent your boots from freezing at camp:
- While you are still wearing your boots boil a liter of water and put the hot water in a Nalgene bottle.
- Make sure the Nalgene bottle lid is tight and place the bottle inside the bottom of your sleeping bag. If you are unable to seriously tighten the bottle, keep it in a dry-sack or plastic bag as a precaution to protect your sleeping bag. Re-tighten the bottle after 2–5 minutes. Do not over-tighten because it can be extremely difficult to open in the morning.
- Then place boots in a waterproof stuff sack or plastic bag and place the bag inside the foot of your sleeping bag. Be aware that in freezing weather your boots may be wet from snowmelt or sweat. This means that if you remove the boots from the warmth of your feet, the boots can freeze solid quickly. To prevent this, remove the boots and quickly place them in the sleeping bag with the hot water bottle.
The sleeping bag method will prevent your boots from freezing and that means you can put them on at any time you need them without the delay of having to warm them up.
How to Unfreeze Boots
If you don’t have room for your boots in your mummy bag, or don’t want to put boots in your sleeping bag, be sure that the arch and toe-box of the boot are not compressed and likely to freeze in an uncomfortable shape.
If your boots do become frozen, here are some tips:
- Do NOT put frozen boots in your sleeping bag without a hot water bottle because your feet will be cold all night.
- Do not attempt to thaw frozen boots with a stove or direct flame because the synthetic materials will melt almost instantly before the boots thaw.
- Do not injure your foot by forcing it into a frozen boot. Boots can freeze in shapes that do not easily fit your feet.
- In the morning, put frozen boots in a dry sack in your sleeping bag and let them warm up. This works better with a hot water bottle. You can also insert a hot water bottle in each boot to warm them up. Do this while you make breakfast and prepare to break camp. Just packing your gear inside your tent will raise the temperature in the tent 10–15º degrees. Usually, the boots will soften up by the time you finish eating breakfast and breaking camp.
The Importance of Extra Gloves
You need light gloves while hiking and more insulated gloves or mittens while in camp or in high winds. The “blood circulation equals warmth” rule is the reason mittens are warmer than gloves.
No one type of glove works for every situation. A multi-glove strategy is recommended because light-weight fleece or smart wool hiking gloves will often get wet from sweat or snow that melts on contact with body warmth. The wetness makes the gloves useless and even dangerous.
In addition to light hiking gloves and insulated mittens waterproof thermal gloves are recommended for use around camp. These are excellent when handling snow. They are usually too warm for hiking except in the coldest of conditions. These gloves work as a backup if your fleece gloves become too wet.
Warmer insulated mittens are great in camp but also too hot for hiking. The thin liner gloves can be worn with insulated mittens. Double layer down mittens are the best protection in harsh weather conditions.
Gloves and mittens are used for three types of activity:
- Hiking: Most of the time you only need thin lightweight fleece or smartwool gloves while hiking. In deep cold or windy conditions, you may need more.
- Around camp and avy-rescue: In these circumstances, inexpensive waterproof thermal gloves usually work best. Waterproof thermal gloves are low-cost and have good dexterity (available in designs for men and women). I recommend these gloves for trips that involve low-elevation rain, handling snow, or potential avalanche rescue.
- Deep cold and high winds: In cold windy conditions use insulated mittens. Double-layer mittens offer the best protection. This type of mittens are usually expensive, but important for safety.
For more about glove strategies, see What are the best gloves for winter backpacking?
Real-life situation: You reach the summit and begin to set up camp. Your hands and gloves are wet with sweat and the wind increases to 15 mph with gusts up to 20 mph and the temperature has dropped to 10º F. The wind chill is now around –9º F. You are not in immediate danger of frostbite (see chart), but in the time it takes to set up your tent, your fingers are getting painfully cold. To stay comfortable you must get out of the cold quickly and switch out of your hiking clothes and layer up with fresh camp clothes. The best solution is to first put on a dry pair of gloves or waterproof thermal gloves to protect your hands, set up your tent and throw your pack inside to anchor the tent and climb into the tent to change clothing (layer up) and warm-up. Then come out and finish setting up the tent, build a snow wall if necessary, dig your cooking pit, make a hot water bottle, etc.
Important Sleeping Bag and Mattress Requirements
For safety and comfort, a sleeping bag system that is rated 10–20 degrees warmer than the expected temperature is recommended. Think of your sleeping bag’s rating as a survival rating, not the comfort rating. That is, a “0º F” bag is only comfortable in 10–15º F weather. The Pacific Northwest winters are mild and most hikers use sleeping bags rated 0–15º for most trips. If you are buying a sleeping bags for shoulder season or winter season use in the Cascades, bags rated 15º are recommended for shoulder seasons and bags rated 0º are recommended for winter. Know your gear limits!
Sleeping bags don’t generate heat, they capture the heat you generate.
If you lose your core warmth and get in a sleeping bag, you will be uncomfortable and shivering. So don’t lose your warmth, but if you do, have the capability to make a hot water bottle to put in the sleeping bag with you. This is something I always plan to do anyway because it just makes sleeping more comfortable.
For more about sleeping bags and sleeping systems for the Pacific Northwest see Winter Sleeping Bags.
Air-Mattress + Solid Pad Required
When sleeping on snow or ice, you MUST have an air-mattress under your sleeping bag regardless of the rating of your sleeping bag. No sleeping bag will keep you comfortably warm when sleeping on snow unless it has a mattress/pad under it.
The weather rating of your sleeping bag is based on having a mattress under the bag and the person wearing a base layer of clothing.
Both an air mattress and a foam pad are standard practice. Air mattresses are the primary protection from the cold ground while sleeping. However, air mattresses can fail, so an additional foam pad should be regarded as essential to both protect your air mattress and add additional R-value. The “R-Value” is a measure of the resistance a material has to heat flow.
One solid-core or foam pad, also called a “closed-cell mattress,” will only provide around 2 R-value. It becomes 4 R-value when folded. A single solid pad is not enough for comfort. For snow or ice, you need a sleeping system that provides a 4+ R-value or better under your sleeping bag. It needs to be either:
foam pad + foam pad
or
foam pad + air mattress
If your R-value is in the 5–7 range and you have a warm sleeping bag you will feel no cold from the snow/ice below. You can check online to find the R-values for different mattresses. A few air mattresses have more than 5 R-Value, but you still need a pad anyway. The main purpose of the solid pad is to keep you insulated while cooking and socializing outside your tent.
Why both pad and mattress are needed
- Your solid pad is not just for putting under your sleeping bag. You will need it around camp for socializing, cooking, camp set up and break down. Keeping a pad under your body and feet when you are on the snow is an essential part of the lose-no-heat strategy around camp.
- If you have an air-mattress with 5+ R-value, you can loan your pad to someone if their air-mattess fails. Carrying both a pad and mattress is a backup team strategy to help prevent discomfort when someone’s air mattress fails or to prevent hypothermia in emergency situations.
Tip: Some people believe that better R-value comes from putting the foam on top of the air mattress. You can do as you like, but for safety, I recommend always putting the foam mattress under the air mattress to help prevent air-mattress punctures. Clip together any loose pack buckles and arrange your gear so that nothing sharp will puncture your air mattress.
Bonus tip: To fit your larger winter sleeping bag into your pack, turn the bag inside out. This will release the air faster when compressing it. Don’t bother rolling up the sleeping bag. Just stuff it in.
Winter Head Gear
To keep your head warm and protected from wind, pack goggles, and a buff or balaclava to protect your face, especially if high winds are in the forecast. In cold windy weather use a ski balaclava. Some designs have breathing holes that reduce your glasses fogging. In milder temperatures, a buff provides some extra warmth and wind protection. Be aware that often the wind speed is much higher in the mountains and early morning gusts may not be indicated in the mountain forecast. Learn more about winter wind here: https://winterbackpacking.com/preparing-for-winter-wind/
UV Protection
From March through the Summer, the UV hazard on the snowfields increases significantly.
Use UV snow (ski) goggles or glacier glasses (must be rated category 4) to protect your eyes from sun glare and snow blindness. Glacier glasses and UV protection are especially important in the springtime and on routes with large snowfields such as Camp Muir and Mount Adams.
Without UV protection severe sunburns will occur on exposed skin including your lips and the underside of your nose! Hooded fishing shirts and lightweight balaclavas are also good for UV protection.
Wear a Climbing Helmet
As mentioned above, you should also wear a helmet. Why? In winter more things are falling. More rocks are breaking loose and falling from freezing water, more trees are falling from the weight of snow, more ice is falling from tree limbs, and more hikers are slipping and falling. Crossing snow-covered slopes or icy rocks increases the risk that you will slip or fall and hit your head against a rock or tree. Even a small piece of ice falling 30-feet from a tree limb will be a hard blow to the head without a helmet. For that reason, you should wear a climbing helmet any time you are on ice and snow even if you are not using an ice ax or doing any climbing. Wear it on your head, not hanging on your pack.
Stoves and Winter Water Management
Essential winter gear:
- Stove (for safety reasons everyone must have their own stove)
- Multiple fire starters (lighter and flints). Matches have a high failure rate.
- Nalgene bottle (leak proof)
- Cooking pot large enough for melting snow
- Stove repair kit (if you use liquid fuel stove)
- Fuel (more than you expect to use)
Stoves are Essential
Stoves are essential because we don’t build campfires and usually camp in alpine zones where campfires are prohibited because organic matter (wood) is too scarce to burn.
Stoves are foremost essential for your winter water supply. Winter gear is heavy. To reduce pack weight, carry only the water you require to reach camp. Try to retain a small amount to use as starter fluid when melting snow.
Bring extra fuel
You will use more fuel in winter. Avoid taking the minimum amount to save weight. If you’re on a 1–2 night trip have two full canisters of fuel or if you are using a liquid-fuel stove, bring a full 20-ounce fuel bottle. Fuel consumption will depend on how cold it is, how much snow you melt, how many meals you make and hot water bottles you make. Usually, you’ll be chatting in the cook area in the evening and drinking miso or tea and putting hot water bottles inside your jacket. We have had as many as four hikers show up on one trip without enough fuel.
Never allow water to freeze in your water bottles.
If it is likely the water will freeze before you can drink it, pour the water out to maintain the use of the bottle.
In deep cold weather (below 20º F), bring a thermos or metal flask filled with hot water.
Hot water in a metal flask will cool down in the course of the day but remain fluid until camp. If you can, keep half a cup of liquid water for starting a boil for melting snow (to prevent burning the pot). Start each day boiling water to put in the flask. For deep cold, only put enough water in regular Nalgene bottles that you can consume before it freezes. More on water management here: How to Keep Your Water from Freezing.
If you’re an ultralight backpacker who camps without a stove or hot food, adopt a winter exception and bring a reliable stove for melting snow, creating hot water bottles, and warming meals. Backup no-cook meals are also recommended.
Canister fuel stoves will work in most Pacific Northwest conditions, but liquid fuel stoves perform better in colder and windy conditions and higher elevations. Stove windscreens are not safe on canister stoves. If you use a canister stove, it is best to use one designed for cold weather conditions. If you use a liquid fuel stove, do not light it in or near a tent because the large primer flame will instantly melt the tent or vestibule. Carry multiple fire-starting tools. Both matches and small cheap lighters can fail in cold snowy conditions. For more about the limitations of canister stoves, see Will a canister stove work for winter backpacking?)
If you use a liquid fuel stove always bring a stove repair kit or at least the main wrench and a replacement shaker needle. Stoves are critical survival and comfort tools in freezing conditions because they can supply water from melted snow, nighttime warmth from hot water bottles, and hot meals.
Each person must bring a stove. Multiple stoves and extra fuel are necessary because someone’s stove may fail. We want backups. Stove failures are not uncommon. We have had as many as three canister stoves fail at the same time in one group of 10 hikers. Liquid fuel stoves are more reliable and fully serviceable in the field. The most common liquid fuel stove problem is hikers forgetting the fuel pump or forcing the pump when the seals are stuck instead of warming the pump first.
Tents
In the winter, tents mainly protect you from wind and snow. Higher wind speeds are more frequent during the winter. Three-season tents can work, depending on the tent, but a 4-season tent provides better wind protection and thus, greater warmth.
Most hikers think about rain and mosquitoes. In the winter, you need to think about wind and snow. For more about tents, see 3-Season vs. 4-Season Tents.
When calculating your gear warmth requirements for a winter forecast, don’t include warmth expected from the tent. Tents do add some warmth, first by blocking wind (reducing the chill factor) and by capturing body warmth. However, your respiration will cause either frost or water condensation within the tent. Even with a double-wall design, there will be some frost or water condensation within the tent depending on the outside temperature. This moisture can get on your down gear and dramatically reduce the warmth effectiveness of that gear. To minimize frost and water condensation, leave the door open at night unless there is snowfall or snowdrift. This also helps prevent an oxygen-deficient atmosphere within the tent. Plan your warmth requirements based on your sleeping-bag rating.
Important to Know
- Never operate a stove in a tent. If you use a stove in a vestibule, make sure the vestibule is well ventilated and the wind direction is carrying the fumes away from you and your tent. Carbon monoxide (CO) is odorless and can kill you quickly.
- Take care to prevent Carbon dioxide (CO2) levels from respiration in an enclosed or snow-covered tent from rising too high and creating an oxygen-deficient atmosphere. Let your tent breathe at night (I usually sleep with my tent door open). Clear away snow buildup to allow ventilation.
Leave No Trace
Always practice “leave no trace” ethics. Leave nothing in the wilderness—no cherry pits, no sunflower seed shells, no orange peels, no toilet paper, no detergents, no campfire scares, nothing. Learn more here.
Leave what you find, keep wildlife wild, and be considerate of other visitors.
Don’t poop in the snow
You don’t need a trowel when snow camping, but not because you have a snow shovel. Snow melts, so what you bury isn’t buried at the end of the season. The best way to care about streams and the environment is to pack it out. Use a Wag Bag or Biffy Bag. These products turn liquids into solids rapidly and seal up securely. They are also easy to use.
Wag Bags, such as the Cleanwaste GO Anywhere Toilet Kit, are 2-layered and the outer bag seals like a heavy-duty ziplock bag (review here). The Cleanwaste option is more robust than the Biffy Bag. However, you will want to attach it to the exterior of your pack, so it is helpful to carry an additional plastic bag for that purpose with a strategy for attaching it.
Tip: Be aware that there is not a lot of toilet paper in Biffy Bag or Wag Bag packages, so carry some extra.
Tip: If you don’t like leaving your tent at night you can carry an extra bottle to pee in. Winter nights are long, so I always plan to go out at night and hopefully see some stars too, no matter how harsh the conditions. On moonlit nights the snow is bright and hiking at night can be very beautiful. I don’t personally use a pee bottle, but there are plenty of windy cloudy nights when I think it might have been a good idea.
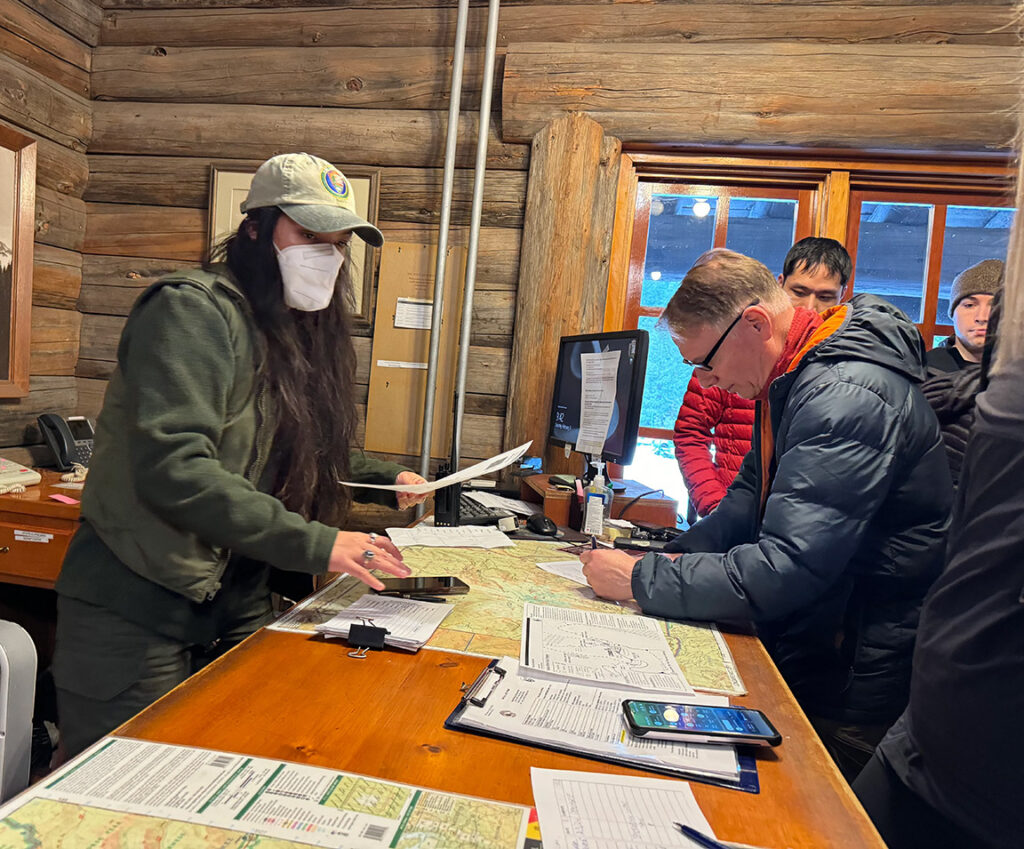
Trail Passes and Wilderness Permits
Don’t forget your trail pass. There is a difference between passes and permits. During certain months, special wilderness permits are required. National Parks also require backcountry permits. However, many locations require no passes or permits in the winter. Some permits have to be obtained at the ranger station on the first day or self-issued. Some trips require day passes or annual passes.
Passes
The annual Northwest Forest Pass ($30) and America the Beautiful Pass ($80): The Northwest Forest Pass is only good for National Forest, which includes Wilderness Areas. The America the Beautiful Pass is good for all federally operated recreation lands (National Forests, Wilderness Areas, National Parks, National Recreation Areas, and National Monuments). There are also special passes for seniors and military members.
Snow Park Passes
Sno-Park permits (parking lots cleared of snow available statewide during the winter) are available online from Nov. 1 through April 30. Sno-park permits are non-refundable ($40).
List of non-motorized snow parks.
Baker Ski Area Parking
Parking information is available on the Baker Ski Area website: https://www.mtbaker.us/ski-area-info/travel-info/overnight-parking.
Click the RV reservation button which takes you to two chooses: “RV Sites” and “RV Storage Sites.” Select “RV Storage Sites” which takes you to a page that gives you the “Unoccupied car/truck/van” option and you can make an online reservation for around $37.00. In the process, you need to specify the vehicle size. An SUV such as a Subaru Forester is roughly 16 x 6 ft. To complete the process you must provide a license plate number and select a vehicle/rig type that *doesn’t include cars.* I have no explanation for this, and some people choose to ignore the entire reservation process because of this.
Important: Be aware that there are two parking locations at the Baker Ski Area: If you pick Heather Meadows Base Area you will be close to the trailhead. If you have to pick White Salmon Base Area, you will be 3 miles down the road (not a good option).
Winter Gear for Your Car
Drivers should carry tire chains or cable traction for icy roads and a saw to clear downed limbs blocking the road. A 30 ft tow strap can also help with removing a downed tree.
- Car key tip: Attach your car keys to the inside of your pack or a zipped pocket to help prevent loss on the trail.
- Trailhead theft and break-in tips: Remove everything of value from your car. Leave the glove box door open to show no items of value. Remove any paperwork from the car such as envelopes (thieves are looking for credit cards).
- After-hike clothing: You will want extra shoes, socks, and a shirt in a bag after the hike for the ride home. To prevent car break-ins, consider keeping these in an ordinary paper grocery bag and spreading them out in the car seat with the bag folded up. Paper grocery bags have a low-perceived value and you want thieves to see that there is nothing of value.

Thanks for reading this post. If you have any comments or suggestions, be sure to comment below.

2 replies on “Before You Go Winter Backpacking”
With so many places to leave comments, I am just going to put this here; I have been an avid winter camper and backpacker for decades. There is just nothing that compares to the beauty and serenity of the mountains and forests in winter. I am in the northeast so we don’t have the altitudes of the PNW. I just wanted to tell you that this is, without question, one of the finest resources I have come across to deal specifically with the winter (and shoulder) seasons. So well written, tremendous detail and it just reeks of your LOVE for this sport. And that’s it! Thanks so much for being here and helping others to get out there. Stay smiling and safe!
Thanks Bill! Much appreciated. I created this website and the Winter Backpacking meetup just to help people who are interested in joining me here in the Pacific Northwest, so it is mostly about conditions found here. Some of the information can be useful in other places too, provided the temps are in the –10 to 50ºF range. Below –10ºF and you’ll need more preparations than I’m discussing here. I also have a Winter Backpacking facebook page which is for everyone who likes winter backpacking anywhere in the world (Winter Backpacking https://www.facebook.com/groups/2796322520594839). Please join us there and share your winter backpacking trips.