Some Exceptions…
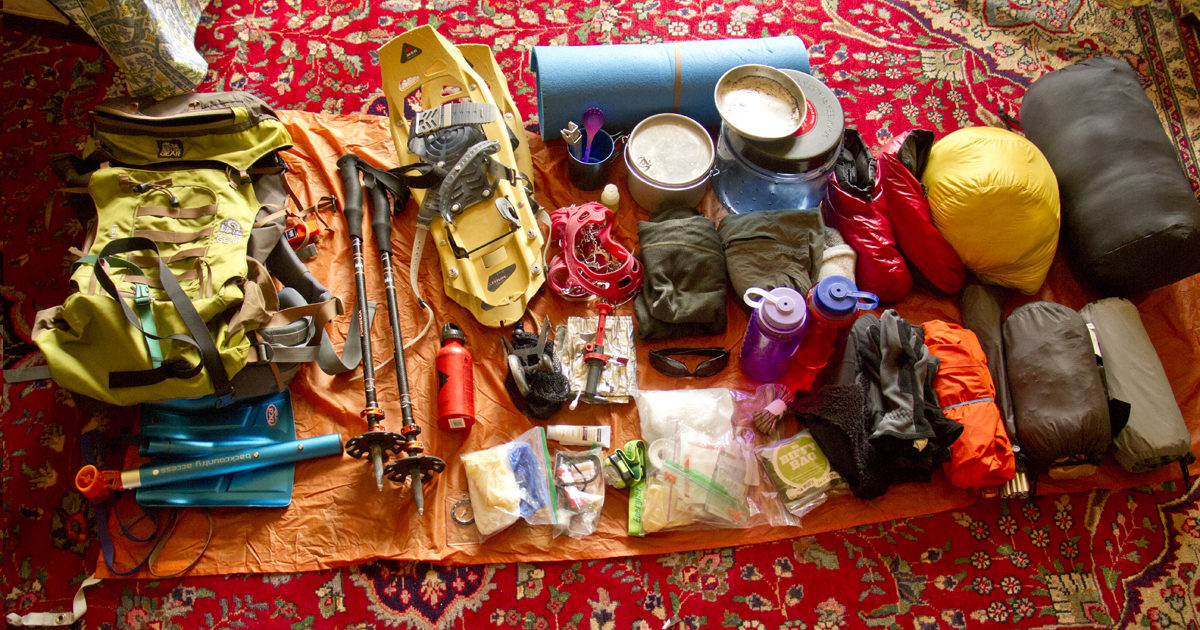
Most of my gear falls in the light to the ultra-light category. This is important especially in the winter because sleeping gear and warm clothes add to your pack weight. But I have a few not-so-ultra-light exceptions, some of which I’m going to discuss in this post. Foremost among them is my extra sleeping pad and some form of food protection, such as a bear canister or metal lunchbox.
Overall, my goal is to keep my weekend pack well below 30–35 lbs (13–16 kilos). That, of course, doesn’t sound ultra-light but keep in mind that this pack weight is for winter conditions. It includes a 4-season solo tent, cold-weather clothing such as a down jacket, two sleeping pads, a 0 or 10-degree down bag (sometimes a –20 F degree bag), avy gear (including a 1lb 4.6oz snow shovel), and 4lb snowshoes strapped to my pack. The snowshoes are not always strapped on, but it common to need to haul them at least part of the way.
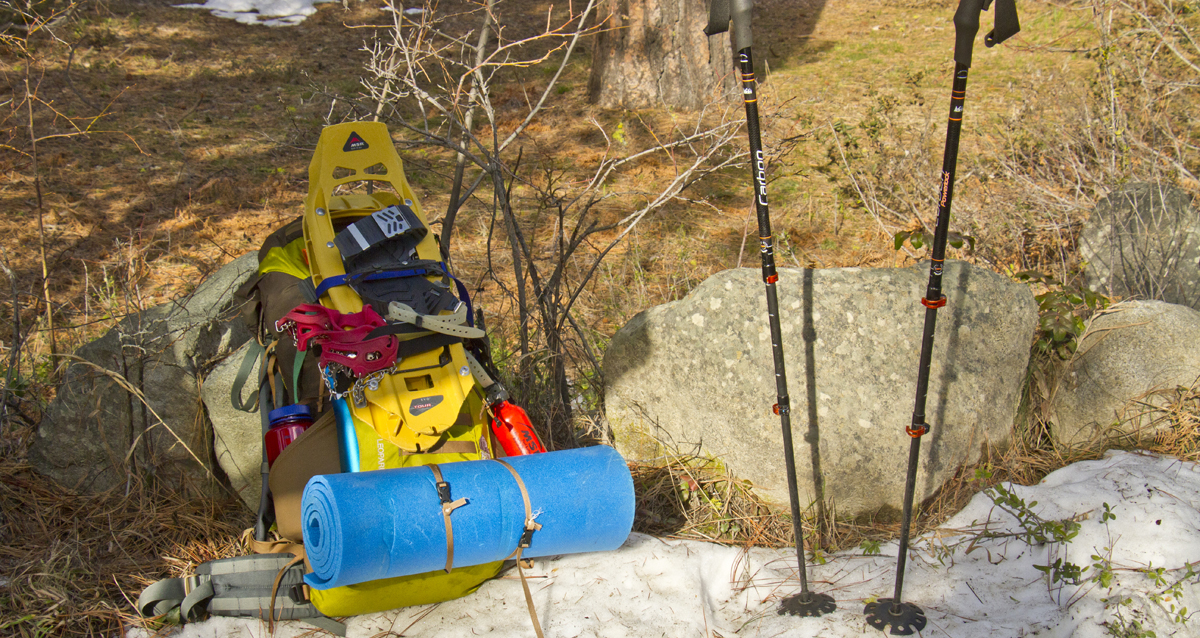
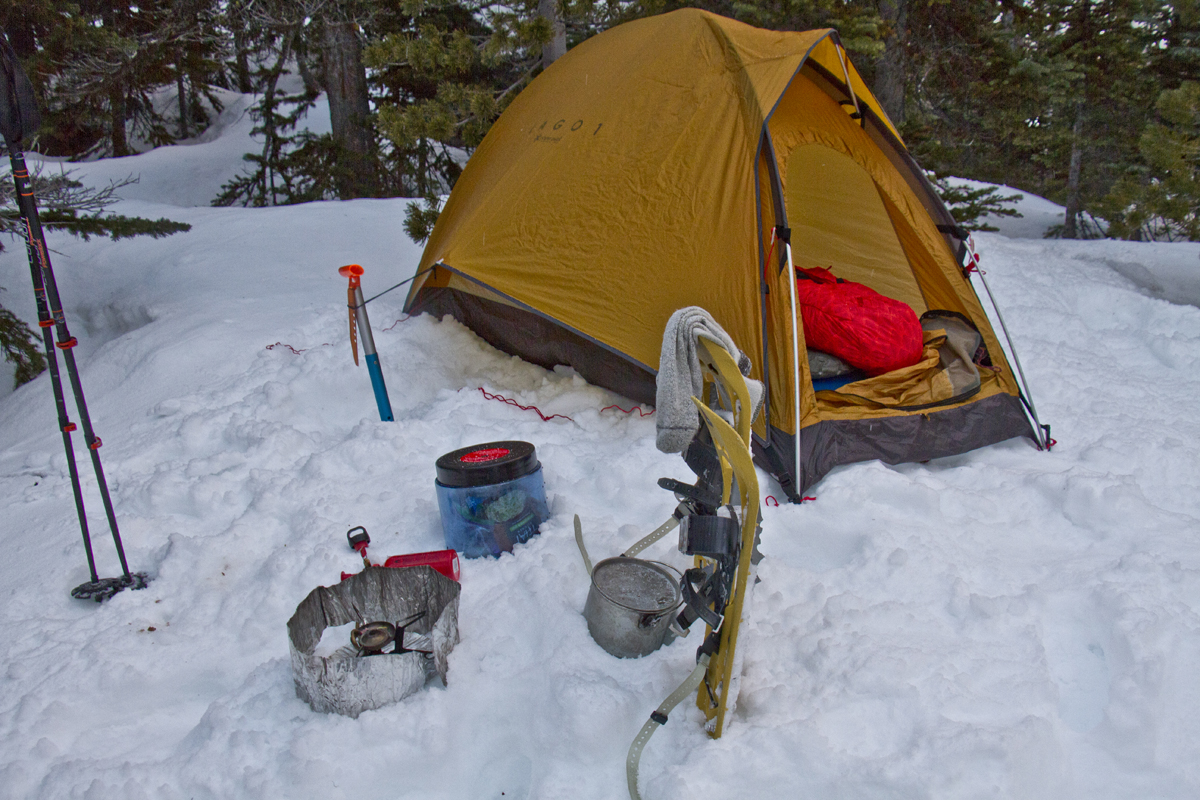
Some people will look at the list and spot the 4-season tent as the most dispensable extra weight. It is true that you can get by with a bivy or tarp, but I like to camp on ridges above the trees where it can get windy. Also, my tent is only 3 lbs. I also carry extra fuel, a robust rain jacket (mostly for wind protection), extra gloves, and a dedicated base layer for nights. Durability and safety will overrule the decision to simply go with the lightest available option. I will try to get the lightest option I can, but without going so far as to compromise durability in high winds or safety.
The next two items might seem even more debatable.
An Extra Sleeping Pad
Some people will regard two sleeping pads as unnecessary, but on snow, in cold weather, a backup is an important safeguard. An R-value of 4 or above is recommended. It is possible to get one air mattress that has enough R-value, but using only an air mattress is risky. In my opinion, it is too risky.
My inflatable provides an R-value of 6.9 (15oz), which is great for keeping out the cold. The 6.9 R-value has worked well for me by itself on hard frozen snow in 10F degree weather. But air mattresses can fail and I know from when my sleeping bag is misaligned with the pad and I’m hanging over onto the snow, the cold comes through fast. That’s why I started carrying an additional foam pad. I started off using my summer blue foam pad which only has an R-value of 1.4 (11.6oz after trimming to 20″ width). For extra security, I later upgraded to a foam pad with a 2.1 R-value (regular size, 14oz). By itself, a foam pad is not sufficient cold resistance, but it can’t be punctured and it helps protect the air mattress and increase the overall R-value. The downside is the extra weight, but from a safety point of view, bringing it has become standard practice.
If you want to be a happy camper in winter, avoid cutting it close when it comes to staying warm and safe. If the night forecast is 30-degree F, be equipped for 10F degrees or lower.
The Bear-proof Canister
Most winter backpackers, even ones who go ultra-light will not take issue with the basics I have mentioned, but out of all my gear, one item gets the most questions. It is the 2lb (0.9 kilos) hard-shell bear-proof food canister. Most ultra-light backpackers prefer cloth sacks that can be hung from trees (only 9–11 ounces, including cord). However, in some places, such as the North Cascades National Park, a hard-shell food canister is actually required, at least in some locations and times of the year (June 1– November 15). By “winter” I don’t mean only December 21st (winter solstice to spring equinox)—I mean winter conditions or snow camping which can be almost year-round at some elevations and well into June even at 3000 feet.
But why carry it when it’s not required or when bears are hibernating? First, black bears may be out in mild winters. One can assume that what the Rangers have figured out in the National Parks probably applies in many places in the Cascades outside the parks.
My main reason for not using cloth food sacks is that in many places, especially at high elevations where I tend to be, there is not always a good place to hang a sack. Trees are scarce and shorter at high elevations. Sometimes trees are encased in snow and hard to approach. That said, I can shorten this explanation but admitting that bears are a concern, but not my main concern. Thankfully, I don’t have any stories to relate about bears trying and failing to get into my food canister.
It’s not just Bears
The truth is, there are plenty of smaller mammals running about in the snow, even when bears are not around. These little mammals, including mice, will quickly chew a hole through a tent, backpack, or sack to get to your camp food. They are also after nest billing materials such as string and the down in your sleeping bag and there isn’t anything you can do about that.
When I get up in the morning and see squirrels or mice running into the nearby rocks, I at least know they didn’t manage to get into the food canister during the evening. Be aware, that even the bear canister is not 100% critter-proof. Remember to flip the canister over at night so that the lid is down to prevent small mammals from crewing through the lid!
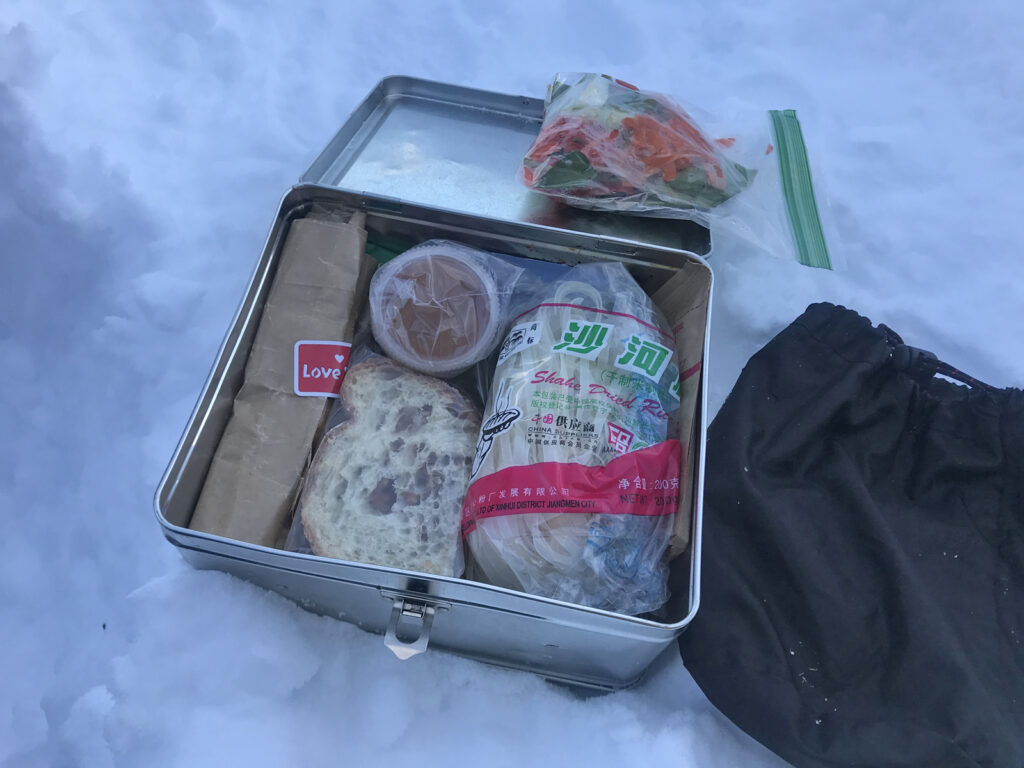
A bear-proof canister is simply an easy place to store all food and toiletries to keep odors off the other gear and safely away from the tent and the backpack.
Many hikers I know also prefer freeze-dried food in a package. They just pour in hot water to hydrate the food, eat it from the package and seal it up afterward—no mess and no pots to clean. It’s quick and efficient. What’s not to love?
The problem for me is culinary. I’ve tried these meals and I prefer to avoid them. For weekend trips, a bit of fresh food is more than worth the extra ounces and a bear canister helps protect food from getting squashed or bruised. There is sometimes a messy pot or plate after a meal, but these can be stored in the canister. Once home, the canister and all the dishes go in the dishwasher. If it is a one-night trip, I’m unlikely to clean any dishes before I get home. For after-meal clean up, I prefer lavash or pita bread. Just use bread to wipe your bowl or cup and eat the bread.
So all-in-all, the bear-proof canister ensures that there are no food, messy pots, or wrappers to leak onto my gear. All food, pots and used packaging end up in the hard canister, separated from everything else in my backpack. It keeps the pack tidy, odorless, and clean.
For these reasons, I generally use the bear-proof canister year-round no matter where I go.
Also, the canister is strong enough to double as a chair in the snow and on wet ground. It can even work as a surface for my camera when I want to use a timer (I rarely carry a tripod). And, it’s large enough that on weekend trips it usually has room for my stove.
Other hikers I know who have bought a canister tend to always bring it for the same reasons. The bear-proof canister is kind of a lifestyle decision, at least for the short trips.
When I really need to cut weight, I switch out my bear canister for a metal lunch box. This will not work with foxes, but it does stop mice, which are the most common problem.
To download my gear checklist (includes weights) for on an overnight snowshoe, click here.
Let me know if you have any questions or suggestions. I’ll be updating this post periodically for correction, etc.
Also, please don’t forget to subscribe to my blog and leave comments below.