1. Camp on snow
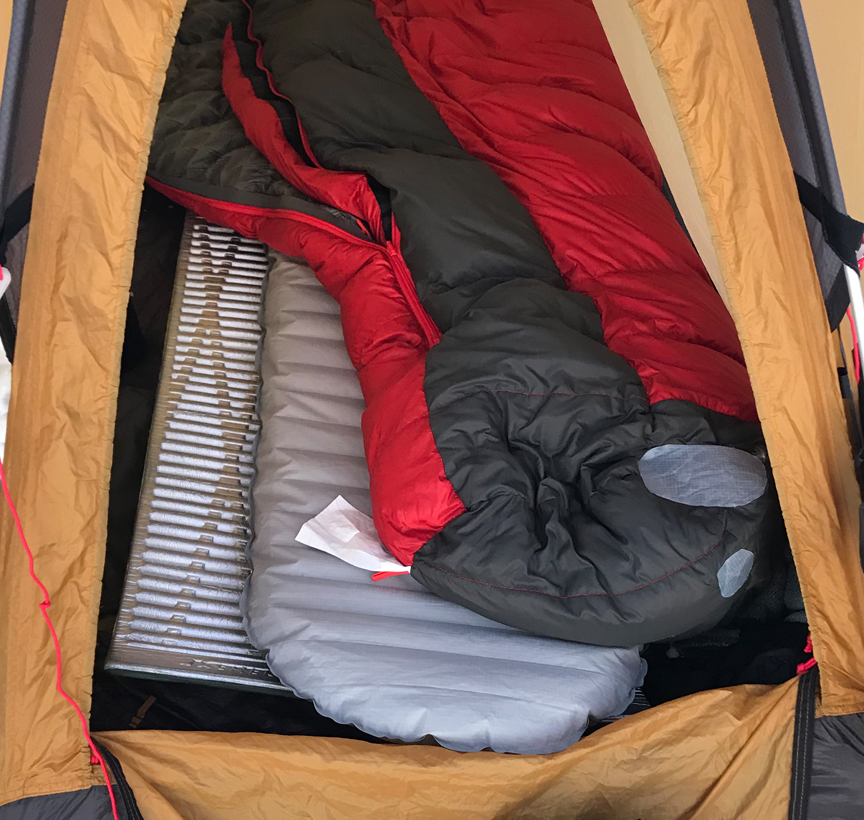
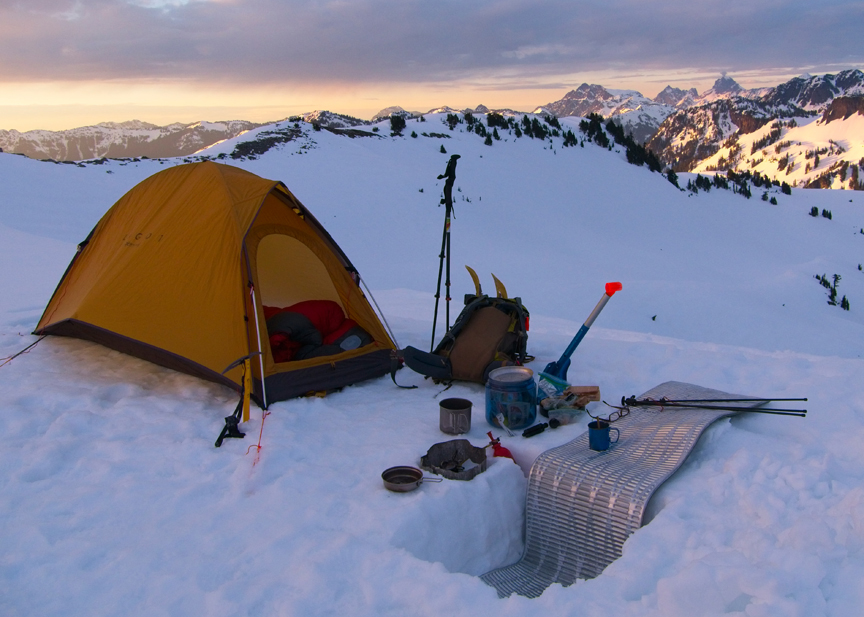
Be equipped to camp on the snow. Once you learn how to do it and how comfortable it is, you may never want to camp on the ground again. To do this, you need a sleeping system with sufficient R-value (5+) under your sleeping bag. The standard practice for snow camping in the Pacific Northwest is two mattresses, either one solid core and one air or two solid ones.
Snow is soft and clean, usually free of sticks and rocks. It makes the most comfortable surface and often requires no preparation. Sometimes you might need to stomp it down a bit with snowshoes or level it with a snow shovel. It is easy to level a spot even on slopes. Pitching a tent on the snow is the lowest impact (leave no trace) way to camp. It also increases your campsite options (unless you are in an area where designated campsites are the only permissible locations). And, it is often the only option if you want to camp in the winter season. So be prepared!
For more on sleeping warm, see winter sleeping bags.
2. Don’t loose your warmth
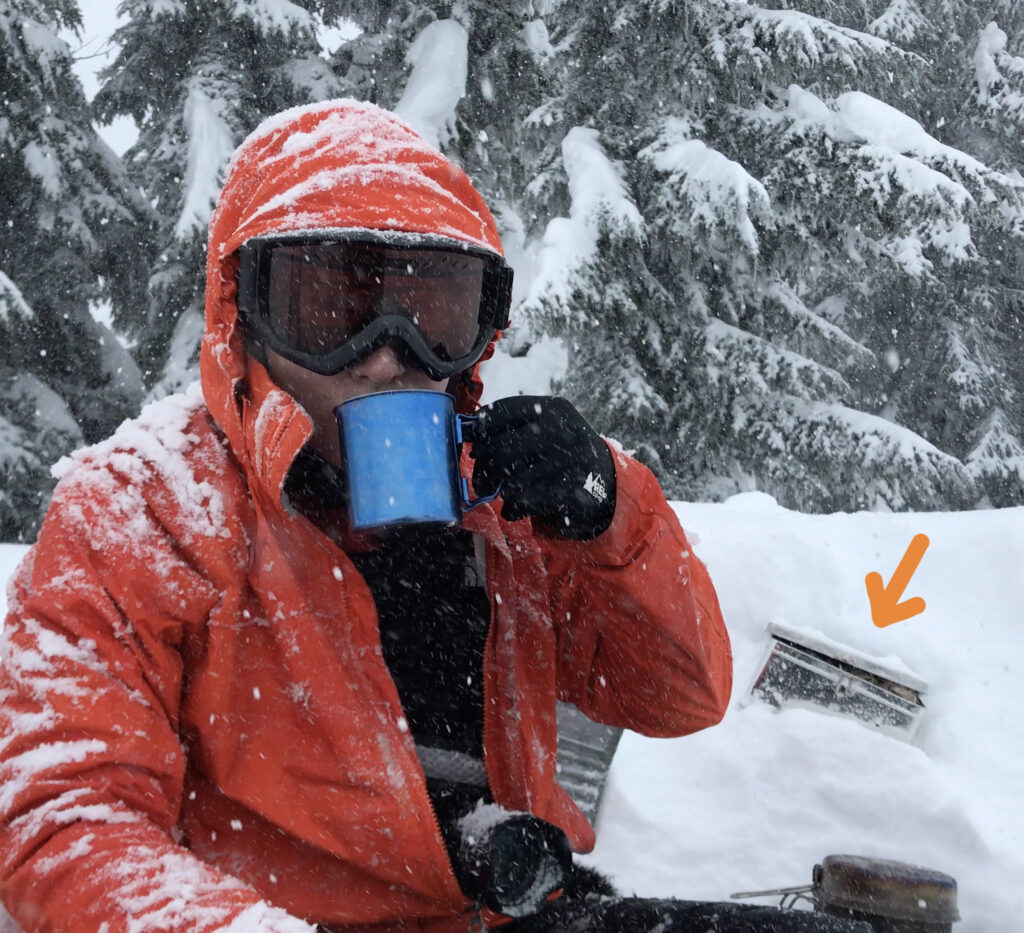
When you arrive at camp, you’ll be warm from the hike. Keep it that way by removing sweaty clothes and layering up as soon as you reach camp. I usually put on a hardshell jacket and rain pants over a fresh base layer, fleece jacket, and down jacket. Don’t think of rain jackets and rain pants as “rain” gear. Rather think of these hardshell layers as wind protection. Wind, like moisture, will rob your body of warmth. Don’t let that happen by standing round in the wind making dinner or doing other activities. Layer up first. It’s the priority once you get to camp and always bring complete rain gear for wind protection. Even on clear nights, high elevation air is often very wet. So bring a tent to stay dry and protected from the wind.
3. Secure your tent without having to tie knots in cold weather
The loops on the corners of your tent are too short for tent stakes in soft snow. This is true even with 4-season tents. So be prepared. You’ll need to add utility cords to allow the stakes to be put deep in the snow in order to secure the tent against high winds. A simple technique for doing this without tying knots in the cold is explained in How to stake a tent in the snow without tying knots.
4. Protect your air mattress
Eliminate your air-mattress’ exposure to all sharp objects and anything that gets hot enough to melt it, such as pots, cups, and stoves. Clip together any loose side-release buckles on your pack to prevent exposed sharp buckle ends from puncturing your air mattress. Leave microspikes, crampons, and trekking poles outside in the tent vestibule. If you don’t have a vestibule and need to put gear outside, have a way of identifying the gear’s location in the morning, such as looping the gear onto a snow shovel. Anything left outside may get buried under falling or drifting snow during the night.
If the air mattress fails, you must have a backup plan, which is why it is important to always carry an extra mattress—usually a solid one. However, solid mattresses have low R-value (2–2.8), so you’ll need to put the deflated air-mattress, your pack, and any extra clothing under it to help make up the difference. If you’re with other hikers, someone may be able to lend you an extra mattress if that still leaves them with one 5+ mattress. If you only bring an air mattress and it gets punctured or the value or seams fail—you’re in trouble. If you at least have a solid core backup, you’ll be uncomfortable, but okay. Remember—two Mattresses! It’s important. The higher the R-value, the safer you will be.
5. Secure the food
For me, all food and snacks go in a bear-proof container that goes outside. I’m usually not concerned enough about bears in the winter to put the container the recommended 100 ft (30 meters) away from the tent, even though black bears can be up and around in mild weather. A more common issue is smaller mammals that will eat through your gear to get at your food. With no trees around, food sacks just end up on the ground. Small animals can, in fact, eat through the lid of some bear-proof containers too, so you may want to flip the container over to protect the lid. To keep animals wild, we need to keep them out of our food.

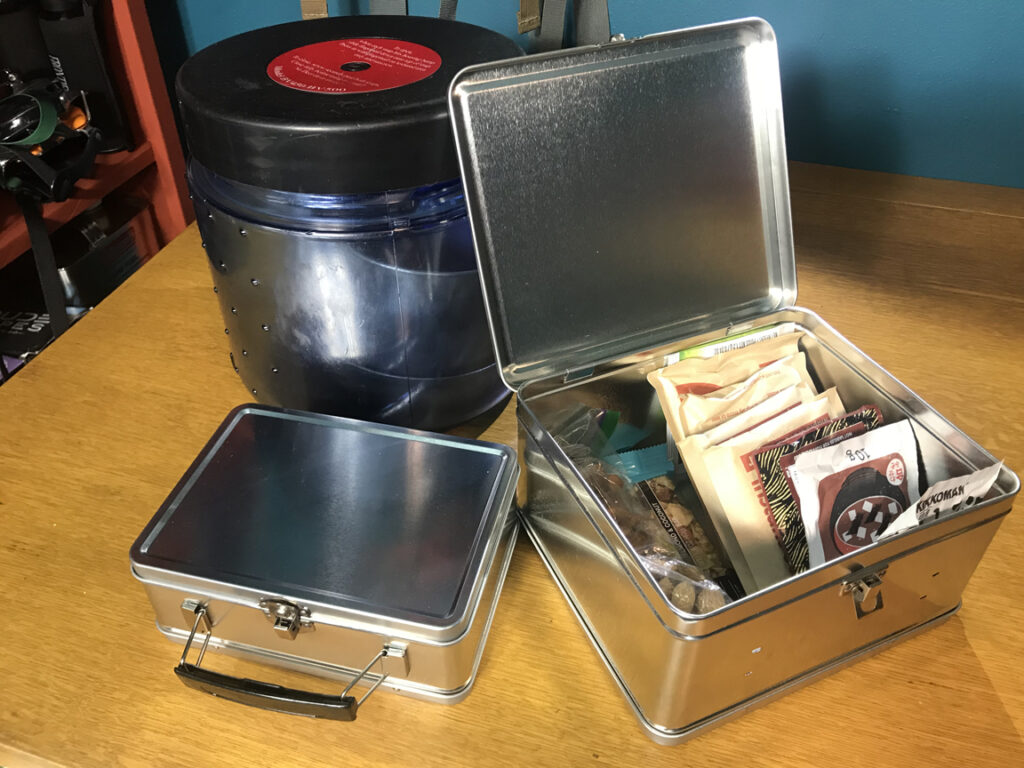
The small bear-proof container known as the “Bear Vault” or BV450 (which I use) adds 2 pounds to my pack and costs around $70. Is it worth it? In many ways it is convenient and effective. For the longest time, I have never left without it. It is, of course, required gear in some locations, such as specific campsites in the national parks. I always figure that if there’s a good reason for a bear-proof canister in a national park, there’s probably a good reason to bring it when camping in the forest or wilderness areas near those parks—which is much of the Cascade Mountains. That said, I am increasingly using the metal lunchbox instead.
If you’re thinking of hanging your food in a sack, that method is certainly a problematic idea at high elevations in the winter. There are few or no tall trees and the trees are often more like snow sculptures with tree wells beneath them. Other hikers are coming to the recognition that the hanging method is ineffective, endangering people and wildlife.
Some people like bear-proof sacks because they are lighter, weighing 7.5–13 ounces. They cost around $85–135, depending on size. They are not approved everywhere and to be effective, must be securely tied to an object, such as a tree, which may be impractical. For me, the biggest drawback of the food sack strategy is the restrictions it places on where you can camp. When everyone is about to set up their tents on a ridge with a beautiful view, I don’t want to be that person who says, “I have to camp down where there are trees so I can hang my food sack.”
6. Don’t lose the gear
Secure all your stuff sacks as you unpack and set up camp. I usually put all the stuff sacks in my tent stuff sack as I unpack. Pull the tent out of the stuff sack and clip the stuff sack to a belt loop (I use a carabiner that holds my water bottle). Then put any additional stuff sacks in it as you set up your campsite (later, this can be a pillow). This helps prevent two problems—light stuff sacks blowing off the ridge in a gust of wind or simply not knowing where a stuff sack is when you need it to pack up in the morning. You don’t want to have to unpack gear to see if a small stuff sack ended up inside of your sleeping bag.
If you are stopping to set up in high winds, put up the tent poles and throw your pack inside the tent to weight it and prevent it from blowing away. A tent can act like a sail, catching the wind and taking off instantly. Sometimes I begin setup by anchoring the windward corner of my tent with my ice ax.
7. Have a gear distribution system
You don’t want to be searching for gear in the dark. Determine where your gear will go inside your tent before you head out to the trail. That is, prepare your tent at home in advance. Create a system for distributing your main gear (pack, boots, etc.) and small items (glasses, headlamp, ditty bag). Different tents have different features. Your system has to work for your tent. My 4-season tent, for example, has a small pocket that would work well for my eyeglasses except that it is located at the entrance and I sometimes want to sleep with my feet at the entrance. For this reason, I use to detach my pack lid and position it where I can easily reach it during the night. This way I have my glasses and headlamp where I can easily find them. Now, I rarely carry a pack lid, so I just set my glasses in the corner of the tent with my headlamp.
My gaiters (usually a bit wet and ice-encrusted) go under my pack, which is inside the tent by the door and under the solid core foam mattress. My air mattress goes between my solid core foam pad and my sleeping bag—which I think is the safest way to do it.
My boots go by the door if temps are above freezing and sometimes inside my the bottom of my sleeping bag in a dry sack if temps are below freezing.
Trekking poles, shovel, ice ax, and snowshoes, are stuck in the snow outside the tent in a vertical position so they can be found in the morning. Or, if extremely high winds, next to the outside edge of the tent. Crampons or micro-spikes go at the base of the snow shovel.
Electronics (transceiver, camera gear, cell phone) go in my pack lid or in my sleeping bag. I sometimes lay my puffy jacket over myself inside my sleeping bag at night. Avoid putting clothing on top of your sleeping bag as this reduces loft. Put any loose clothing (hiking pants, gloves, etc.) inside your make-shift pillow or sleeping bag to keep them dry from condensation and warm for when you put them on later.
One consideration is to keep gear situated so that there isn’t anything touching the tent walls and collecting moisture. Another consideration is high winds. If there is a threat of high winds that might compromise the tent, I want as much loose stuff as possible inside my pack to prevent items from blowing away.
8. Dig a cooking pit
Dig a small pit that will work as a chair. You can set up your stove with a slot in the snow to secure the fuel bottle. You can use your solid core foam pad as insulation for both your butt and your feet. Don’t use an air mattress because there are too many ways for it to get punctured or melted near your cooking gear.
Avoid standing around on bear snow. Put your solid core mattress under your feet as much as possible. It is hard to recover heat once it is lost.
Fill in the pit before you leave (i.e., leave no trace or hole for someone to stumble into).
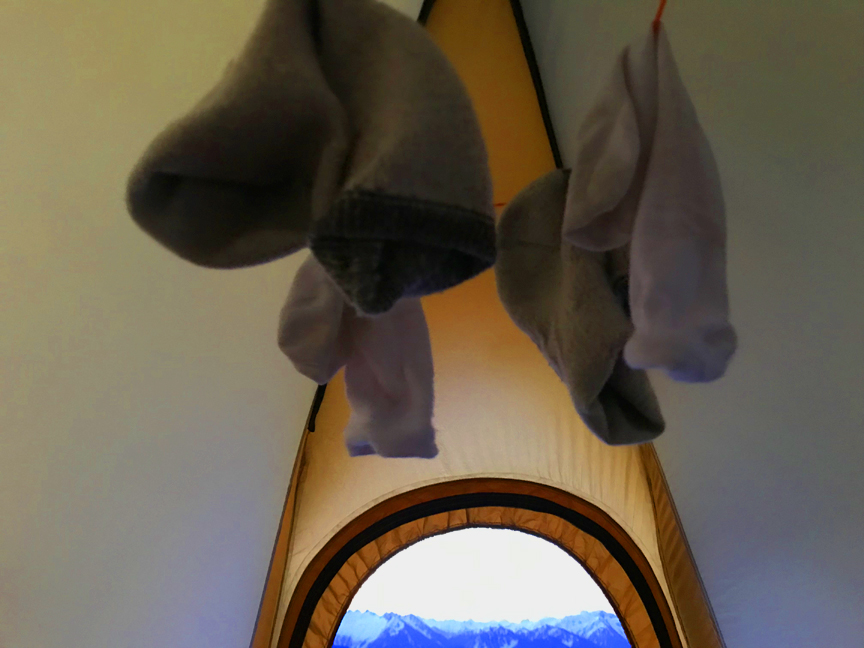
9. Create a clothesline
A clothesline can be handy for airing out wet socks and sweaty clothes and hanging gear that you want to find easily, such as your headlamp.
Look inside your tent and see if there are any sewn loops that allow for a clothesline. Many tents have them. A clothesline is usually ineffective in winter, but if your camp is setup up long enough in the morning, the solar energy of direct sunlight can heat the inside of the tent and actually dry out the clothes. This is better than laying the clothing on exposed rocks when there is a risk that they might get blown off the ridge.
10. Make a pillow
Stuff sacks (tent, tent pole bag, air mattress bag) and sweaty clothes all go inside the tent stuff sack to form a small night-time pillow.
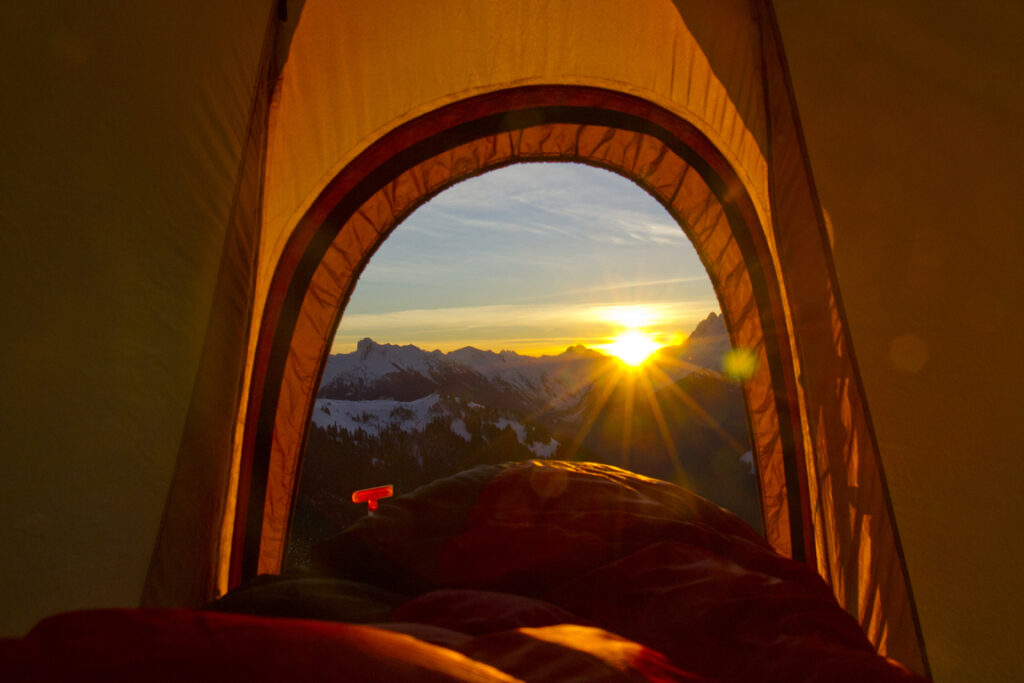
11. Bonus tip! Get the early sunlight
It is possible and worthwhile to identify where the sun will come up over the horizon and make sure your campsite is in line to receive the sunlight when it first breaks. Having the early morning sun shining on your campsite can make a real difference in temperature. It is a very fine experience to be warm and well lit when you’re preparing breakfast.