An Intro to Landscape Winter Astrophotography by Daniel Kuo
Photographing the night sky can be a profoundly rewarding experience and a great way to connect with the cosmos. Modern Cell phones and digital cameras enable us to capture stunning details in the sky that are difficult to see with our eyes, such as subtle airglow in the upper atmosphere and intricate star clusters and dust lanes within our own Milky Way.
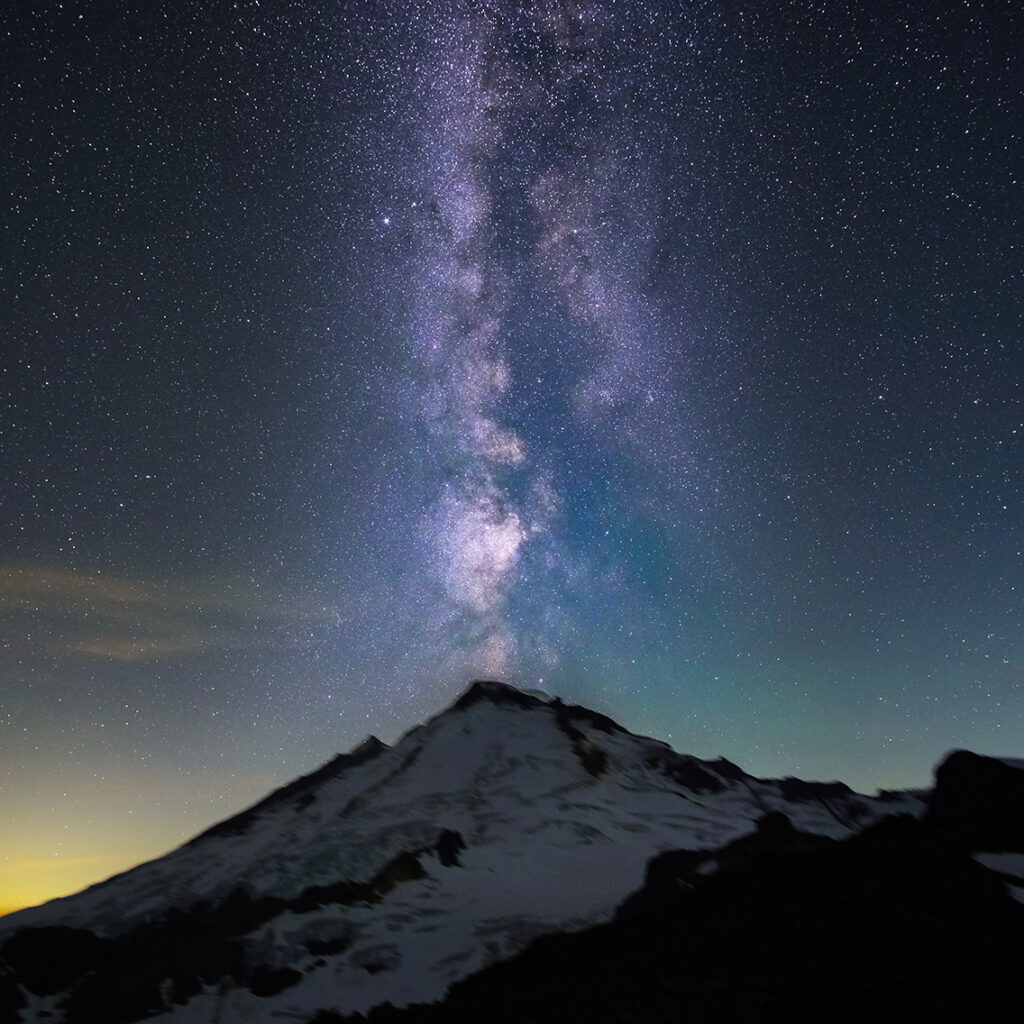
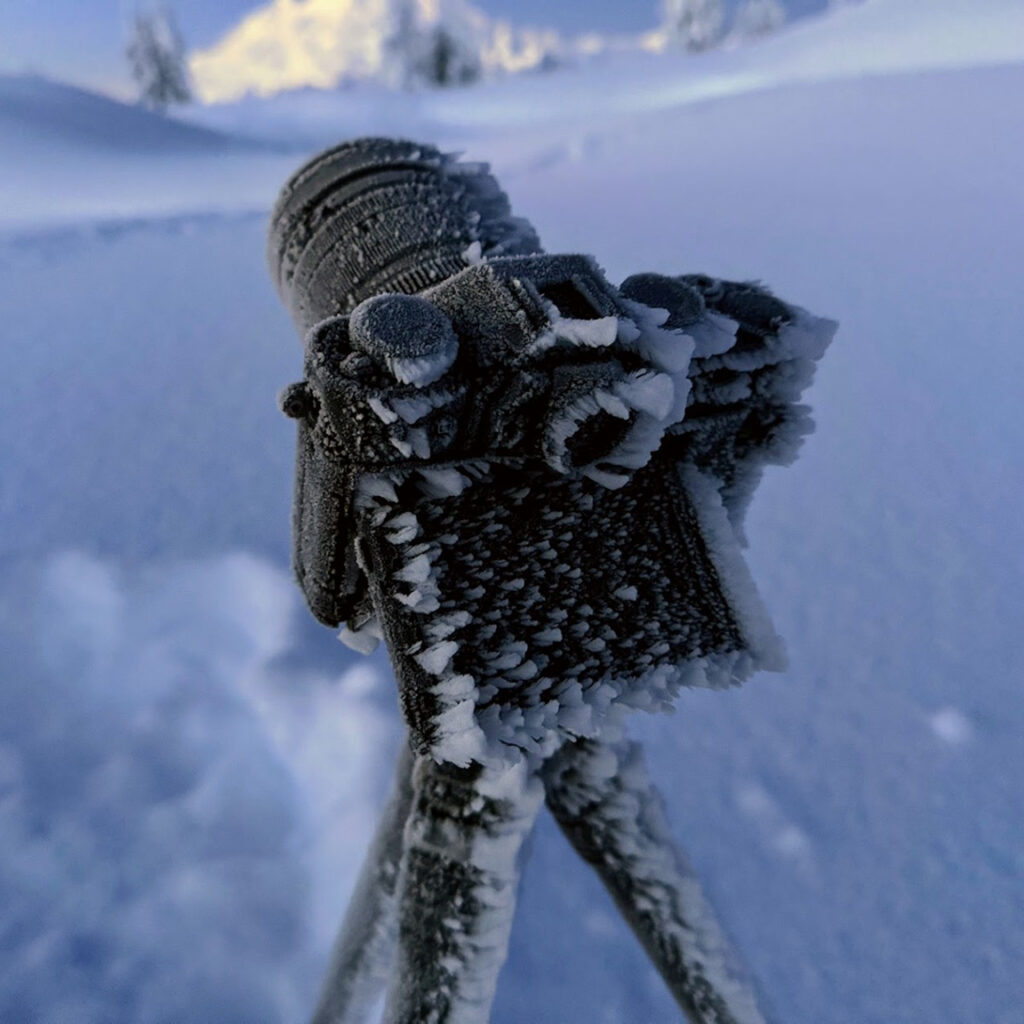
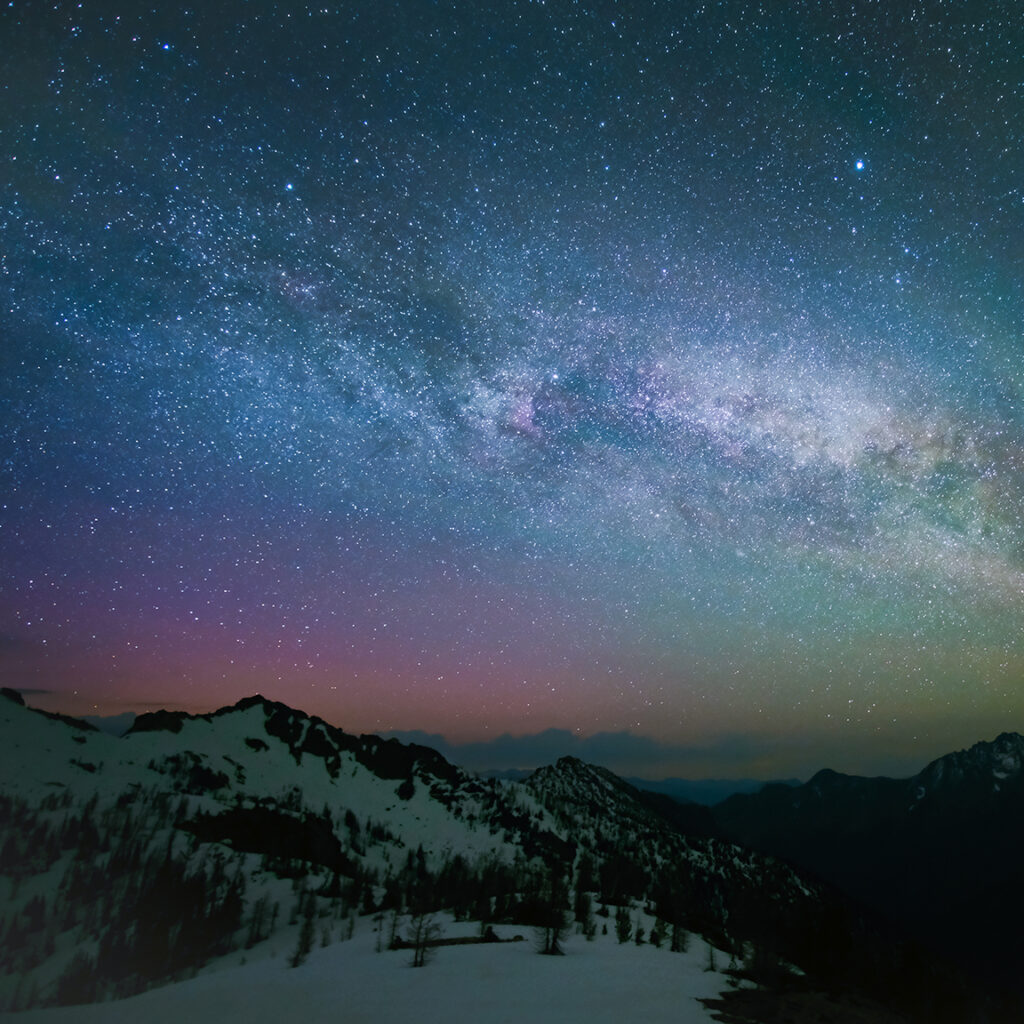
When backpacking in the Pacific Northwest, you will often come across rugged and vast landscapes that make for beautiful photographs. When the night falls, the light from the moon and milky way can reveal the terrain in a new light. Capturing these moments with your camera allows you to appreciate these hidden nightscapes and share this unique perspective of the night with friends and family.
Phones, DSLR, and Mirrorless Cameras
Photography is all about capturing light to form an image. In the daytime, cameras only need a short exposure to gather enough light, but at night we need long exposures and wide-aperture lenses so we can capture as much of the faint light as possible.
Getting Started with Your Phone
Don’t have an expensive camera or don’t want to extra weight? That’s okay! Modern smartphone phone cameras can still create good results and are a great way to get into the hobby without spending a lot of money. Flagship phones such as the Google Pixel and iPhone 14 and 15 Pro have built in astrophotography and long-exposure modes that make capturing an image easy. The automatic modes are easier to use than a dedicated camera, and can be a great stepping stone into the hobby before you start investing in more expensive gear.
Phones are capable of impressive results, but a dedicated camera will provide the highest quality images and will give you much more post-processing flexibility. If you’re planning to pursue astrophotography further, you’ll likely want to invest in standalone camera down the road.
DSLR or Mirrorless
Even though phones has come along way, a dedicated interchangeable lens camera like a DSLR or mirrorless is still best option for this purpose because full frame cameras will have an advantage in light-gathering power.
Since the scenes we are shooting are very dim, you will want to pair your camera with a fast, wide-aperture lens for the best results. A fast lens will pull in more light and help to produce a higher quality image with less noise. A wide angle F1.4 or F2.0 prime lens is ideal for the purpose, but slower lenses can still work well if you combine them with more advanced techniques like image stacking or star tracking to reduce noise (not covered in this article).
Modern APS-C and Micro Four Thirds cameras can also produce excellent results and are a compromise for keeping your pack weight down on long backpacking trips.
Tripod and Additional Equipment
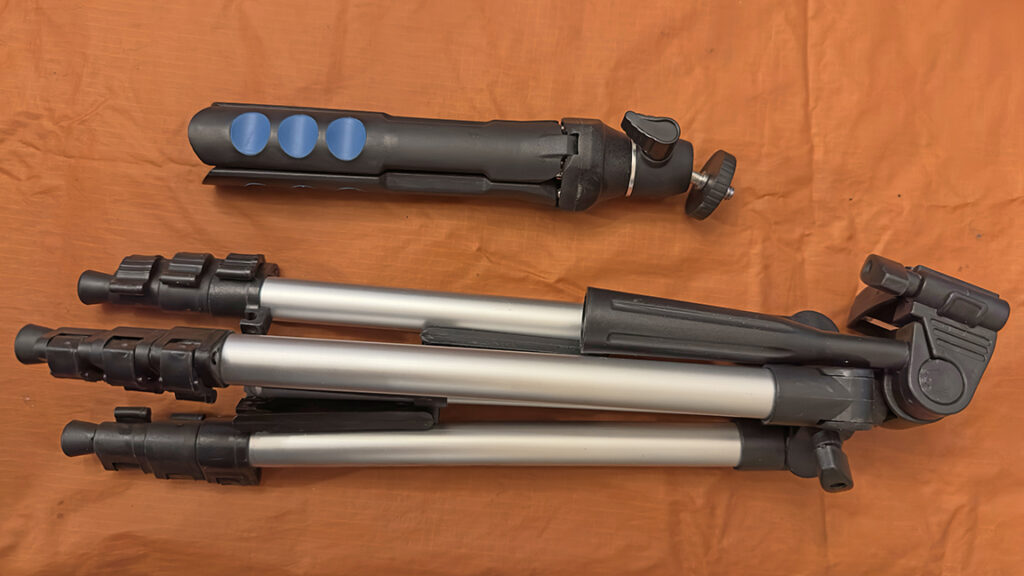
In addition to a camera you’ll need a stable tripod. When taking nighttime landscape photos, you’ll be using long exposures ranging from tens of seconds to upwards of minutes. Any vibration or unsteadiness can ruin the image. For this reason you need a steady tripod. Even with a tripod, windy conditions coupled with an unstable tripod can make astrophotography impossible. As such, make sure to choose a high quality tripod for your kit.
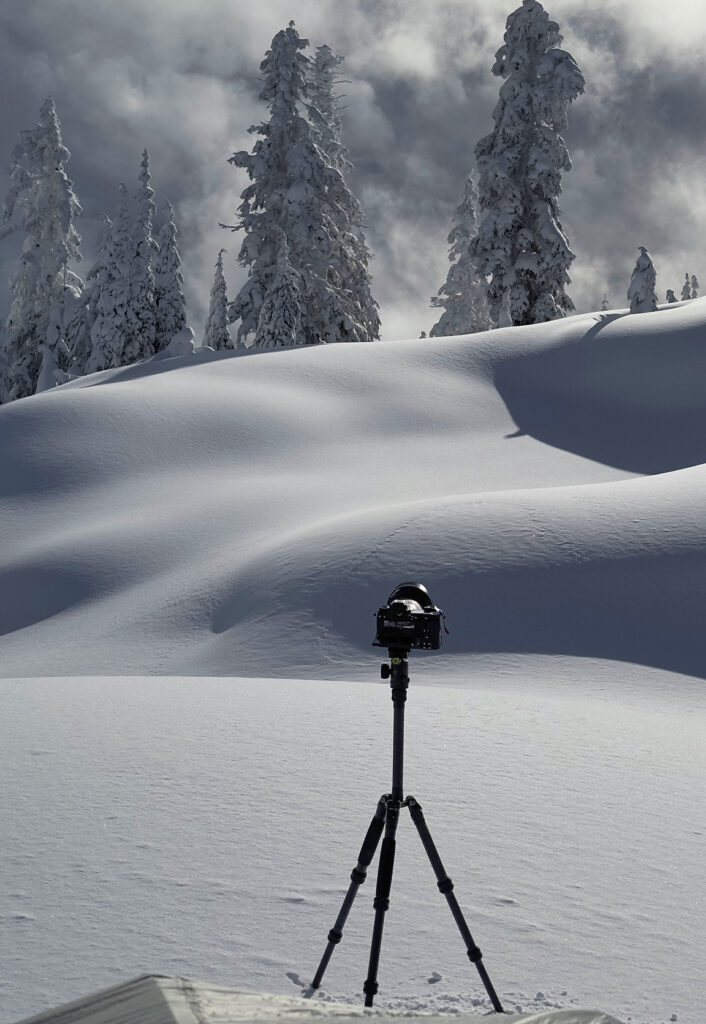
Carbon fiber tripods are exceptionally stiff while still being lightweight enough to carry on a backpacking trip and are a good choice for astrophotography. Tripods with thicker legs sections will also better resist wind and vibrations, but the tradeoff is they will also be heavier. For backpacking adventures I prefer a compact, lightweight carbon fiber tripod, like the Marsace XT-04S (571 gm/20.1 oz) or Sirui AM-225 (857 gm/1.89 lbs).
Besides a tripod, an extra camera battery or USB power bank can be a good idea. The long exposures and cold nighttime temperatures tend to drain your camera battery on even a one-night trip. Having an extra power source ensures your camera can keep shooting throughout the night.
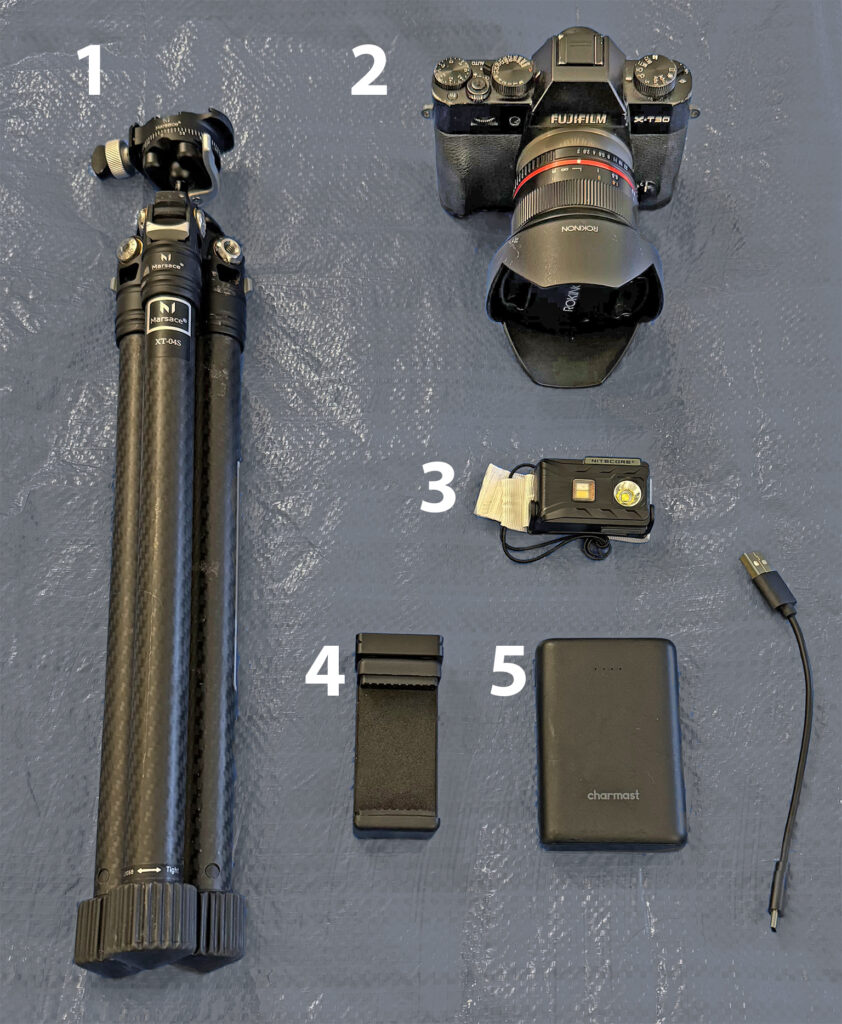
My Backpacking Astrophotography Equipment
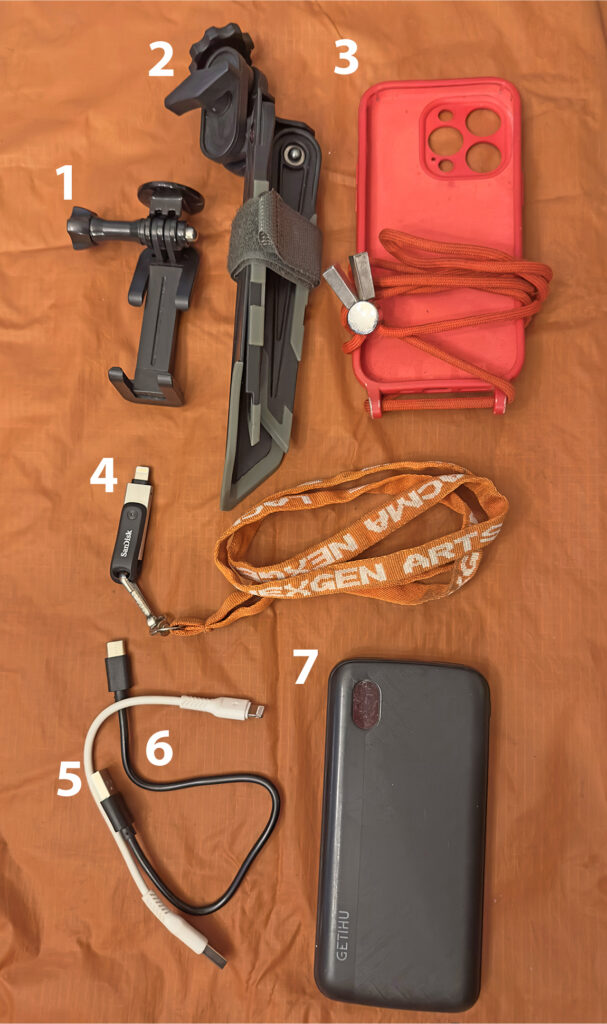
My astrophotography kit consists of the following:
- Fujifilm X-T30 (APS-C mirrorless camera) + Rokinon 12mm F2 Lens
- USB power bank
- Marsace XT-04S carbon fiber tripod
I chose this system as it’s lightweight while still providing good image quality. The whole kit weighs just under 3 lbs. When backpacking (and especially when winter backpacking) you may already have a heavy pack, so keeping your camera gear lightweight ensures you don’t add too much extra burden.
How to Photograph the Milky Way
With an iPhone Pro
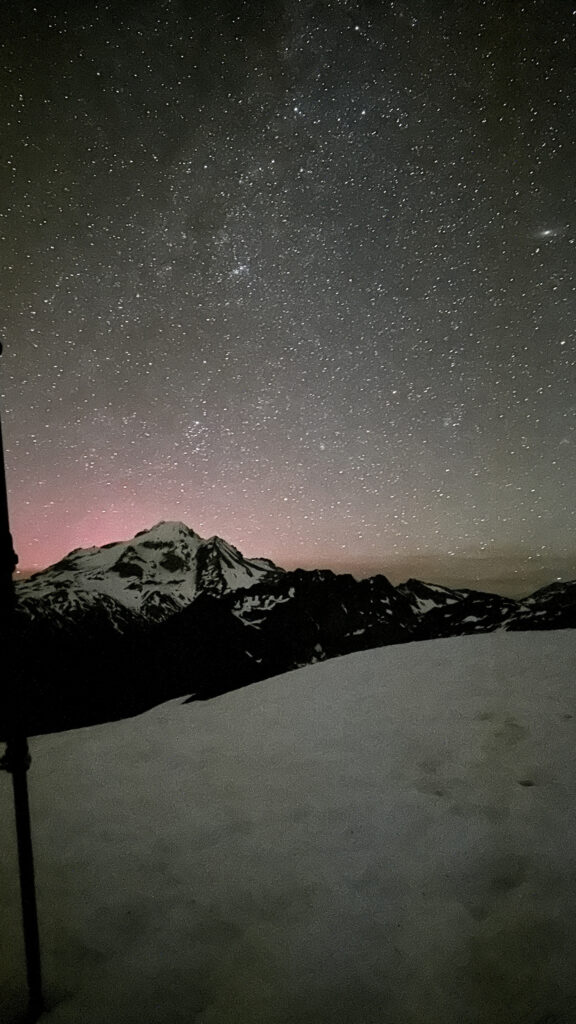
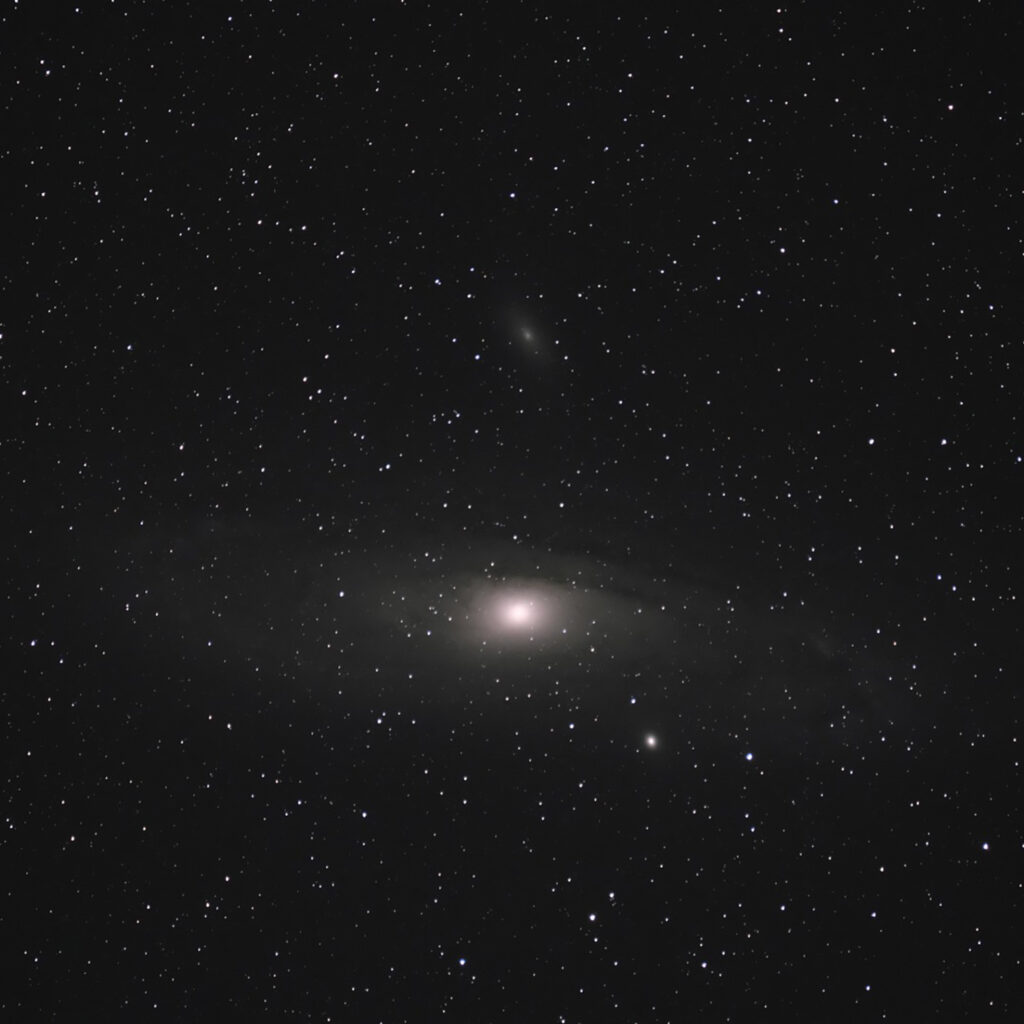
The Night Mode setting began with the iPhone 11 and has improved with later models. There are also apps that can improve the process. However, you can simply launch the phone and activate the Night Mode setting in the upper right of the screen. Make sure your phone is on a stable tripod. The first photo will take a 10 second exposure that is sufficient to capture your camp and some stars. The phone automatically detects the tripod and when you click the 2nd photo the phone will extend the exposure to 30 seconds which is beyond the maximum manual setting of 10 seconds. This is sufficient to capture an image of the Milky Way and even the Andromeda Galaxy.
With a Dedicated Camera
When shooting the milky way, put your camera into manual mode and set the ISO, shutter speed, and aperture manually. As a starting point, I like to set the ISO to 6400, and set the lens aperture as wide as it will go (Ideally F2.0 or faster).
When choosing a shutter speed, we must consider the rotation of the earth, which will cause star trailing when using long exposures. Star trails can be a desirable effect for certain compositions, but for this article we will look at shutter speeds used for getting sharp stars images.
To determine the shutter speed, I like to use online calculators like this one from the Lonely Speck, or shutter speed apps like the one available on the PhotoPills phone app (iOS/Android). These apps take account of your camera’s sensor size, resolution, and even the declination to ensure you get sharp photos with minimal star trailing.
The 500 Rule
An outdated, but still useful method for calculating shutter speed is the 500 rule. The rule states that the maximum shutter speed you can use before you get star trailing is 500 divided by the focal length of your lens. For example, if you are shooting with a 24mm lens, the maximum shutter speed you should use is 500/24 = 20.8 seconds. Note that if you’re shooting APS-C or Micro 4/3rds you need to convert your lens focal length to its full-frame equivalent focal length before running the calculation (IE, my 12mm Rokinon is an 18mm full-frame equivalent focal length, so the 500 rule would be 500/18 = 27.8s).
The 500 rule doesn’t account for modern high-resolution sensors, so most of time you’ll end up using shutter speeds faster than what is calculated. However, it’s still a good tool for approximation and great way to quickly calculate shutter speed in your head without having to pull up an app or webpage. If this is all too much to think about, just set your shutter speed to 15 seconds, and adjust it faster or slower depending on whether you see star trailing.
How to Focus
After choosing your exposure settings, you’ll need to focus the camera. This is easier said than done when working in the dark, but nailing the focus is critical for getting a good photo. Autofocus doesn’t work reliably at night, so you’ll need to manually focus on a bright star or the moon. On modern mirrorless/DSLR cameras you can use the live view feature to zoom in and fine-tune your focus. Try to get the stars to look as tight and pinpoint as possible, and if you start to see the light from the stars twinkle and flicker in the live preview, you’ll know you have achieved good focus.
After you have everything ready, take some test shots. Zoom in and check the results to make sure everything looks good. Are the images a little too dim? Make the shutter speed longer or increase ISO. Are you starting to get star trailing? Reduce the shutter speed. Stars looking bloated or blurry? Refocus the lens.
More than anything, check and double check your shots as the night goes on. It’s all too easy to bump the focus ring accidentally in the dark, and sometimes lenses can shift focus on their own as they cool down over the night.
Other Milky Way Considerations
Once you’re comfortable with setting up your camera, there are some other things to think about when shooting the night sky and Milky Way.
- Check when the Milky Way rises and sets. Summer months are best for capturing the detail in the Milky Way core, but you can still get good results in the fall and winter months shooting the outer arms. In the Pacific Northwest, the sun sets very late and rises very nearly in the summer, so there’s only a few hours of darkness to work with. Ideally, you’ll want to shoot during or after astronomical twilight to get the best detail out of the Milky Way, although beautiful photos can be found just after dusk as well. There are any many apps you can use to check Sunrise/sunset time, but my favorite are Golden Hour (free) and PhotoPills (paid). Both are available for iOS and Android. PhotoPills has a useful Night AR mode that overlays the predicted location of the Milk Way over your current camera view.
- Find a location with minimal light pollution. Light pollution can easily overpower the faint stars in the night sky and can lead to washed out images. For the best results make sure the direction you’re planning to shoot in is also free of any major light-emitting cities. DarkSiteFinder (https://darksitefinder.com/map/) and Light pollution map (https://www.lightpollutionmap.info/) are fantastic tools for visualizing light pollution in your area.
- Get out when the sky is clear. It may seem obvious, but you can’t photograph the Milky Way when it’s cloudy. Check the weather for cloud cover before you head out. Additionally, on the west coast wildfire season can last late into summer and the resulting smoke can result in dull images. You can use the US Goverment’s Interactive Map of Air Quality to view forest fires in your area.
- Consider the moon phase and rise set times. To get the most detail from the Milky way you’ll want to shoot after the moon has set. However, the moon itself can be used to light up the foreground terrain and can provide a unique perspective on the surrounding landscape.
- Take several shots! Use the burst mode or intervalometer on your camera to shoot a series of images. Often during long exposures a gust of wind or an errant headlamp beam from your camping buddy can ruin the shot. Taking multiple images tilts the odds in your favor that you’ll get at least one good image. Additionally, with multiple shots you can use image stacking techniques to reduce noise and increase detail (not covered in this article).
- Shoot RAW and post-process your images. To get the most out of your photo’s you’ll want to shoot RAW to preserve the most detail and image information. Additionally, postprocessing will help bring out detail and color from your image. There are several free tools for image post-processing, but I’ve found I get the best results with Adobe Lightroom (paid). On1 Photo Raw works well is available without a subscription for a one-time purchase fee.
Be Creative and Have Fun
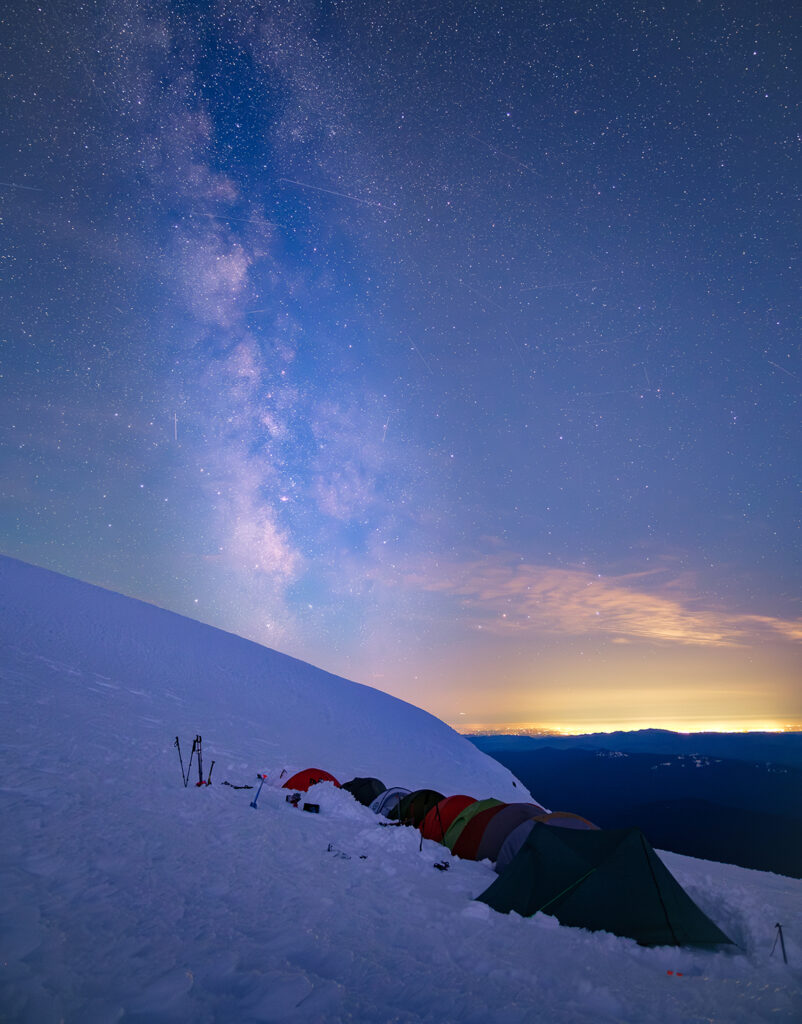
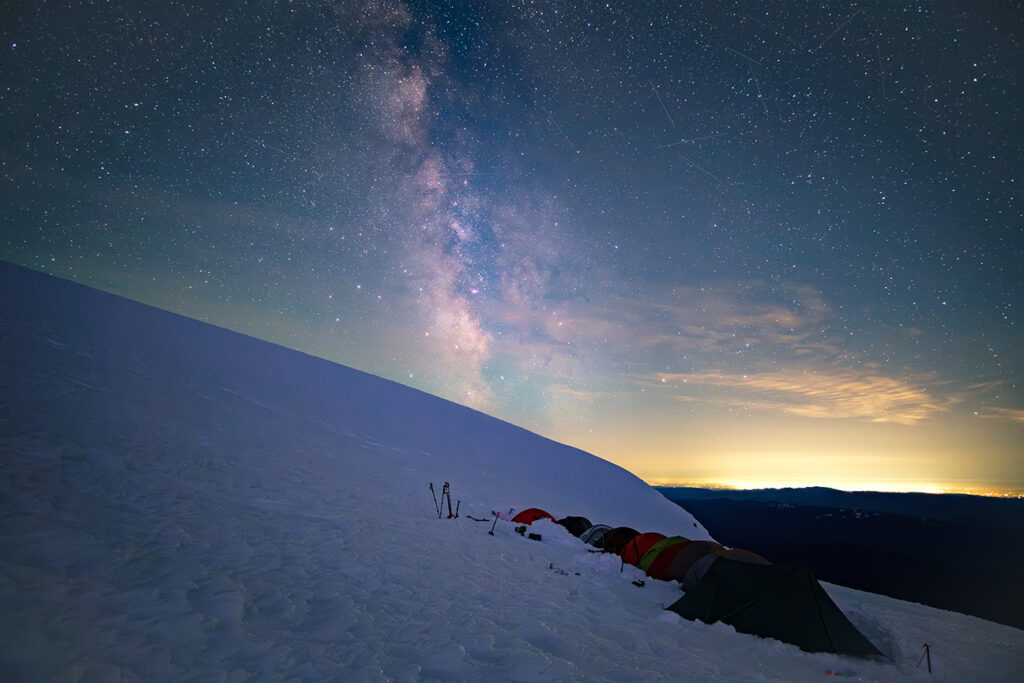
Beyond the technical aspects of operating your camera, getting a great photo involves finding composition that showcases the unique landscape surrounding you as well as the night sky. To take your photos the next level, think about how you can creatively use the scenery around you in conjunction with the night sky. A prominent mountain peak can draw attention to the center of the frame where the Milky Way lies. A valley, some well-placed trees, or your camping tent can be used provide a sense of scale and framing. A pond reflection can gently pull the viewers gaze from the ground up into the sky.
More than anything, have fun taking the photos, and spend some time enjoying the night sky while you’re shooting. Share the images you take with your friends and family so they too can experience the beauty of the places you visited.
Final thoughts
I hope this inspires you to get out into the night and capture some photos. I’ve always loved the peace and quiet that the nighttime brings, and some of my favorite moments are sitting in awe of the night sky as my camera clicks away capturing exposures. There’s a certain calmness that you don’t experience any other time than deep in the night with the universe spread out above your head.
When you take a photo of the Milky Way, light that has been travelling for thousands of years ends its long journey on your camera sensor, so that we may enjoy the resulting images. It’s the joy of connecting with the night sky that keep me shooting despite the late nights, frigid temperatures, and groggy mornings. More than anything, astrophotography helps bring us closer to the stars that often go unseen over our heads every night.
Thanks Daniel for sharing these tips with us. — Michael Rohani
To learn more ways to make the most of your winter nights, please see Embrace the Winter Night
Have any questions or comments?
In the comment section below, let us know your thoughts. Your comments and questions are welcomed.
4 replies on “Winter Astrophotography”
This is amazing! Such breathtaking pictures! Very useful post. Thank you so much!
Great article and pictures! I used my Samsung S22 Ultra and was able to get a real nice picture of the Orion constellation. With a little editing the picture revealed the gasses around the area! I was surprised.
Impressive. Good to know that it’s not just iPhones that can do astrophotography.
Just what I needed! I will try out these tips and suggestions the next time I’m out, very much appreciated.
Thank you!