By Scottie Bussell, MD, MPH
Having pain in our feet can take the joy out of backpacking, slow you down, and cause you to not complete the trip. Blister prevention begins with three main considerations:
- Comfortable footwear
- Your sock strategy
- Foot conditioning
- Preemptive practices
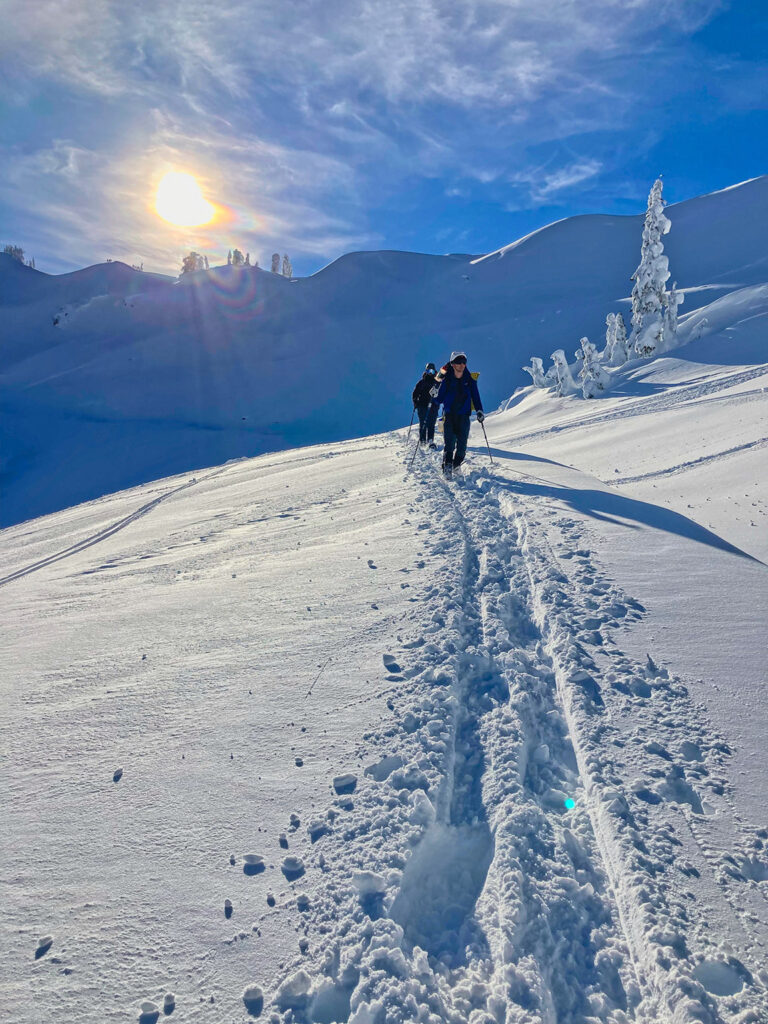
1. Comfortable Footwear
Good foot care starts with choosing the right shoes for your feet and the terrain conditions. The main considerations are looseness for warmth, traction, ankle band for security (boot doesn’t come off), sufficient sole flexibility for distance hiking but rigid enough for crampons, level of cushion for the sole of your feet, a reinforced toe box for kicking-steps in hard snow, and water resistance versus breathability to keep your feet dry.
Generally, it is preferable to avoid heavy and stiff mountaineering boots and light trail running shoes that don’t have well-cushioned and rigid soles. Mountaineering boots are heavy, placing more fatigue and strain on legs. Mountaineering boots are notorious for creating blisters. Some trips may require crampons and toes punching into hard snow making stiff B1-type backpacking boots or B2 mountaineering boots necessary. In such situations, lighter, less rigid B1–B2 climbing boots are preferable. For more information about boot selection, see Footwear for Winter Backpacking in the Cascade Mountains.
Special Considerations:
Arches. If your arches are not supported this will lead to sore, fatigued feet and blisters. Backpackers with flat arches may experience “toe drift” where the front part of the foot and toes point outward and thus be more prone to blisters, especially when wearing mountaineering boots. Abnormal arches can be compensated for with insoles. “There is some evidence that foot blister incidence can be reduced by closed cell neoprene insoles.” (https://pubmed.ncbi.nlm.nih.gov/8570998/)]. See Footwear for Winter Backpacking in the Cascade Mountains for further discussion on insoles.
2. Sock strategy
Military studies have shown that wearing a thick wool outer sock over a polyester liner sock resulted in the least blisters. “Foot blister incidence was lower among participants who wore the prototype [thick wool] boot sock and [polyester] liner than among those wearing the standard military sock (40 vs. 69%, p < 0.001) or among subjects wearing the standard military sock with liner (40 vs. 77%, p < 0.001).” And foot “blisters and cellulitis severe enough to require medical attention occurred with greater frequency in the standard military sock group…” (https://pubmed.ncbi.nlm.nih.gov/8918120/). The double-sock strategy is effective for both warmth and blister prevention. For more information on sock options see What are the Best Socks for Winter Backpacking?
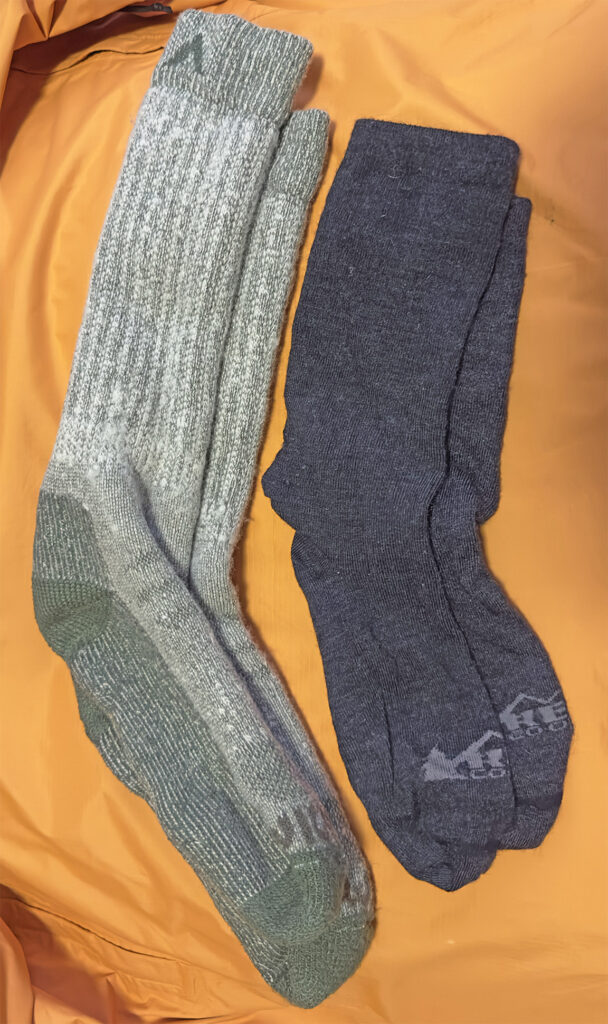
Typically, we wear thick socks with polyester liner socks for 3-season hiking and wool liner socks for winter. We do not get blisters and have noticed no difference between synthetic and natural fiber liner socks. One study concluded: “Multivariate analysis showed that the proportion of natural/synthetic fibers in the composition of the sock was not related to the presence of blisters.” (https://pubmed.ncbi.nlm.nih.gov/35144880/) Wool socks are also ideal for winter environments. In particular, Merino wool has many ideal properties such as thermoregulation and antibacterial properties; it can absorb up to 35% of its weight in water without feeling damp (https://www.pcta.org/2024/the-benefits-of-wearing-merino-wool-in-the-backcountry-93576/ ).
The sock composition study concluded that: “The use of wet socks heightens the risk of foot blisters in hikers, but the composition of the sock is not associated with blistering.” We recommend packing an extra pair of socks to maintain dry feet to avoid blisters. Monitor socks for wrinkles and keep them dry. Wet socks can usually be dried overnight by placing them in your sleeping bag.
3. Foot conditioning
Blisters occur due to friction forces, repetition, and skin moving out of sync with your foot bones (https://pubmed.ncbi.nlm.nih.gov/36701678/). Exposure of the skin to repeated low-intensity frictional forces helps the feet to adapt and become blister-resistant. The skin thickens and develops calluses in response to repeated pressure or friction. (https://pubmed.ncbi.nlm.nih.gov/8570998/).
Frequent neighborhood walks and short hikes using the socks and shoes you will wear on long backpacking trips help build up blister resistance and foot toughness. Always try out new shoes on short walks and hikes instead of sporting them on a long hike or backpacking trip. Five to ten miles is a rough suggestion for a short hike. Wearing a heavy day-pack will help simulate backpacking with a winter backpack. For conditioning, consider adding water bottles to your day pack to add weight. Avoid showing up with new mountaineering boots for long hikes!
I discourage emollients such as Vaseline, Trail Toes, or HikeGoo designed for warm weather hikers and backpackers because they do not protect against frostbite and may even increase the risk (Lehmuskallio E. Emollients in the prevention of frostbite. Int J Circumpolar Health 2000; 59(2), 122–130).
4. Preemptive practices
Blisters tend to occur on the heel while hiking uphill whereas blisters form on the toes more often in downhill hiking. In some cases, a particular shoe fit will increase discomfort over time and the likelihood of blisters. Blisters occur in four stages:
Stage 1: Hotspots
Hotspots are sore spots on your feet that are hot from friction. The most important thing to do at this stage is stop immediately. It takes only minutes to prevent a blister. Not preventing a blister will slow down your hiking, cost you more time, and it will take many days to heal. Typically, applying a plastic Band-Aid or Leukotape protects against hotspots. Moleskin can work but is not ideal because it tends to absorb moisture that can increase friction. It is best to avoid cloth or cotton bandages because they absorb and retain moisture. A more expensive option that will cause the least friction is ShearBan® (https://www.ithacasports.com/shearban-sheet.html).
Stage 2: Skin layer separation
As the blister develops, the skin layers separate creating a roof layer over a raw layer. After a few hours, the blister is full of fluid. At this stage, treatment is more difficult. Applying some form of Island dressing is helpful—that is, a bandage that has a soft absorbent center pad and a breathable adhesive border. For example, BAND-AID® Brand TRU-STAY® Sheer Adhesive Bandages come in multiple sizes.
Stage 3: Torn roof
When the outer surface layers (epidermis) begin to tear exposing the dermis, the middle layer of skin, this is a “torn roof.” This raw skin is painful to touch. If you feel a hotspot and then a stinging sensation you have waited too long. At this stage, you need to clean the wound with an antiseptic wipe and then apply an island dressing. If you continue to hike the situation will likely deteriorate further. Adding layers of Leukotape may be your only way of mitigating a worsening wound.
Stage 4: Exposed intra-epidermis
The exposed intra-epidermal tear of the blister looks more like a scrape than a blister. At this stage you can clean the wound and use a temporary island dressing, but this needs to change to a hydrocolloid dressing that can remain on the wound for 3–7 days. Hydrocolloid bandages are waterproof and contain a gel that provides a moist and insulating environment to help the wound heal (for example, BandAid Hydroseal All-Purpose). As with stage 3, if you continue to hike the situation will likely deteriorate further. Adding layers of Leukotape may be your only way of mitigating a worsening wound.
Do Not Open or Pop Blisters
Unless necessary, do not open/pop blisters as the skin provides a barrier to infection. If the blister is large or cannot be adequately protected, and interferes with walking, clean the area with soap and water or an alcohol pad and use a knife or safety pin. “Clinical experience suggests draining intact blisters and maintaining the blister roof results in the least patient discomfort and may reduce the possibility of secondary infection. Treating deroofed blisters with hydrocolloid dressings provides pain relief and may allow patients to continue physical activity if necessary” (https://pubmed.ncbi.nlm.nih.gov/8570998/). In the backcountry, place the lancing instrument under a lighter for 30 seconds to kill germs. Cover with a hydrocolloid dressing. Cover a blister that opens on its own similarly.
Rarely, blisters can become severely infected. Signs of infection include pus, increased pain, warmness, foul smell, and redness (https://www.blister-prevention.com/blogs/treatment/infected-blister). Sometimes a fever and chills develop. Contrary to non-infected blisters an infected blister needs to be drained. After first aid is applied, backpackers should end their trip if feasible and seek medical attention as antibiotics may be needed.
Summary of common blister prevention strategies
- Double sock strategy
- Pros: Inexpensive, good evidence-base results. Probably the most effective blister prevention strategy.
- Cons: Only works if footwear is fitted for double sock strategy, otherwise boots are too tight, increasing coldness (lack of circulation) and chances of blisters.
2. Create a physical barrier. Use Leukotape, plastic Band-Aids, or duct tape to create a protective barrier.
- Pros: Inexpensive, simple, and good evidence-base results.
- Cons: Need to change barriers frequently. Warnings: some people may have an allergic reaction to the glue in duct tape.
3. Re-tie boots before going up and down hills to prevent foot slippage in shoes.
- Pros: Easy
- Cons: Time-consuming if there are many ups and downs in the terrain.
4. Apply moisturizer to calluses after each shower with a good foot cream because cracked calluses are prone to blisters.
- Pros: Easy and inexpensive
- Cons: None
5. Toughen your feet: Soak your feet with strong black tea twice daily for two to three weeks. Alternatively, you can use a sponge to apply rubbing alcohol or a tincture of benzoin.
- Pros: Inexpensive. Anecdotal experience from long-distance hikers and marathon/ultramarathon runners.
- Cons: Not well studied. Possibility of over-drying feet and causing cracking. Time consuming.
Blister supplies to include in your First Aid Kit (1-2 nights)
1. Products for creating a physical barrier
- Band-Aids
- Leukotape K: Cut 5–10 three-inch strips.
- ShearBan: 1, 8 x10 sheet.
2. Products for treating blisters
- Alcohol pads (Disinfectant): 3 packages.
- Island dressing: 20 (various sizes).
- Hydrocolloidal dressing: 4 (various sizes).
3. Pain relief (and frostbite treatment)
- Aloe Vera packets: 2 packets
- Ibuprofen: 800 mg x 6 (take 800 mg every 8 hours as needed)
Share Your Thoughts and Experiences
We want to hear from you! In the comment section below, let us know about your blister experiences and any lessons you have learned.